Advertisement
Quick Links
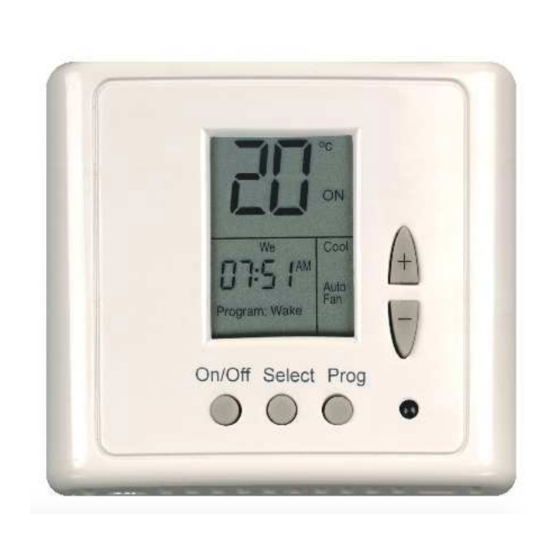
TRE24-PROG-HC11
(US Program - Celsius)
Owner's Manual
Installation and Operating Instructions
Please read this manual carefully before installation and use.
Index
Options and accessories
Installation Instructions
Wiring Connections
DIP Switch Configuration and External Sensor Connection
Operating Manual
Technician Settings
Hand held remote control (RT08)
1. Options and Accessories
• Hand held remote control with weekly program.
• External sensor option:
RS01 for remote temperature sensing (1 required)
RS02 for average temperature sensing (2 required)
For details on where to purchase accessories, please contact Meitav-tec for your
nearest location or visit our web site at www.meitavtec.com
File: tre24-prog-hc11-haften.doc | Rev. 1 | 14/2/2013
1
2
3
4
5
6
7
Advertisement

Related Manuals for meitav-tec Haften TRE24-PROG-HC11


Summary of Contents for meitav-tec Haften TRE24-PROG-HC11
- Page 1 RS01 for remote temperature sensing (1 required) RS02 for average temperature sensing (2 required) For details on where to purchase accessories, please contact Meitav-tec for your nearest location or visit our web site at www.meitavtec.com File: tre24-prog-hc11-haften.doc | Rev. 1 | 14/2/2013...
- Page 2 2. Installation Instructions It is very important to find the right place to install the thermostat. Please make sure to follow all the installation instructions in order to get an accurate reading of the temperature. Separate the front panel from back panel by depressing the tongue located in the top of the thermostat.
- Page 3 3. Wiring Connections Rc-Rh - If one transformer is in use, Rc-Rh must be shorted - (Default from Factory) Table 3.1 – Wiring Connections Terminal Function 24Vac RED (Bridged to RH) 24Vac RED (Bridged to RC) 24Vac Common from transformer Heater Fan Medium External Sensor (option)
- Page 4 4. DIP Switch Configuration Before making any changes disconnect power to the main board. Table 4.1 – DIP Switch Selection Switch Function Default Internal Sensor Control External sensor control Not in use Electrical Heat Oil/Gas Heat 3 minutes compressor delay Without delay (for test only) Internal Sensor Control External sensor control...
- Page 5 5. External sensor connection - option The external sensor must be Meitav-tec type. Before making any changes disconnect power to the main board. Table 5.1 - N.TC. Sensor: Temperature ~ Resistance Characteristics Temp °C 10.0 12.8 15.6 18.3 21.1 23.9 26.7...
- Page 6 6. Operating Manual 6.1 Turning the thermostat On/Off • Press the “On/Off” button to turn the thermostat ON or OFF - the words "ON" or "OFF" will appear on display. 6.2 Adjusting Temperature In Cool mode or in Fan mode: •...
- Page 7 6.3 Mode, Fan speed, Auto Fan • Press the “Select” button – “UnLo” and the actual mode will appear on display. • Using the “+” and “-” buttons switch between: Cool – “Cool” will appear on display Heat – “Heat” will appear on display Cool/Heat –...
- Page 8 6.5 Programming The thermostat is a 5-1-1 programmable; weekdays Monday through Friday, Saturday and Sunday both have individual programs. There are four program events per day: 1-Wake, 2-Day, 3-Return, 4-Sleep Switch between Programmable/Non Programmable configurations The TRE24-PROG-HC11(U.S Program-Celsius) is a Programmable thermostat by default. To switch to a Non Programmable configuration the remote control MUST be used (see instructions below).
- Page 9 To modify the Program to your own needs simply follow the steps of the following chart: Prog Prog Prog Set the Set the Set the hours minutes Prog Prog Prog Prog START START TIME TIME COOL HEAT (hours) (minuts) Prog Prog Prog Prog...
- Page 10 6. Technician Settings To offset the Room temperature readings- when needed: Adjust the set-point temperature for cooling to 10°C. • • Wait until display returns to normal. Press and hold the “Select” button (5 sec.) –“Offs” and the OFFSET temperature will •...
- Page 11 7. RT08 - Hand Held Remote Control - Option The remote control is Infrared; the remote must be pointed at the thermostat to operate. Every time you change parameters in the Remote Control, you must send it to the thermostat by pressing the “On/Send”...
- Page 12 7.5 Temperature Set Point In Fan mode and in Cool Mode: • Press the “+” or “-” buttons - “COOL” and set-point temperature for cooling will flash. Using the “+” and “-” buttons, adjust the set-point • temperature for cooling. Press the “On/Send”...
- Page 13 7.6 Real Time Clock and Day • Press the “Select” button – “CLOCK SET” will flash. Press the “+” or “-” buttons - the hours will flash. • Adjust the hours using the “+” and “-” buttons. • Press the “Select” button again – the minutes will •...
- Page 14 Programming Procedure To enter programming, press and hold the • SELECT button for three seconds - “PROGRAM” (flashing) and the days Mon-Fri will appear on display. • Press the “+” or “-” buttons, “PROGRAM 1” and “START” (flashing) will appear on display. Press the “+”...
- Page 15 Press the “Select” button again - “PROGRAM 3” and “START” • (flashing) will appear on display. Press the “+” or “-” buttons and adjust the hours, minutes and • temperature, the same way as in PROGRAM 1 • Press the “Select” button: “PROGRAM 4” and “START” (flashing) will appear on display.
Need help?
Do you have a question about the Haften TRE24-PROG-HC11 and is the answer not in the manual?
Questions and answers