
Related Manuals for promotal Quest 2080-10


Summary of Contents for promotal Quest 2080-10
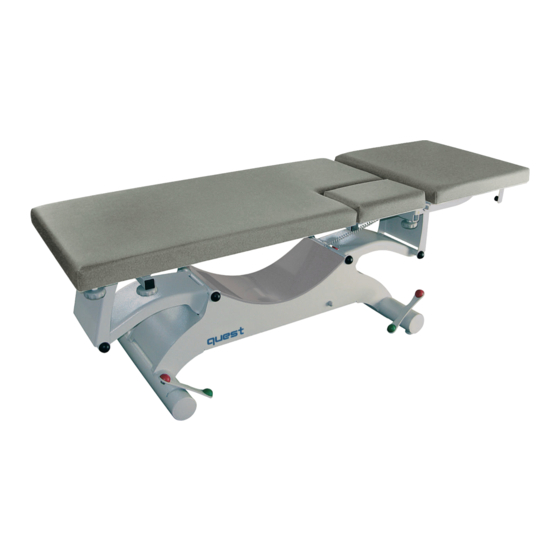
- Page 1 User’s Guide Model Shown 2080-50 Cardiology couch 2080-10 / 2080-15 / 2080-20 2080-30 / 2080-50...
- Page 2 Operating Manual are deemed correct at the time of 22, rue de Saint-Denis de Gastines printing. B.P. 26 - 53500 ERNÉE Cedex Promotal , however, reserves the right to modify its models FRANCE and its procedures or render them obsolete without notice. Tél. :...
-
Page 3: Table Of Contents
Summary Important Information Safety symbols Power supply Electromagnetic interfere Precautions when unpacking Material delivered in cardboard packaging Dismounted material Products delivered on wooden palettes Storage condition Conditions of use Unpacking / Installation Verification Cleaning protocol Warning Cleaning/Disinfecting User’s Guide – Examination Couch Intended use Authorisation to use Patient weight capacity... - Page 4 Summary Adjusting the backrest tilt (for models 2080-10, 2080-15, 2080-20 and 2080-30) Adjusting the backrest tilt (for models 2080-50) Fill-in cushion Installing the cushion Removing the cushion Paper roll Installation of the paper roll holder Using the paper roll The levellers Adjusting the levellers Block’n Roll ®...
- Page 5 Summary Using the paper cutter The pedal control (reference 2051-10) Installation of the pedal control The pedal control (reference 2051-20) Installation of the pedal control The pedal control (reference 2051-30) Installation of the pedal control Options Castors with brakes Using the castors Face slit in head-cushion Accumulator Technical characteristics of the accumulator...
-
Page 6: Important Information
Important Information Safety symbols Warning sign The information marked with this symbol must be read and strictly followed ! Note Procedure, practice, or condition. Maximum number of Correct orientation for Humidity limitation stacked pallets transportation Atmospheric pressure Temperature Fragile limitation limitation Not to use sharp Keep in a dry place... -
Page 7: Power Supply
Electromagnetic interfere This Promotal examination equipment was designed and built in order to minimize electromagnetic interferences with other devices. If interferences are noted, it is necessary to withdraw the parts causing the interference and/or to connect the equipment on isolated circuits. -
Page 8: Precautions When Unpacking
Precautions when unpacking Material delivered in cardboard packaging ○ Small, lightweight, easy ○ Heavy or cumbersome material requiring the to handle materiel of lifting gear In this case, the products can be easily handled without any lifting gear, taking care to position the product In this case, it is possible to use a fork lift truck, according to the directional arrows on the packaging. -
Page 9: Verification
Check that the package contains the device, the accessories and options, the power cord (if electric DM) and the Operating guide. Note : Authorized CE representative Countries in the EEC should direct all questions, incidents, and complaints to Promotal’s Authorized CE representative listed below : Promotal 22, rue de Saint-Denis de Gastines 53500 Ernée,... -
Page 10: Cleaning Protocol
Any modification to the medical device without written authorization from the manufacturer is forbidden. Caution Only accessories designed and provided by Promotal for this medical device are authorised for use. Caution This medical device is not intended to be cleaned in a washing tunnel. -
Page 11: User's Guide - Examination Couch
User’s Guide – Examination Couch Intended use This appliance is designed for use in professional premises only : ○ Medical practices ○ Care establishments This appliance must not be installed in domestic premises. This table is designed to be used only by healthcare staff. This examining table is used to perform interventions under the best possible safety conditions. -
Page 12: Electrical Connections
User’s Guide – Examination Couch Electrical connections This table must be connected to the main electricity supply. ○ Connection to the supply : 120 V or 230 V (depending on country) ○ Frequency : 50/60 Hz ○ Protection Classification / Degree of electric shock protection : Class 2 / B ○... -
Page 13: Using The Couch
Using the Couch Safety : For safety reasons, and in order to avoid malfunctioning, no objects should be placed under the seat cushion or between the moving parts of the couch. Connecting the hand control Possible to connect 3 controls. Using the hand control To achieve the desired position, simply apply and The couch is fitted with an internal device to limit... -
Page 14: Adjusting The Height
Using the Couch Adjusting the height Press on the hand control. Be careful to avoid trapping fingers or limbs during use Down Note : After a lot of use, a gap may appear when in the horizontal position. Placing the table in the low (or high) position will reinitialize the motors. -
Page 15: Adjusting The Backrest Tilt (For Models 2080-10, 2080-15, 2080-20 And 2080-30)
Adjusting the backrest tilt (for models 2080-10, 2080-15, 2080-20 and backrest to the desired position. 2080-30) The patient must not lean with his / her full weight on the backrest during With one hand, move the lever (L1) either up this procedure. -
Page 16: Fill-In Cushion
Using the Couch Fill-in cushion Installing the cushion Standard 230 mm Option 2081-75 275 mm Ensure the cushion is in the correct position before using. Removing the cushion User’s Guide... -
Page 17: Paper Roll
Paper roll Installation of the paper roll holder N°4 Allen key Using the paper roll Caution follow the indications provided well obtain a greater Cover the upholstery with paper before use. longevity of the material. User’s Guide... -
Page 18: The Levellers
Using the Couch The levellers Adjusting the levellers Screw or unscrew the leveller to the desired height. Block’n Roll ® (for models 2080-15, 2080-30 and 2080-50) Using the Block’n Roll ® Caution : Must not be use with the patient, This system is only to be used to move the table for cleaning purposes. -
Page 19: Accessories
Accessories Pair of Clamps (reference 166) Installing the Clamps Take the stopper (B) out of the square tube if necessary. Loosen the nuts (V), and put the pair of clamps ref.166 (E) into position in the square tubes. Tighten the nuts. The clamps accept accessories with a diameter of 16 Arm rest (reference 2536) -
Page 20: Pair Of Stirrups
Accessories Pair of stirrups (reference 850) Installing the stirrups Caution Clamps are necessary to install Tighten screws before use. these accessories. (réf. : 166) Pair of legrests (reference 840) Installing the legrests Caution Clamps are necessary to install Tighten screws before use. these accessories. -
Page 21: Hook Iv Pole
2 hook IV pole (reference 985-01) Installing the IV pole Tighten screws before use. Caution Clamps are necessary to install these accessories. (réf. : 166) Auto-blocking I.V. pole Installing the IV pole (reference 2985-01) Unscrew the screw handle. Insert the I.V. pole and rescrew. Caution Clamps are necessary to install these accessories. -
Page 22: The Pair Of Barriers
Accessories The pair of barriers (reference 85114-01) Installing the pair of barriers 3. Tighten the screw. 1. Unscrew the screw. 2. Insert the pair of barriers. Approach the barriers to Caution obtain a spacing of 25 mm beteween the barriers and 25 mm (acceptable spacing indicated the upholstery. -
Page 23: Headrest
Headrest (reference 1102-10) Backrest extension (reference 2055-01) Installating the Backrest extension N°4 Allen key User’s Guide... -
Page 24: Headrest
Accessories Headrest (reference 2054-01) Installating the Headrest N°4 Allen key Intallation of the headrest on the upholstery 600150-65 et 600150-75 Intallation of the headrest on the upholstery 600150-70 User’s Guide... -
Page 25: Adjustable Paper-Roll Holder
Adjustable paper-roll holder (reference 2056-02) Installating the paper roll holder 1. Remove the standard paper roll holder. M6x25 (x 2) N°4 Allen key 3. Replace the paper roll holder. User’s Guide... -
Page 26: Installating The Paper Roll Holder [With The Head-Rest (Ref. : 2054-01)]
Accessories Installating the paper roll holder [with the head-rest (ref. : 2054-01)] N°4 Allen key ENT0810 (x 2) M6x30 (x 2) User’s Guide... -
Page 27: Installation Of The Paper Roll
Installation of the paper roll The paper roll is positioned on a mobile axis with adjustable hooks at each end. 1. Unscrew the screw handle (VS). 2. To remove the paper roll holder slightly (PR). 3. Insert the paper roll. Cover the upholstery with paper before use. -
Page 28: Using The Paper Cutter
Accessories Using the paper cutter 1) Slide the paper under the paper cutter. 2) Replace the paper cutter. The pedal control (reference 2051-10) (for model 2080-10 and 2080-15) Installation of the pedal control (Cf : page 16) The pedal control (reference 2051-20) (for model 2080-20 and 2080-30) Installation of the pedal control... -
Page 29: The Pedal Control (Reference 2051-30)
The pedal control (reference 2051-30) (for model 2080-50) Installation of the pedal control (Cf : page 16) User’s Guide... -
Page 30: Options
Options Castors with brakes (reference 81036) (pour modèle 2080-10 and 2080-20) Using the castors Caution : Must not be use with the patient, This system is only to be used to move the table for cleaning purposes. Free position Brake position Caution Ensure brakes are fully engaged before installing a patient. -
Page 31: Accumulator
Accumulator (references 2092) Technical characteristics of the accumulator Voltage ......: 24 V DC capacity ......: 1.2 Ah Fuse ........: T 15 A Protection index ....: IPX6 Type of accumulator ..: Gel plomb Charge time ...... : approx. -
Page 32: Protection Classe 1 And Equipotential Terminal
Options Protection Classe 1 and equipotential terminal (references 2059-01) Electrical connection : Class 1 ○ Connection to the supply : 120 V or 230 V (depending on country) ○ Frequency : 50/60 Hz ○ Protection Classification / Degree of electric shock protection : Class 1 / B ○... -
Page 33: Lifespan Of The Medical Device
Do not hesitate to contact Midmark Europe, if necessary. We will suggest to you a solution to process this Do not hesitate to contact Promotal, if necessary. We will suggest to you a solution to process this equipment equipment in the best conditions. -
Page 34: Re-Fit The Protection Cover
Lifespan of the Medical Device Re-fit the protection cover Re-fit the protection cover Cable User’s Guide... -
Page 35: Maintenance Notebook
Maintenance notebook... -
Page 36: Note
Note User’s Guide... - Page 37 User’s Guide...
-
Page 38: Warranty Information
No Authorization No person or fi rm is authorized to create for Promotal any other obligation or liability in connection with the products. THIS WARRANTY IS PROMOTAL’S ONLY WARRANTY AND IS IN LIEU OF ALL OTHER WARRANTIES, EXPRESS OR IMPLIED. -
Page 39: Declaration Of Conformity
EU Declaration of Conformity Promotal 22 rue de Saint Denis de Gastines 53500 Ernée – France SRN: FR-MF-000001666 declare, under our sole responsibility, that the following electrical medical device: Commercial name: Quest Cardio 2080-10 / 2080-15 / 2080-20 2080-30 / 2080-50... - Page 40 PROMOTAL - FRANCE www.promotal.com DIC2080-10_2121EN...
Need help?
Do you have a question about the Quest 2080-10 and is the answer not in the manual?
Questions and answers