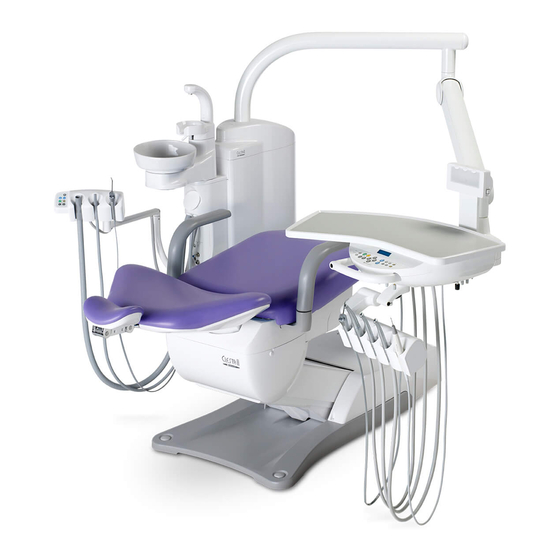
Belmont Clesta II Operating Instructions Manual
Dental unit
Hide thumbs
Also See for Clesta II:
- Operating instructions manual (40 pages) ,
- Installation instructions manual (24 pages) ,
- Installation instructions manual (16 pages)
Table of Contents
Advertisement
Quick Links
Advertisement
Table of Contents

Related Manuals for Belmont Clesta II


Summary of Contents for Belmont Clesta II
-
Page 3: Table Of Contents
TABLE OF CONTENTS SAFETY PRECAUTIONS ------------------------------------------------------------------------- 1 1. OVERVIEW AND MAJOR COMPONENTS ----------------------------------------------- 6 2. DIMENSIONS AND SPECIFICATIONS 2-1. DIMENSIONS ------------------------------------------------------------------------------ 7 2-2. SPECIFICATIONS ------------------------------------------------------------------------- 7 3. OPERATING INSTRUCTIONS 3-1. DOCTOR TABLE SECTION ------------------------------------------------------------- 8 3-2. CUSPIDOR UNIT SECTION -------------------------------------------------------------16 3-3. - Page 4 Intended Use of the Product This product is an active therapeutic device intended for the exclusive use for diagnoses, treatments and relative procedures of dentistry. The product must be operated or handled by the qualified dentists or by dental staffs under the supervision of the dentist.
- Page 5 Refer to operating instructions Serial number Reference number *1 : The color of black part is blue in the actual label.
- Page 6 REQUEST FOR WATER FLUSHOUT (DISCHARGE) E type:Standard E Precautions for water quality safety A type:Option A C A U T I O N To maintain the water quality for treatment and for stable water supply to the handpieces, ensure to carry out flushout of the residual water in the unit before starting treatment.
-
Page 7: Safety Precautions
... - Page 8 16. Prohibition of using this equipment adjacent to or stacked with other electronic equipment Use of this equipment adjacent to or stacked with other equipment should be avoided because it could result in improper operation. If such use is necessary, this equipment and the other equipment should be observed to verify that they are operating normally.
- Page 9 11. Precautions for cleaning a Cuspidor bowl 12. Pay attention to water discharge when attach/detach the Cuspidor bowl Make sure to turn the main switch off when you attach/detach the cuspidor bowl. Cup filler sensor may react to hands.
- Page 10 • Never use sandpaper, metal scrub brushes and abrasive cleaning agents to clean the unit. • Do not use strongly acidic cleaning agents or alkaline pipe cleaning agents to avoid corrosion of metals, etc. 26. Combination with accessories or other devices Use only our qualified accessories, other devices or equipment for this product to ensure the safety of product.
- Page 11 29. Clean and sterilize the vacuum tip, syringe nozzle before use The vacuum tip, syringe nozzle which contacts oral tissues, is provided without sterilization. Cleaning and sterilization is necessary before use. For the method of cleaning and sterilization, see "Care and Maintenance" on page 22 to 24. Be careful not to drop the handpiece Be careful not to drop the handpiece.
-
Page 12: Overview And Major Components
Cuspidor Bowl... -
Page 13: Dimensions And Specifications 2-1. Dimensions
340˚ 290˚ 290° 340° ø50.8 (ø42.7) 21° 21˚ 28˚ 28° -mm- CLESTAⅡ CHAIR CLESTAⅡ CHAIR (EURUS TYPE) 900/300 AL-720S/ EURUS Dental Light Dental Light AL-720M LIGHT 1554 1479 99.5 EURUS LIGHT 10 to 95% ... -
Page 14: Operating Instructions
MAIN LOCK... - Page 15 manual...
- Page 16 -10-...
- Page 17 -11-...
- Page 18 Flush out system The CLESTA II is equipped with two types of flush out system. Short time flush out is for cleaning handpiece water lines. Long time flush out is for handpiece water lines, bowl flush water line and cupfiller water line.
- Page 19 Micromotor micromotor -13-...
- Page 20 -14-...
- Page 21 (Optional) Handpiece Holder Holder Support Arm -15-...
-
Page 22: Cuspidor Unit Section
EURUS LIGHT / Fig.3-22 Assistant Side Control Panel and Cuspidor Unit Control Panel 900 Dental Light (Type 920) / EURUS LIGHT -16-... - Page 23 VH-18 BT06 Vacuum Handpiece Saliva ejector Handpiece (6) Cuspidor Bowl (Optional) (Fig.3-26) cuspidor bowl Fig.3-26 -17-...
- Page 24 (7) Clean Water System (Optional) (Fig.3-27, Fig.3-28) (Fig.3-27) increases (Fig.3-27) (Fig.3-28) Fig.3-27 Fig.3-28 AL-720S 900 (Type920) 300 (Type320S) EURUS LIGHT AL-720M (10) Monitor Bracket (Optional) (Fig.3-31) PC monitor can be mounted on this bracket. Note: Do not apply an excessive load or shock to the monitor or monitor bracket.
-
Page 25: Foot Control Section
(Fig.3-32) Fig.3-32 Foot Control (Type A2) (Fig.3-33) Fig.3-33 Electric Motor Foot Control (Type SE) (3) Foot Switch (Optional) (Fig.3-34) A. Chair Manual Control Switches B. Chair Auto Mode Switches (Fig3-7)(Fig.3-8). Note: Please refer to page 9 Fig.3-34 Foot Switch -19-... -
Page 26: Care And Maintenance
5. CARE AND MAINTENANCE Cleaning Unit Cleaning and Sterilization of product exterior Clean the metallic parts with a dry soft cloth. Wipe off water immediately if water is put on the product. Water may cause rusting. Clean the resin parts with a wet soft cloth. Use FD333 or FD366 made by Durr or ethanol for cleaning and bacteria elimination from the product exterior. - Page 27 (2) Solid Collector (Fig.5-4) Solid Collector Pull out the solid collector filter and clean it. Filter After cleaning, refit the solid collector firmly. (3) Tubings and hoses Tubings and hoses can be cleaned with FD333 or FD366 made by Durr. (4) Cleaning vacuum and saliva ejector lines (Fig.5-5) Fig.5-4 Solid Collector Filter The sucking unit comes into contact with secretions, spit and...
- Page 28 (6) Vacuum Handpiece and saliva ejector Handpiece * Cleaning and sterilization must be done every after use to patients. VH-18 BT06 Saliva ejector Handpiece For effective sterilization, washing for removing Vacuum Handpiece contamination and immersion by a cleaning agent are required. Then, rinse by water in order to remove residual procedures from cleaning to sterilization.
- Page 29 Assembly before sterilization (Fig.5-11) Caution when assembling vacuum handpiece before Vacuum Tip/Vacuum Handpiece/Saliva Ejector Handpiece sterilization can be autoclave. Vacuum handpiece and saliva ejector handpiece have to assemble before autoclave. Insert the cap Body straight down When assembling the vacuum handpiece, align the two Align the surfaces;...
- Page 30 (7) Belmont 77 Syringe * Cleaning and sterilization must be done every after use to patients. Disassembly (Fig.5-13) Remove the nozzle from syringe by turning it in direction A. Cleaning by hand A. Wipe off the surface contamination by a cloth while rinsing the surface by running clean warm water at 40±5 degrees.
- Page 31 (8) Handpieces Observe the instructions given in the package insert and Instruction Manual included with the handpiece to clean it. (9) Air Filter Drain Valve (Fig.5-16) 【 CLESTAⅡ CHAIR 】 Air filter drain valve is located under the Air Filter Maintenance Lid Drain Valve maintenance lid.
-
Page 32: Maintanance And Inspection
6. MAINTENANCE AND INSPECTION -26-... - Page 33 -27-...
-
Page 34: (Maintenance And Inspection By User) 6-2. Guideline For Periodical Check
Slide knob for vacuum handpiece WARNING 7. Detachable Parts P A R T S P A R T S Handpiece Saliva ejector Handpiece Handpiece hose Vacuum tip Cuspidor bowl Solid collector lid Drain cap Solid collector filter Basket strainer Male connector for water service outlet Cupfiller base Male connector for air service outlet Cupfiller nozzle... -
Page 35: Electromagnetic Compatibility (Emc)
8. ELECTROMAGNETIC COMPATIBILITY (EMC) This product complies with EMC Standard EN60601-1-2:2015. 1. Precautions regarding EMC and compliance with accompanying documents Medical electrical equipment requires special precautions regarding EMC and needs to be installed and put into service according to the EMC information provided in this booklet. 2. - Page 36 6. Electromagnetic immunity declaration 2 Guidance and manufacturer’s declaration – electromagnetic immunity The CLESTAⅡ Unit is intended for use in the electromagnetic environment specified below. The customer or user of the CLESTAⅡ Unit should ensure that it is used in such an environment. Immunity test IEC 60601 test level Compliance level...
-
Page 37: Handpieces That Can Be Used With This Product
However, there still could be a case that the connectors of turbines or air motors may not fit into some handpieces due to the manufacturing tolerances. Have your local authorized Belmont dealer check the connectability before purchasing the handpiece. Except for our recommended handpieces, we shall not be liable for any problems deriving from bad connectability or their performance. -
Page 38: Accessories
It may be different from the following list depending on the specification of the unit. Accessories intended use, etc. The container to take in cotton and swab for dental treatment. Receptacle to do away with used cotton,etc. Grip for portability of foot control to reduce hand contact. - Page 39 60143723 0001...
- Page 40 NOTE TAKARA COMPANY EUROPE GmbH Berner Strasse 18, 60437 Frankfurt am Main, Germany Tel:+49 69 506878 0 Fax:+49 69 506878 20 BOOK NO. 1E07TYA0 Printed in Japan 2019-12...
Need help?
Do you have a question about the Clesta II and is the answer not in the manual?
Questions and answers