Table of Contents
Advertisement
Quick Links
Advertisement
Table of Contents

Subscribe to Our Youtube Channel
Related Manuals for DEPURECO PUMA Series


Summary of Contents for DEPURECO PUMA Series
- Page 1 INSTRUCTION AND MAINTENANCE MANUAL PUMA SERIES ORIGINAL INSTRUCTIONS...
-
Page 2: Table Of Contents
TABLE OF CONTENTS: 1. INFORMATIVE SECTION 1. INFORMATIVE SECTION ............3 Foreword ......................... 4 Main parts ......................6 Optional parts ....................7 Manufacturer's identification data ..........7 Identification plate ..................7 Atex marking ....................... 8 Permitted Uses ....................9 Authorised environmental conditions ..........9 Noise level...................... -
Page 3: Informative Section
IMPORTANT - The DEPURECO term and logo in this document refer to and are the property of DEPURECO INDUSTRIAL VACUUMS S.r.l. This document remains the exclusive property of DEPURECO S.r.l. Full or... -
Page 4: Foreword
Foreword Dear Customer Thank you for having chosen DEPURECO; we hope you will enjoy using your new DEPURECO PUMA Z22 series vacuum cleaner This manual has been drafted in order for our customer to fully appreciate the quality of this machine. - Page 5 Directive 2006/42/EC and the technical data are taken from the technical file archived at DEPURECO. With reference to Regulation 1907/2006/EC (REACH), DEPURECO hereby declares that no Substances of Very High Concern - (SVHC) included in the Candidate List, are contained in its products.
-
Page 6: Main Parts
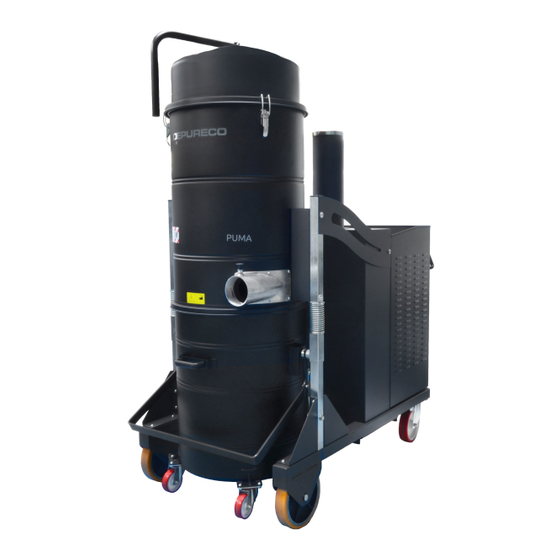
This manual forms an integral part of the vacuum cleaner. Read this manual and the other attachments supplied carefully. Knowledge of the instructions here contained is indispensable for the safe use and maintenance of the vacuum cleaner Main parts PUMA 30 Carrying handles Electrical Panel Cover... -
Page 7: Optional Parts
Optional parts Automatic filter cleaning system with reverse air jet (S.P.) A wide range of optional accessories is available from DEPURECO depending on the intended use of the vacuum. Manufacturer's identification data DEPURECO INDUSTRIAL VACUUMS S.r.l. Corso Europa 609 - 10088 Volpiano (TO) - ITALY phone +39 011 98 59 117 - fax +39 011 98 59 326 | VAT NO. -
Page 8: Atex Marking
Atex marking Marking for appliance suitable to contain an area classified as ZONE 20 indoors and suitable for use in an outdoor area classified as ZONE 22: Manufacturer ..Address ………. Appliance … XXXX Serial no....II 1/3 D Ex htc IIIC T140°C Da/Dc 15°C ≤... -
Page 9: Permitted Uses
II: Appliance group (I: electrical appliances for mines, II: electrical appliances for surfaces) 1/3D: Category 1/3D, i.e. suitable for use in ZONE 22 and with ZONE 20 indoors 1/2D: Category 1/2D, i.e. suitable for use in ZONE 21 and with ZONE 20 indoors IIIC: Dust group (any kind of dust, including conductive dust) -
Page 10: Noise Level
Noise level The phonometric tests performed on this specific vacuum cleaner model demonstrate a sound pressure level of PUMA 10 Z22 PUMA 15 Z22 74 dB(A) PUMA 18 Z22 PUMA 30 P Z22 78 dB(A) PUMA 30 S Z22 WARNING! Workers exposed to sound pressure levels higher than 85 dB(A) must be protected by suitable personal protection device (PPE) such as certified ear muffs. -
Page 11: 1.10 Technical Data
1.10 Technical data PUMA STD PUMA PUMA PUMA PUMA PUMA PUMA PUMA PUMA Weight* [Kg] Weight with FIX [Kg] base * Overall 1050x1950x230 dimensions [mm] 850x1550x1980 Voltage / [V]- 400 - 50/60 Frequency [Hz] [kW- 7.5 – 8.5 – 11 – 12.5 Power 15-20... - Page 12 PUMA ATEX PUMA PUMA PUMA U.M. PUMA 10 PUMA 30 Peso [Kg] 1050 x Dimensioni di [mm] 850 x 1550 x 1980 1950 x ingombro 2300 Tensione / [V]- 400 - 50/60 Frequenza [Hz] [kW]– Potenza 7,5-10 11-15 15-20 18,5 18,5-25 [Hp] Depressione...
-
Page 13: 1.11 Technical Data
DEPURECO shall not be held liable for any injuries to persons or damage to objects caused by misuse or improper use of the vacuum. -
Page 14: Safety Section
In the event of equipment, procedures, work methods or techniques not expressly provided for by DEPURECO being used, it is crucial to ensure beforehand that there are no dangers for oneself and the others. Nevertheless, DEPURECO shall not be held liable. -
Page 15: Safety Recommendations
DEPURECO from any liability. Each section lists further safety measures specific to the various functions. WARNING! Setting to work – connection to the power supply Make sure there is no evident sign of damage to the vacuum cleaner before starting work. - Page 16 (superficial antistatic properties are not accepted). The use of original DEPURECO accessories is recommended. Verify electric continuity with an ohmmeter: 1. Between the inlet and the ending part of the vacuum’s accessories: The resistance measured must be inferior to 100MΩ...
-
Page 17: Safety Plates And Symbols
Clean them using a cloth with water and soap. Do not use solvents, naphtha or petrol. Request replacements for damaged plates from DEPURECO. If a plate is located on a component that is being replaced, make sure to fit the old plate to the new component. - Page 18 Warning! Crushing hazard for the upper limbs during insertion and locking of the dirt container under the vacuum cleaner. Never place your hands between the vacuum and the dirt container while inserting and locking the later under the vacuum cleaner. Lock the container by means of the special lever, using BOTH HANDS Warning! Read carefully this use and maintenance manual before using the vacuum...
-
Page 19: Residual Risks
Warning! The removal of safety plates from the vacuum and/or its components and packaging is strictly prohibited. DEPURECO shall not be held liable for the vacuum's safety in the event of failure to comply with this prohibition. Applied Directives The following directives apply to the vacuum cleaner described in this... -
Page 20: Atex Safety Instructions
ATEX safety instructions Ex Hexagon – ATEX Directive 2014/34/EU In this manual the Ex hexagon is next to the main safety instructions concerning the risk of explosion. All staff involved in the installation, use and maintenance of the appliance and its components should receive technical training for the tasks to be carried out, particularly for working in areas with a potentially explosive atmosphere. - Page 21 The user must ensure that the appliances are used according to their intended use, namely that they are employed in ZONES classified as compatible with the zones for which said appliances are declared suitable by the manufacturer. The appliance is designed to work in standard environmental conditions: ...
- Page 22 If dusts that can give rise to self-ignition are vacuumed, the collection bin must be emptied immediately after each activity. This precaution must also be taken when vacuuming different types of dust, the mixture of which can give rise to exothermic reactions.
- Page 23 For the installation and maintenance of electrical parts (e.g. cables, cable glands and terminals), always follow the guidelines given in EN 60079-14. When opening junction boxes (for inspections), make sure that the gaskets are in place when closing them again. The plug is not ATEX certified (or is not supplied): the user must either connect the plug to a socket installed in a SAFE AREA or fit an ATEX plug.
-
Page 24: Handling, Unpacking And Installation Section
HANDLING, UNPACKING AND INSTALLATION SECTION Handling Warning! The instructions for transporting and unpacking the vacuum correctly are shown on the packaging as well. The following instructions also indicate the operations to be undertaken should vacuum need re-packed unpacked after subsequent transportation. -
Page 25: Unpacking
Unpacking Cut and unwind the two packaging fixing belts remove the staples that fix the carton packaging to the pallet with the aid of a screwdriver remove the carton completely loosen and remove the fastening screws and brackets from both sides Page 25 of 48... -
Page 26: Installation
In the event of one or more components being damaged, do not continue with installation, inform DEPURECO about the anomaly and agree upon action to be taken. The vacuum cleaner is already fitted with an appropriate filter intended... - Page 27 Note: the flexible tube and the relevant end-pieces and accessories are not included with the STANDARD model. Contact your dealer (or DEPURECO) for information regarding the various types of OPTIONALS that can be used on this specific model. The following operation must be carried out by a qualified electrician.
-
Page 28: Work Cycle
Work cycle Work cycle Make sure the power supply cable is undamaged and in perfect state. Caution! Before connecting the power outlet, make sure that the voltage of the power supply line matches the one reported on the data plate of the appliance. - Page 29 Turn the disconnector from O to I [1] Check that the white power on indicator [3] is on Press the green button [6] to start vacuuming Check that the direction of rotation of the pump matches the one indicated by the arrow in the figure Press the red button [7] to stop the vacuum cleaner Press the emergency button [2] in the event of an EMERGENCY...
- Page 30 Warning! Do not use the vacuum cleaner with a clogged filter To clean the filter, proceed as follows: Switch the vacuum off by rotating the main switch (7) to “OFF” Shake the filter by energetically pushing the lever from right to left as shown in the picture Warning! If the vacuum gauge still indicates an irregular vacuum value the...
-
Page 31: Emptyng The Bin
Emptyng the bin Warning! Wear PPE (gloves, dust mask, goggles, etc.) during this operation. Depending on the type and quantity of material being vacuumed, it is necessary to periodically check the bin to avoid filling it excessively. Proceed as follows to empty the container: Switch the machine off by switching the main switch (7) to “OFF”... -
Page 32: Insert And Lock The Bin
Insert and lock the bin Follow the steps below to insert and lock the container: place the bin under the vacuum and push the bin lever completely, using two hands. The pins (A) must be aligned with the slots (B) Warning! Crushing hazard for the upper limbs during insertion and locking of the dirt container under the vacuum cleaner. -
Page 33: Storage - Decommissioning
Storage – Decommissioning Remove the filter and clean it; empty the refuse collection container and store the vacuum in a place protected against weather agents with the temperature ranging between 5 and 45 °C and cover it with a nylon tarp to protect it against dust. -
Page 34: Maintenance Section
MAINTENANCE SECTION Warning! Special vacuum maintenance must carried solely specialised technicians authorised by the DEPURECO dealer. Informative notes This section describes checks routine maintenance operations required to ensure proper vacuum operation. Maximum reliability and minimum maintenance costs are the result of a planned maintenance and inspection schedule carefully followed throughout the entire lifespan of the vacuum. -
Page 35: General Safety Regulations
General safety regulations Warning! All the operations described above must be carried out with the plug disconnected from the socket. Before starting maintenance cleaning operation, wear suitable PPE (protective clothing, goggles and/or gloves, etc.) according to the work to be done. Place a sign on the vacuum with the message: “MACHINE UNDER MAINTENANCE DO NOT START”... - Page 36 Before every work shift Check that the power cord and the plug are not damaged: replace them immediately if there are any signs of wear, using a cord of the same type (information DEPURECO). This operation sole responsibility of an electrician.
-
Page 37: Replacing The Filter
Replacing the filter Warning! Wear appropriate (dust mask, latex gloves, goggles, etc.). Proceed as follows to replace the filter: Switch the vacuum off by positioning the main switch (7) on "OFF" Disconnect the vacuum cleaner from the power socket Unlock the three locking hooks (A) on both sides Disconnect the hose (B) by unscrewing the clamp with a dedicated hex Remove the vacuum’s cap (C) Extract the filter and place all components on a work bench... - Page 38 Loosen the fastening clip (H), remove the filter from its support and, using scissors, cut the lower belts that clamp it to the shaking cage Remove the filter, put it in a plastic bag, seal it and dispose it of according to the current legislation on the type of material extracted To reassemble the filter, operate in reverse order: Insert the new filter in the support ring and lock it by means of...
-
Page 39: Replacing The Cartridges On The S.p. Cartridge Cleaning System (If Provided)
insert the filter with ring and cage inside the filtering chamber Reposition the vacuum cleaner’s cap (C), Pay attention to the direction of the inlet which must be positioned in the direction of the flexible hose (B) Lock the fastening clips (A) Connect the hose (B) Connect the compressed air supply (A) to the valve’s junction connect the vacuum cleaner to the mains... - Page 40 Scollegare i tubi dell’aria collegati alle valvole e serbatoio (blu) - Remove the vacuum’s cap - Lift the filtering cartridges support (G) and position it upside down on a work bench Warning! Two people are needed to carry out this operation, - Unscrew and remove the fastening nuts from the base of the cartridges.
-
Page 41: Replacing The Hepa Cartridge (If Provided)
- Remove and replace the cartridges. remove the cartridges, put them in a plastic bag, seal dispose according applicable legislation on the type of material collected. To reassemble the cartridges, operate in reverse order: Replacing the HEPA cartridge (if provided) To replace the HEPA cartridge proceed as follows: Switch the machine off by turning the main switch to “OFF”... - Page 42 Lock the unit’s three locking hooks (A) and secure the HEPA unit Connect the vacuum cleaner to the mains Switch the vacuum cleaner on by positioning the main switch to "ON", then check to make sure it works properly. EXCLUSIVELY USE FILTERS MANUFACTURED BY DEPURECO Page 42 of 48...
-
Page 43: Troubleshooting
Verify the integrity of the The vacuum cleaner No power supply plug and the power cable will not start Contact DEPURECO’s technical assistance service Shake the filte. Replace it should the cleaning Clogged filter The vacuum gauge not be enough . -
Page 44: Scrapping
Scrapping case scrapping, avoid damage environment, all components of the vacuum cleaner, must disposed responsibly, appropriate landfills, in compliance with current legislation - Italy Legislative Decree 152/2006 subsequent amendments. (subsequent modifications and additions). Before scrapping the machine, the plastic and rubber materials must be separated from the electrical material. - Page 45 MAINTENANCE LOG: INTERVENTION 1: DATE: TECHNICAL ASSISTANCE: TYPE OF INTERVENTION: INTERVENTION 2: DATE: TECHNICAL ASSISTANCE: TYPE OF INTERVENTION:...
- Page 46 INTERVENTION 3: DATE: TECHNICAL ASSISTANCE: TYPE OF INTERVENTION: INTERVENTION 4: DATE: TECHNICAL ASSISTANCE: TYPE OF INTERVENTION:...
Need help?
Do you have a question about the PUMA Series and is the answer not in the manual?
Questions and answers