Table of Contents
Advertisement
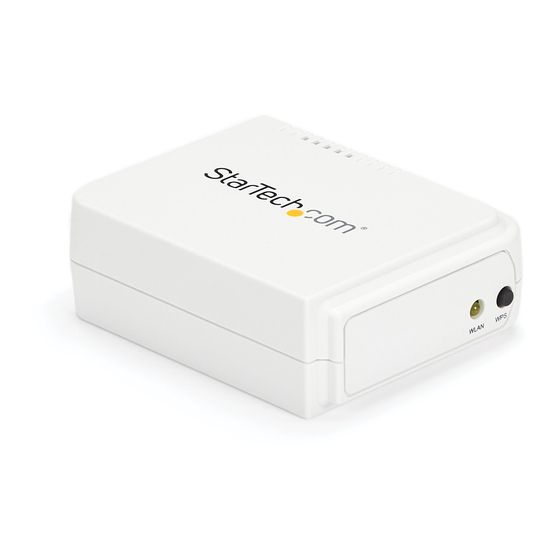
Wireless N USB 2.0 Network Print Server
*actual product may vary from photos
DE: Bedienungsanleitung - de.startech.com
FR: Guide de l'utilisateur - fr.startech.com
ES: Guía del usuario - es.startech.com
IT: Guida per l'uso - it.startech.com
NL: Gebruiksaanwijzing - nl.startech.com
PT: Guia do usuário - pt.startech.com
For the most up-to-date information, please visit: www.startech.com
Manual Revision: 08/31/2015
Advertisement
Table of Contents

Related Manuals for StarTech.com PM1115UW


Summary of Contents for StarTech.com PM1115UW
- Page 1 DE: Bedienungsanleitung - de.startech.com FR: Guide de l'utilisateur - fr.startech.com ES: Guía del usuario - es.startech.com IT: Guida per l'uso - it.startech.com NL: Gebruiksaanwijzing - nl.startech.com PT: Guia do usuário - pt.startech.com For the most up-to-date information, please visit: www.startech.com Manual Revision: 08/31/2015...
-
Page 2: Fcc Compliance Statement
(1) This device may not cause harmful interference, and (2) this device must accept any interference received, including interference that may cause undesired operation. Changes or modifications not expressly approved by StarTech.com could void the user’s authority to operate the equipment. - Page 3 StarTech.com. Where they occur these references are for illustrative purposes only and do not represent an endorsement of a product or service by StarTech.com, or an endorsement of the product(s) to which this manual applies by the third-party company in question. Regardless of any direct acknowledgement elsewhere in the body of this document, StarTech.com hereby...
-
Page 4: Table Of Contents
Table of Contents Introduction ....................1 Packaging Contents ..........................1 System Requirements ..........................1 Product Diagram ..................2 Front View ..............................2 Rear View ..............................2 LED Indicators............................. 3 Reset Button ..............................3 Installation ....................4 Hardware Installation ..........................4 Software Installation ..........................4 Technical Support ..................16 Warranty Information ................16 Instruction Manual... -
Page 5: Introduction
Introduction Packaging Contents • 1x Wireless USB Print Server • 1x Power Adapter • 1x Software CD • 1x Quick Start Guide System Requirements • Windows® 8 / 8.1 (32/64bit), 7 (32/64), Vista (32/64), XP (32/64), Windows Server® 2012, 2008 R2, 2003 (32/64), Mac OS 10.x, 9.x, Linux 2.4.x / 2.6.x / 3.x (Tested up to 3.5) Instruction Manual... -
Page 6: Product Diagram
Product Diagram Front View WLAN LED WPS Button Reset Button Rear View LED Indicators Ethernet Port DC Jack USB Port Instruction Manual... -
Page 7: Led Indicators
LED Indicators State Indication When power is connected, the Status Status Blinking for POST (Yellow) indicator will flash five times, and then go solid. LAN Port has a valid network connection On (Green) at 100Mbps. LAN Port has a valid network connection WLAN On (Yellow) at 10Mbps. -
Page 8: Installation
6. (Optional) Connect an RJ45 network cable to the print server, then to your network switch or wall jack. Software Installation For full operating instructions and specifications, please visit www.startech.com/ PM1115UW Windows 1. Find the wireless print server by viewing your available wireless networks and connecting to the PM1115UW SSID. - Page 9 PM1115UW Note: If you cannot find the PM1115UW network, then your version of Windows may not be configured to show Ad-Hoc wireless networks. To resolve this issue, you need to use an RJ45 cable to either connect your print server to your network switch or to connect directly to the computer.
- Page 10 Note: The setup CD will install the print server driver, PSAdmin and Setup Wizard into your computer. The default installation directory will be C:\Program files\ Network Print Monitor. 4. Click Next on the following screen and the wizard will automatically discover the print server.
- Page 11 5. From the “Select A Print Sever” screen, select the print server that you want to configure and click Next. Instruction Manual...
- Page 12 6. Click “Yes, I want to change settings”, then click Next to configure the wireless and IP settings of the print server to match your network: Instruction Manual...
- Page 13 Select your desired Communication Type: • Infrastructure (Access Point) • Ad-Hoc (Peer-to-Peer; default) SSID: • If using Ad-Hoc mode, enter the SSID you would like the print server to display • If using Infrastructure mode, enter the SSID of the access point that you want to connect to Note: If you require a site survey to determine the names of available access points, please use the web console method, outlined in the full online manual.
- Page 14 • Channel: optional • Data Transmit Rates: select Auto or others • Transmit Mode: select Auto or others • On the Wireless Security screen, enable or disable WEP/WPA/WPA2 encryption, configure according to your wireless network and click Next. • On the TCP/IP Settings screen, specify a fixed or dynamic IP address for the print server, a fixed IP address is highly recommended.
- Page 15 9. Make sure the Use the following port radio-button is clicked and select LPT1: (recommended Printer Port) from the pull-down list. Then click Next. Instruction Manual...
- Page 16 Select Manufacturer and Printer from the lists of printer drivers. Then click Next. If you already have the printer’s driver installed, you will be asked whether to keep it or to replace it. Click Next. Supply a name for the printer and choose whether you want to make it your default printer.
- Page 17 Click Start -> Printers and Faxes and highlight your newly installed printer. Instruction Manual...
- Page 18 Right-click, select Properties, then the Ports tab and verify that the print server’s port appears. Instruction Manual...
- Page 19 Select the General tab and click Print Test Page to verify the configuration. Note: If you want to install more print servers, start the setup wizard from your Windows Start menu: Start -> All Programs -> Network Print Server -> PSWizard and repeat the installation procedure.
-
Page 20: Technical Support
Limitation of Liability In no event shall the liability of StarTech.com Ltd. and StarTech.com USA LLP (or their officers, directors, employees or agents) for any damages (whether direct or indirect, special, punitive, incidental, consequential, or otherwise), loss of profits, loss of business, or any pecuniary loss, arising out of or related to the use of the product exceed the actual price paid for the product. - Page 21 StarTech.com is an ISO 9001 Registered manufacturer of connectivity and technology parts. StarTech.com was founded in 1985 and has operations in the United States, Canada, the United Kingdom and Taiwan servicing a worldwide market.
Need help?
Do you have a question about the PM1115UW and is the answer not in the manual?
Questions and answers