Advertisement
1
1
1
Shipping Package
The package includes the following items:
PISO/PEX-730 Series Card x1
PISO-730U
PISO-730U-5V
PEX-730
2
2
2
配置圖
SW1
ON
Copyright © 2017 ICP DAS Co., Ltd. All Rights Reserved.
Q
u
Q
u
f
o
r
P
I
S
O
f
o
r
P
I
S
O
Quick Start (This Document) x1
CA-4002 D-Sub Connectorx1
DI
DO
E-mail: service@icpdas.com
i
c
k
S
i
c
k
S
/
P
E
X
-
7
3
/
P
E
X
-
7
3
English/ Feb. 2017 / Version 1.2
1. CON1: Isolated DIO channel 0-15.
2. CON2: 5V/TTL DI channel 0-15.
3. CON3: 5V/TTL DO channel 0-15.
4. SW1: Card ID Setting
5. PCI Bus: for PISO-730U/PISO-730U-5V
PCI Express: forPEX-730
※
For more detailed SW1 information,
please refer to manual Section 2.4 Card ID
Switch Settings.
(CD:\NAPDOS\PCI\PISO-DIO\manual\)
t
a
r
t
t
a
r
t
0
S
e
r
i
e
s
0
S
e
r
i
e
s
Software CD x1
Page: 1
Advertisement
Table of Contents

Related Manuals for ICP DAS USA PISO-730 Series


Summary of Contents for ICP DAS USA PISO-730 Series
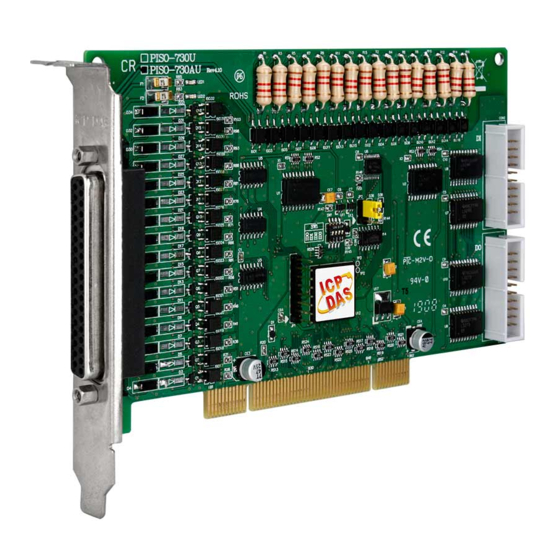
- Page 1 English/ Feb. 2017 / Version 1.2 Shipping Package The package includes the following items: PISO/PEX-730 Series Card x1 Quick Start (This Document) x1 Software CD x1 PISO-730U PISO-730U-5V CA-4002 D-Sub Connectorx1 PEX-730 配置圖 1. CON1: Isolated DIO channel 0-15. 2.
- Page 2 CD: \NAPDOS\PCI\UniDAQ\DLL\Driver http://ftp.icpdas.com/pub/cd/iocard/pci/napdos/pci/unidaq/dll/driver/ The PISO-DIO series classic driver supports Windows 98/NT/2K and 32-bit XP/ 2003/7/8/10. Recommended to install this driver for have been used PISO-730 series boards of regular user, please refer to : http://ftp.icpdas.com/pub/cd/iocard/pci/napdos/pci/piso-dio/manual/quickstart/classi ...
- Page 3 Shut down and power off your computer. Remove the cover from the computer. Select an unused PCI/PCI Express slot. Carefully insert your I/O card into the PCI/PCI Express slot. Replace the PC cover. Power on the computer. ...
- Page 4 E-mail: service@icpdas.com Copyright © 2017 ICP DAS Co., Ltd. All Rights Reserved. Page: 4...
- Page 5 Prepare for device: DN-37 (optional) wiring terminal board Exterior power supply device. For example: DP-665 (optional) CA-3710 (optional) cable and CA-2002 (optional) cable Self-test wiring as follows: Use CA-2002 to connect the CON2 with CON3 on board. ...
- Page 6 PISO-730U-5V External Power +5 V ~ + 12 V Wiring: External Power +5 V connect to EO.COM1 (Pin10) and EO.COM2 (Pin19) External Power +24 V connect to EI.COM1 (Pin9) and EI.COM2 (Pin28) External Power GND connect to IGND (pin29) +24V CON2 CON1...
- Page 7 Confirm that PISO-730 Series card has been successfully installed in the host system. Note that the device numbers start from 0. Click the “TEST” button to start the test. Check the results of the Digital Input/Output functions test.
- Page 8 4. Click the “Digital Input” tab. 5. Select “Port0” from the “Port Number” drop-down menu. 6. The DI indicators will turn black when the corresponding DO channels 0, 2, 4 and 6 are Note: Port0/1 IDI is the reverse logic, so the red light means low status (Logic 0) and the black light means high status (Logic 1).
Need help?
Do you have a question about the PISO-730 Series and is the answer not in the manual?
Questions and answers