Advertisement
Quick Links
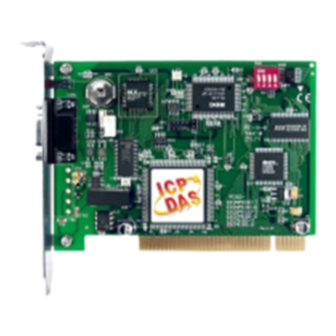
PISO-DNS100 DeviceNet Multi-Slave PCI board
1.
Introduction
This Quick Start User Guide introduces users how to implement the PISO-DNS100 PCI
board to your application quickly. Therefore, it is only provided with the basic instructions. For
more detailed information, please refer to the PISO-DNS100 manual in the ICPDAS CD-ROM.
Also, users can download the manual from the ICPDAS web site:
http://www.icpdas.com/products/Remote_IO/can_bus/piso-dns100.htm
This manual would help you quickly to familiarize yourself with the PISO-DNS100 PCI
board and DeviceNet communication. For more the detail information, please refer to the user's
manual of the PISO-DNS100. Here is the example of the DeviceNet network.
The users should prepare at least one DeviceNet master for demonstrating the I/O data
exchanging. The users can use the PLC with DeviceNet master module to start this demo. There are
some DeviceNet master products provided by ICPDAS, such as PISO-DNM100, PISO-CAN
200/400...etc. Please visit the following web site for more information.
http://www.icpdas.com/products/Remote_IO/can_bus/can_intro.htm#5
PISO-DNS100 Quick Start Manual (Version 1.0, Sep/2008) ------------ 1
Quick Start User Guide
Advertisement

Subscribe to Our Youtube Channel
Related Manuals for ICP DAS USA PISO-DNS100


Summary of Contents for ICP DAS USA PISO-DNS100
- Page 1 Quick Start User Guide Introduction This Quick Start User Guide introduces users how to implement the PISO-DNS100 PCI board to your application quickly. Therefore, it is only provided with the basic instructions. For more detailed information, please refer to the PISO-DNS100 manual in the ICPDAS CD-ROM.
- Page 2 I/O data. To establish slave server mechanism, there are four main steps to be followed. The figure demonstrates the basic process for the DeviceNet communication between masters and slaves. Hardware Setting Terminal Resister Setting Pin assignment (1) 5-pin screw terminal connector PISO-DNS100 Quick Start Manual (Version 1.0, Sep/2008) ------------ 2...
- Page 3 Here shows the users how to connect the master and slave devices by CAN bus. The slave devices should be connected to form the serial type which is shown as follows. The following wire connection is wrong which is shown as follows. PISO-DNS100 Quick Start Manual (Version 1.0, Sep/2008) ------------ 3...
-
Page 4: Indicator Led
Indicator LED Green Event or Status Description There are some problems with the hardware of the PISO-DNS100 board. Please contact your local field agent. There are some slaves which can not be on-line. There exists at least Twinkle one duplicate MAC ID in the DeviceNet network. -
Page 5: Driver Installation
The other data and resource is copied to the following directory: C:\ICPDAS\PISO-DNS100\ You can find the software in the path of /devicenet/slave/piso-dns100 in the Fieldbus_CD or from ftp://ftp.icpdas.com.tw/pub/cd/fieldbus_cd/devicenet/slave/piso-dns100 After installing the software, the related software, demos and manuals are also installed in your PC. - Page 6 After clearing successfully, the Input Length = 1 , Output Length = 1 users should change the baud rate to the Please press “OK” button to add it. original setting. PISO-DNS100 Quick Start Manual (Version 1.0, Sep/2008) ------------ 6...
- Page 7 “Board ID” field. Note that the value of Demo\Project1.exe. After executing the demo, “Board ID” must the same with the previous it would also search the PISO-DNS100 boards selection of the toolkit. in your PC. PISO-DNS100 Quick Start Manual (Version 1.0, Sep/2008) ------------ 7...
- Page 8 PISO-DNS100 Quick Start Manual (Version 1.0, Sep/2008) ------------ 8...
Need help?
Do you have a question about the PISO-DNS100 and is the answer not in the manual?
Questions and answers