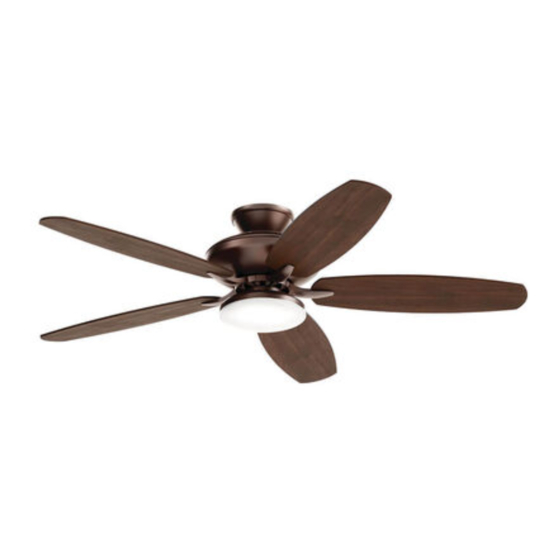
Summary of Contents for Kichler Lighting 52" RENEW DESIGNER
- Page 1 52" RENEW DESIGNER Product images may vary slightly from actual product. INSTRUCTION MANUAL UL Model #330163...
-
Page 2: Table Of Contents
TABLE OF CONTENTS SAFETY RULES FINISHING THE MOTOR INSTALLATION TOOLS AND MATERIALS REQUIRED ATTACHING THE FAN BLADES PACKAGE CONTENTS INSTALLING THE LED LIGHT KIT MOUNTING OPTIONS OPERATING INSTRUCTIONS HANGING THE FAN TROUBLESHOOTING INSTALLATION OF SAFETY SUPPORT ELECTRICAL CONNECTIONS Read all instructions BEFORE assembly and USE of product KEEP INSTRUCTIONS FOR FUTURE USE 52"... -
Page 3: Safety Rules
SAFETY RULES CAUTION -RISK OF SHOCK- 10. To avoid personal injury or damage to the fan and other items, be cautious when working around or cleaning the fan. Disconnect Power at the main circuit breaker panel or main fusebox before starting and during the installation. Do not use water or detergents when cleaning the fan or fan WARNING blades. -
Page 4: Package Contents
TOOLS REQUIRED • Philips screw driver • Blade screw driver • 11mm wrench • Step ladder • Wire cutters PACKAGE CONTENTS Unpack your fan and check the contents. You should have the following items: A. Fan blades (5) K. Package hardware: B. -
Page 5: Mounting Options
MOUNTING OPTIONS If there is not an existing UL (cUL for Canadian Installation) listed mounting box, then read the following instructions. Disconnect the power by removing fuses or turning off circuit breakers. Outlet box Secure the outlet box directly to the building structure. Use appropriate fasteners and building materials. -
Page 6: Hanging The Fan
HANGING THE FAN CUL Listed REMEMBER to turn off the power before you begin. electrical box To properly install your ceiling fan, follow the steps below. NOTE: This ceiling fan is supplied with two types of hanging assemblies; the standard ceiling installation using the downrod with ball and socket mounting and the “close-to-ceiling”... - Page 7 Hanger ball HANGING THE FAN Cross pin Standard Ceiling Installation Step 1. Pass the 120-volt supply wires through the center hole in the Ceiling canopy ceiling hanger bracket as shown in Fig. 5. Decoration ring Step 2. Secure the hanger bracket to the ceiling outlet box with the screws and washers provided with your outlet box.
- Page 8 Screws and Lock HANGING THE FAN washers(3 of 6 places) Canopy Close-to-Ceiling Installation Step 1. Pass the 120-volt supply wires through the center hole in the ceiling hanger bracket as shown in Fig. 8. Decoration ring Step 2. Secure the hanger bracket to the ceiling outlet box with the Gasket screws and washers provided with your outlet box.
-
Page 9: Installation Of Safety Support
INSTALLATION OF SAFETY SUPPORT (Required for Canadian installation ONLY) A safety support cable is provided to help prevent the ceiling fan from falling, please install it as follows. Hanger bracket Step 1. Attach the provided wood screw and washers to the ceiling joist next to the mounting bracket but do not tighten. - Page 10 ELECTRIC CONNECTIONS Step 2. Motor to Receiver Electrical Connections: (Fig. 14) Connect the black wire from the fan to the black wire marked “TO MOTOR L” on the Outlet box receiver. Connect the white wire from the fan to the white wire marked in the ceiling “TO MOTOR N”...
-
Page 11: Finishing The Motor Installation
Ceiling mounting Screws & Washers FINISHING THE MOTOR INSTALLATION bracket Standard Ceiling Installation Decoration ring Step 1. Tuck all the connections neatly into the ceiling outlet box. Canopy Step 2. Slide the canopy up to ceiling and attach the canopy to the ceiling mounting bracket using 4 screws at the top edge of the mounting bracket. -
Page 12: Attaching The Fan Blades
Screw Washer ATTACHING THE FAN BLADES Blade arm Blade CAUTION: Remove the rubber shipping blocks attached to the face of the motor. These blocks keep the motor from shifting during shipping and MUST be removed during installation. Step 1. Attach the blade to the blade bracket using the screws and Fan motor washers as shown in Figure 15. - Page 13 INSTALLING THE GLASS SHADE Step 1. Raise the glass shade against the light kit and turn clockwise until snug, DO NOT OVERTIGHTEN. (Fig. 17) Light kit Glass shade Fig. 17 | KICHLER.COM...
-
Page 14: Operating Instructions
OPERATING INSTRUCTIONS Turn the power on and check the operation of your ceiling fan. The pull chain controls the fan speed as follows: Step 1. 3-speed pull chain controls the fan speed as follows: 1 pull = High, 2 pulls = Medium, 3 pulls = Low, and 4 pulls = off. NOTE: To set the fan blades in reverse, the reverse slide switch is located on the side of the switch housing. -
Page 15: Troubleshooting
TROUBLESHOOTING Problem Solution Fan will not start. Check circuit fuses or breakers. Check all electrical connections to ensure proper contact. CAUTION: Make sure the main power is OFF when checking any electrical connection. Fan sounds noisy. Make sure all motor housing screws are snug. Make sure the screws that attach the fan blade brackets to the motor are tight. - Page 16 FCC Warnning: This equipment has been tested and found to comply with the limits for a Class B digital device, Pursuant to part 15 of the FCC Rules. These limits are designed to provide reasonable protection against harmful interference in a residential installation. This equipment generates, uses and can radiate radio frequency energy and, if not installed and used in accordance with the instructions, may cause harmful interference to radio communications.
- Page 17 www.kichler.com KICHLER LIGHTING ® 7711 EAST PLEASANT VALLEY ROAD CLEVELAND, OHIO 44131-8010 CUSTOMER SERVICE 866.558.5706 8:00 AM TO 5:00 PM EST, MONDAY - FRIDAY 52" Renew Designer |...


Need help?
Do you have a question about the 52" RENEW DESIGNER and is the answer not in the manual?
Questions and answers