Linak DESKLINE DL5 User Manual
With cbd6s
Hide thumbs
Also See for DESKLINE DL5:
- User manual (36 pages) ,
- User manual (23 pages) ,
- User manual (24 pages)
Table of Contents
Advertisement
Quick Links
Advertisement
Table of Contents

Related Manuals for Linak DESKLINE DL5


Summary of Contents for Linak DESKLINE DL5
- Page 1 DL5/DL6 with CBD6S User manual LINAK.COM/DESKLINE Page 1 of 32...
-
Page 2: Table Of Contents
Initialisation of the DESKLINE DL5/DL6 parallel systems ............19 ® Anti-Collision ..........................20 PIEZO description (optional) ....................21 Accessories ............................. 22 Disposal of LINAK products ......................23 Labels ............................24 Drawing appendix .......................... 25 Addresses ............................32 Page 2 of 32... -
Page 3: Preface
This User Manual does not address the end-user. It is intended as a source of information for the manufacturer of the equipment or system only, and it will tell you how to install, use and maintain your LINAK electronics. It is the responsibility of the manufacturer of the end-user product to provide a User Manual where relevant safety information from this manual is passed on to the end-user. -
Page 4: Valid For
Valid for: This User Manual is valid for the following products: (See the first 3 - 5 characters on the label) Columns: 1 single DL5 standard / DL5 PLUS / DL6 standard / DL6 PLUS or 2 in parallel Control boxes: CBD6S 200 W, CBD6S 300 W Controls: DPF1M/DPG1M/DPG1B (if memory function is required) -
Page 5: Important Information
Important information Important information on LINAK products can be found under the following ® headings: Warning! Failure to comply with these instructions may result in accidents involving serious personal injury. Failing to follow these instructions can result in the product being damaged or being destroyed. -
Page 6: Before Installation, Reinstallation Or Troubleshooting
• System connection. The individual parts must be connected before connecting the control box to the mains. See the User Manual for LINAK actuators, if necessary. During operation • If the control box makes unusual noise or smells, switch off the mains voltage immediately. -
Page 7: Only For Eu Markets
Only for EU markets This appliance can be used by children aged from aged 8 years and above and persons with reduced physical, sensory or mental capabilities or lack of experience and knowledge if they have been given supervision or instruction concerning use of the appliance in a safe way and understand the hazards involved. -
Page 8: Repairs
Products under warranty must also be returned to authorised LINAK service centres. Further information on DESKLINE warranty can be found on the LINAK website www.linak.com/warranty. Warning! If any of the DESKLINE products are opened, there will be a risk of subsequent malfunction. -
Page 9: Declaration Of Confirmity
DECLARATION OF CONFORMITY LINAK A/S Smedevænget 8 DK - 6430 Nordborg hereby declares that LINAK Actuator System composed of: Control Box(s) CBD6SP00020A-009 CBD6S*000*0A-709 (The ‘*’ in the product description can either be a character or a number, thereby defining the variation of the product) -
Page 10: Misc. On The Deskline ® Dl5/Dl6 System
Do not bolt the legs to the floor so that free movement is prevented. This could cause serious damage to the legs in fault situations. Warranty This DESKLINE product is subject to warranty pursuant to the terms of LINAK DESKLINE Warranty Paper, available on the LINAK website www.linak.com/warranty. Maintenance Clean dust and dirt on the outside of the system at appropriate intervals and inspect them for damage and breaks. -
Page 11: Etl-Markering
ETL-marking Due to space limitations, the complete ETL-marking demands are not represented on the marking plates. The full ETL Recognized Component markings are shown here. C/N 120690 Conforms to UL962 Cert. to CSA Std. C22.2 No. 68-09 ETL Recognized Component mark for Canada and United States C/N 9901916 Conforms to UL962... -
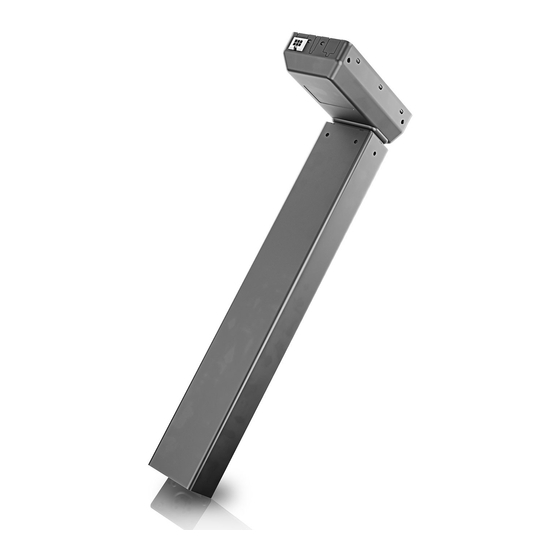
Page 12: Description Of The Deskline ® Dl5/Dl6 System
Description of the DESKLINE DL5/DL6 system ® Each DESKLINE DL5/DL6 lifting units is equipped with a motor and parallel/memory drive is ensured by means of software in ® the CBD6S (SMPS) that also takes account of oblique load on the desk. Soft start and stop are also part of this software, which ensures a soft start and stop when adjusting the desk. -
Page 13: Installation
Installation Mounting guidelines for the DESKLINE DL5/DL6 system The motor housing is supplied with six M6 threaded holes for mounting on the top frame. 1. Mount motor housing on top frame using six M6 screws with the following specifications: Quality: Min. grade 8.8 Length: Max. -
Page 14: Mounting Of The Foot Part
Mounting of the foot part The DL5/DL6 is supplied with four threaded holes M6 for mounting of the foot. The DL5 PLUS™/DL6 PLUS™ is supplied with four M6 and two M8 threaded holes. 1. Mount column bottom on desk feet using four M6 or two M8 screws with the following specifications: Quality: Min. -
Page 15: Mounting Crossbar
Mounting crossbar We have experienced a few cases where customers have designed a desk with a crossbar with a hidden column bracket, where the bracket has been pulled out when tightening the crossbar. To eliminate this failure, please follow the guidelines below when constructing a desk. -
Page 16: Mounting The Tabletop
Mounting the tabletop The sound from the lifting column spreads as vibrations to the tabletop which amplifies the sound. This can, however, be reduced. 1. Place vibration/shock-absorbing material between tabletop and top frame. Assembled desk Desks with crossbar To avoid damage of the lifting unit there must be at least 1 mm space between the ends of the two M8 screws for the mounting bracket and the lifting unit surface. -
Page 17: Mounting Guidelines Cbd6S (Smps)
Mounting guidelines CBD6S (SMPS) The control box is to be fastened with 2 screws with a head diameter between ø 8 and ø 10 mm. With regard to the tension surface ø 10 mm is preferable due to a lower surface tension. See drawing appendix for placing of mounting holes and the space the CBD takes up. -
Page 18: Electric Connection Of The Dl5/Dl6 System
Electric connection of the DL5/DL6 system The DESKLINE DL5/DL6 system is to be connected as shown on figure 4. Each DL5/DL6 is to be connected to the sockets on ® the control box by means of the motor cables, which have a 6-pin plug in each end. Finally, the mains cable is to be mounted and power switched on. -
Page 19: Initialisation Of The Deskline ® Dl5/Dl6 Parallel Systems
Initialisation of the DESKLINE DL5/DL6 parallel systems ® The DESKLINE system is intialised by pressing the down button once or twice and holding it down until DL5/DL6 runs into end stop, it will then automatically run approx. 3 mm out again and hereafter slowly run in again. Only release the down button when the movement has stopped completely. -
Page 20: Anti-Collision
Anti-Collision The function (Anti-Collision) is an option for the standard CBD6S (SMPS) control box. A system with Anti-Collision can limit material damages on a desk if a collision with a solid object should occur. Enabling the anti-collision To enable the Anti-Collision function a little plug called a dongle must be mounted in one of the 2 control ports. The function is only active when the dongle is mounted. -
Page 21: Piezo Tm Description (Optional)
PIEZO™ description (optional) For optimised safety against squeezing and blocking on a desk, LINAK has developed DL6 columns with an integrated sensor, called PIEZO. The option minimises the risk of damage to a desk caused by squeezing or blocking of obstacles in up and down direction. -
Page 22: Accessories
Please contact your nearest LINAK contract, distributor or subsidiary. Warning! By unauthorised opening of the system there is a risk that it may malfunction at a later date. Spare parts Please contact your nearest LINAK contact for information on spare parts. Page 22 of 32... -
Page 23: Disposal Of Linak Products
Disposal of LINAK product As LINAK customers often ask us how our products can be disposed or scrapped we have prepared this guide that enables a classification to different waste fractions for recycling or combustion. Guide We recommend our products to be disassembled as much as possible and divided into different waste groups for recycling or combustion. -
Page 24: Labels
4 channels LINAK APPLICATION POLICY The purpose of the application policy is to define areas of responsibilities in relation to applying a LINAK product defined as hardware, software, technical advice, etc. related to an existing or a new customer application. -
Page 25: Drawing Appendix
DRAWING APPENDIX Version Combination code B (Built-in length) S (Stroke length) O (Outer profile length) [mm] [mm] [mm] DL5xxxxxx645500 DL5 built-in length, stroke length, and outer profile length (mm) DL5 motor housing and profile dimensions (mm) Page 25 of 32... - Page 26 DL5 Bracket options Combination code Std bracket Bench left Bench right DL5xx1xxxxxxxxx DL5xxLxxxxxxxxx DL5xxRxxxxxxxxx Bracket options (dimensions in mm) Page 26 of 32...
- Page 27 Version Combination code B (Built-in length) S (Stroke length) O (Outer profile length) [mm] [mm] [mm] DL6xxxxxx650560 BIFMA DL6xxxxxx665518 DL6 built-in length, stroke length and outer profile length (mm) DL6 motor housing and profile dimensions (mm) Page 27 of 32...
- Page 28 DL6 Bracket options Combination code Std bracket Bench left Bench right DL6xx1xxxxxxxxx DL6xxLxxxxxxxxx DL6xxRxxxxxxxxx Bracket options (dimensions in mm) Page 28 of 32...
- Page 29 Socket Standard Combination code Type DL5xxxxx0xxxxxx Standard DL6xxxxx0xxxxxx Standard DL6xxxxxExxxxxx Standard Socket combination Profile designs Standard PLUS Page 29 of 32...
- Page 30 Standard bracket Bench bracket Page 30 of 32...
- Page 31 CBD6S 200W (SMPS) CBD6S 300W (SMPS) up to 4 channels Page 31 of 32...
-
Page 32: Addresses
® without prior notice. LINAK cannot guarantee product availability and reserves the right to discontinue the sale of any product. The user is responsible for determining the suitability of LINAK products for a specific application. All sales are subject to the ‘Standard Terms of Sale and Delivery’, available on LINAK websites.
Need help?
Do you have a question about the DESKLINE DL5 and is the answer not in the manual?
Questions and answers