Table of Contents
Advertisement
Available languages
Available languages
Advertisement
Chapters
Table of Contents

Subscribe to Our Youtube Channel
Related Manuals for APA 16617


Summary of Contents for APA 16617
- Page 1 DE GB FR NL IT DE Mikroprozessor Batterie-Ladegerät 6 / 12 V 4 A Art.-Nr. 16617 Inkl. Zubehör EAL GmbH +49 (0)202 42 92 83 0 info@eal-vertrieb.com Otto-Hausmann-Ring 107 42115 Wuppertal, Deutschland www.eal-vertrieb.com +49 (0) 202 42 92 83 – 160...
-
Page 2: Table Of Contents
Inhalt 1. Bestimmungsgemäßer Gebrauch ______________________________________________ 2 2. Lieferumfang __________________________________________________________ 3 3. Spezifikationen _________________________________________________________ 3 4. Symbolerklärung ________________________________________________________ 3 5. Sicherheitshinweise ______________________________________________________ 3 6. Bedienungsanleitung _____________________________________________________ 4 6.1 Übersicht ___________________________________________________________ 4 6.2 Verwendung der Adapter-Ladekabel ___________________________________________ 5 6.3 Vorbereitung _________________________________________________________ 5 6.4 Anschließen des Batterieladegerätes ___________________________________________ 5 6.4.1 Anschluss des Adapterkabels mit den Polzangen ___________________________________ 5 6.4.2 Anschluss des Adapter-Ladekabels mit den Ringösen ________________________________ 5... -
Page 3: Lieferumfang
2. Lieferumfang • 1x Ladegerät • 1x Gebrauchsanleitung • 1 x Adapter-Ladekabel mit Polzangen • 1 x Adapter-Ladekabel mit Ringösen 3. Spezifikationen Abmessungen: 180 x 80 x 45 [mm] Gewicht: 0,465 kg Länge Netzkabel: 1,50 m Länge Ladekabel: 1,00 m + 0,50 m Adapter-Ladekabel Eingang: 220-240 V AC 50/60 Hz Ausgang:... -
Page 4: Bedienungsanleitung
• Ziehen Sie den Netzstecker, wenn das Gerät nicht benutzt wird. • Halten Sie das Verpackungsmaterial, besonders Folien und Folienbeutel, von Kindern fern. Es besteht Erstickungsgefahr. • Entfernen Sie vor der Inbetriebnahme alle Schutzfolien vom Gerät. • Verlegen Sie das Netzkabel so, dass es Sie nicht behindert und niemand versehentlich daran ziehen kann. •... -
Page 5: Verwendung Der Adapter-Ladekabel
6.2 Verwendung der Adapter-Ladekabel Das Adapter-Ladekabel mit Polzangen (Position F in der Übersicht) verwenden Sie, wenn Sie das Ladegerät klassisch an die Batteriepole anschließen. Das Adapter-Ladekabel mit den Ringösen (Position E in der Übersicht) ist dafür vorgesehen, fest an einer schwer zugänglichen Batterie angeschlossen zu bleiben. Das Ladegerät kann dann bequem mit dem Adapter angeschlossen werden. -
Page 6: Auswahl Des Ladeprogramms
6.5.1 Auswahl des Ladeprogramms Wählen Sie nun durch (mehrmaliges) Drücken der MODE-Taste das für Sie passende Ladeprogramm. Die Ladeprogramme können in folgender Reihenfolge durch Drücken der MODE-Taste ausgewählt werden: Motorrad 6 V Motorrad 6 V Winter Motorrad 12 V Motorrad 12 V Winter Auto 12 V Auto 12 V Winter Abhängig vom Ladezustand der Batterie passt das Gerät den Ladestrom an, um die angeschlossene Batterie... -
Page 7: Entfernen Des Ladegeräts
Fehlermeldungen Fehleranzeige nach Falschanschluss (Verpolung), Kurzschluss, Auswahl eines falschen Ladeprogramms oder Überhitzung. Fehlermeldung im 6 V – Modus, wenn eine Batterie mit weniger als 5,5 V ± 0,2 angeschlossen wird oder wenn nach 4 h Ladezeit die Spannung immer noch unter 6 V liegt. In diesem Fall ist die Batterie defekt und muss ersetzt werden. -
Page 8: Proper Use Of The Product
GB Microprocessor battery charger, 6V/12V, 4A Article No. 16617 Contents 1. Proper use of the product __________________________________________________ 8 2. Scope of delivery _______________________________________________________ 9 3. Specifications _________________________________________________________ 9 4. Explanation of symbols ___________________________________________________ 9 5. Safety notes _________________________________________________________ 9 6. Operating instructions ___________________________________________________ 10 6.1 Overview___________________________________________________________ 10... -
Page 9: Scope Of Delivery
2. Scope of delivery • 1x Charger • 1 x Operating instructions • 1 x Adapter charging cable with pole callipers • 1 x Adapter charging cable with eyes 3. Specifications Dimensions: 180 x 80 x 45 [mm] Weight: 0.465 kg Long mains cable: 1.50 m Length of charging cable:... -
Page 10: Operating Instructions
Element 1.pdf 25.01.19 10:55 • Always wear suitable working clothes, protective gloves and goggles. Battery acid is corrosive! Immediately and thoroughly wash off any splashed acid and consult a doctor if necessary. If battery acid gets into the eyes, immediately rinse under running water for at least 10 minutes and consult a doctor. •... -
Page 11: Preparation
6.3 Preparation Clean the battery poles to remove dust and corrosion residue. Only for open batteries: Remove the plugs of the battery cells. Check the liquid level in the cells, consult the operating instructions of your battery for more information. Replenish only sufficient distilled water to ensure that the minimum filling level is achieved. -
Page 12: Selecting The Charging Programme
6.5.1 Selecting the charging programme By pressing the MODE button (multiple times), you can select the appropriate charging programme for your needs. The charging programmes appear in the following order and may be selected by pressing the MODE button: Motorbike 6 V Motorbike 6 V winter Motorbike 12 V Motorbike 12 V winter... -
Page 13: Removing The Charger
Error messages Display of error after faulty connection (wrong poles), short-circuit, selection of an incorrect charging programme or overheating. Error message in 6 V – mode, if a battery is connected with less than 5.5 V ± 0.2 or the voltage is still lower than 6 V after 5 hours of charging time. -
Page 14: Element 1.Pdf
FR Microprocesseur d‘appareil de recharge de batterie, 6V/12V, 4A N° d‘art. 16617 Sommaire 1. Domaine d‘application ___________________________________________________ 14 2. Contenu de la fourniture __________________________________________________ 15 3. Spécifications _________________________________________________________ 15 4. Explication des symboles __________________________________________________ 15 5. Consignes de sécurité ____________________________________________________ 15 6. -
Page 15: Contenu De La Fourniture
Cet appareil n‘est pas destiné à être utilisé par des enfants ou des personnes physiquement, sensoriellement ou mentalement lésées ou ne disposant pas de l‘expérience ou des connaissances nécessaires. Les enfants doivent rester à distance de cet appareil.Cet appareil n‘est pas destiné à une utilisation industrielle/commerciale.Toute autre utilisation ou modification de l‘appareil est considérée comme non conforme et dangereuse. -
Page 16: Mode D'emploi
Element 1.pdf 25.01.19 10:55 • Ne mettez par l‘appareil en marche ou retirez immédiatement la fiche de contact s‘il est endommagé ou si vous suspectez un défaut. Dans ces cas, veuillez contacter nos techniciens. • Retirez la fiche de contact lorsque l‘appareil n‘est pas utilisé. •... -
Page 17: Utilisation Des Câbles Adaptateurs De Chargement
1. Affichage de la tension de la batterie 2. Programme pour batterie de 6 V 3. Programme de chargement d‘hiver 4. Programme pour batterie de 12 V 5. Programme de chargement voiture 6. Programme de chargement moto 7. Affichage de l‘état de chargement de la batterie Fig. -
Page 18: Chargement De La Batterie
6.5 Chargement de la batterie Branchez le câble adaptateur de chargement sur le câble de chargement (position D dans la vue d‘ensemble) du chargeur de batterie. Branchez maintenant le câble secteur (position A dans la vue d‘ensemble) du chargeur de batterie dans la prise secteur. -
Page 19: Débranchement Du Chargeur De Batteri
Mode moto Programme de chargement pour batteries 12 V de 1,2 Ah jusqu‘à 14 Ah, températures supérieures à 0°C Courant de charge : 2 A maximum Tension de charge : 14,3 V Mode moto hiver Programme de chargement pour batteries 12 V de 1,2 Ah jusqu‘à 14 Ah, températures inférieures à... -
Page 20: Entretien Et Nettoyage
7. Entretien et nettoyage 7.1 Maintenance À condition d‘être utilisé conformément aux spéci cités pour lesquelles il a été conçu, le câble adaptateur n‘exige pas d‘entretien. 7.2 Entretien Nettoyez le corps du connecteur mâle et le câble à l‘aide d‘un chi on doux et sec. N‘utilisez pas de nettoyants agressifs ou contenant des solvants. -
Page 21: Reglementair Gebruik
NL Microprocessor-acculader, 6V/12V, 4A Art.nr. 16617 Inhoud 1. Reglementair gebruik ____________________________________________________ 21 2. Leveringsomvang ______________________________________________________ 22 3. Specificaties _________________________________________________________ 22 4. Uitleg bij de symbolen ___________________________________________________ 22 5. Veiligheidsinstructies ____________________________________________________ 22 6. Gebruiksaanwijzing _____________________________________________________ 23 6.1 Overzicht ___________________________________________________________ 24 6.2 Gebruik van de adapter-laadkabel ____________________________________________ 24 6.3 Voorbereiding ________________________________________________________ 24... -
Page 22: Leveringsomvang
Dit apparaat mag niet worden gebruikt door kinderen, personen met beperkte geestelijke vaardigheden of zonder ervaring en/of gebrek aan kennis. Daarvoor is de oplader niet ontworpen. Kinderen moeten uit de buurt van het apparaat worden gehouden. Het apparaat is niet bedoeld voor bedrijfsmatig gebruik. Ieder ander gebruik of veranderingen aan het apparaat gelden als oneigenlijk en kan gevaarlijk zijn. -
Page 23: Gebruiksaanwijzing
• De waarschuwingsdriehoek geldt als aanduiding van alle voor de veiligheid belangrijke aanwij- zingen. Neem deze te allen tijde in acht, anders kan lichamelijk letsel of schade aan het apparaat worden veroorzaakt. • Rook niet en ontsteek geen open vuur als u aan de accu werkt. Er bestaat dan explosiegevaar. •... -
Page 24: Overzicht
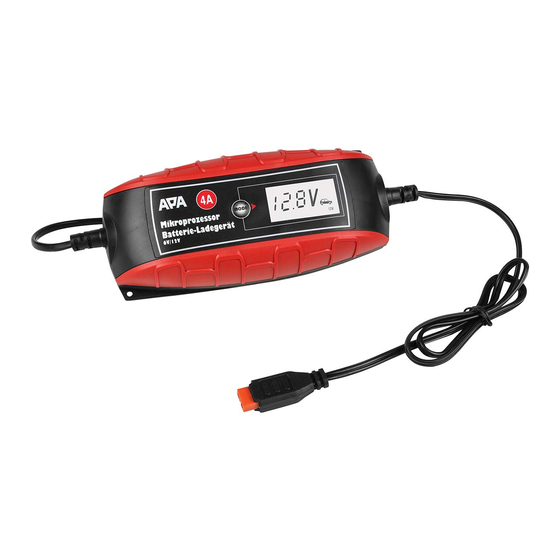
6.1 Overzicht A Netsnoer B MODE-toets C Display D Laadkabel E Adapter-laadkabel met ringogen F Adapter-laadkabel met pooltangen Afbeelding 1: overzicht 1. Accuspanningsindicatie 2. 6 V-oplaadprogramma 3. Oplaadprogramma voor de winter 4. 12 V-oplaadprogramma 5. Oplaadprogramma voor de auto 6. Oplaadprogramma voor de motorfiets 7. -
Page 25: De Adapter-Laadkabel Met De Ringogen Aansluiten
6.4.2 De adapter-laadkabel met de ringogen aansluiten Let op: Zorg ervoor dat de oplader niet is aangesloten op het stopcontact en dat de adapter-laadkabel niet is aangesloten op de acculader. Bevestig het ringoog van de rode pluskabel op de plusaansluiting van de accu van uw voertuig, bijvoorbeeld de schroef van de poolklem. - Page 26 Mogelijke laadprogramma‘s 6 volt-modus Oplaadprogramma voor 6 V-accu‘s, 1,2 Ah tot 14 Ah, temperaturen boven 0°C Laadstroom: 2 A maximaal Laadspanning: 7,2 V 6 volt-wintermodus Oplaadprogramma voor 6 V-accu‘s, 1,2 Ah tot 14 Ah, temperaturen onder 0°C Laadstroom: 2 A maximaal Laadspanning: 7,4 V Motorfietsmodus...
-
Page 27: De Oplader Verwijderen
6.6 De oplader verwijderen Let op: Trek eerst de stekker uit het stopcontact en neem de volgorde bij het losmaken van de klemmen in acht. Zo voorkomt u vonkvorming. Omdat tijdens het opladen uiterst explosief knalgas ontstaat, is dit zeer belangrijk voor uw veiligheid. Trek de stekker van de oplader uit het stopcontact. -
Page 28: Indice 1. Uso Conforme
IT Caricabatterie con microprocessore, 6V/12V, 4A Cod. art. 16617 Indice 1. Uso conforme _________________________________________________________ 28 2. Volume di consegna _____________________________________________________ 29 3. Specifiche ___________________________________________________________ 29 4. Explication des symboles __________________________________________________ 29 5. Avvertenze di sicurezza ___________________________________________________ 29 6. Istruzioni per l‘uso ______________________________________________________ 30 6.1 Panoramica _________________________________________________________ 30... -
Page 29: Volume Di Consegna
Questo dispositivo non è destinato all‘uso da parte di bambini e persone con capacità mentali limitate o senza esperienza e/o con conoscenze insufficienti. Tenere il dispositivo lontano dalla portata dei bambini. Questo dispositivo non è destinato all‘impiego industriale. Qualsiasi altro impiego o cambiamento del dispositivo si considera non conforme e può essere pericoloso. EAL GmbH non si assume nessuna responsabilità... -
Page 30: Istruzioni Per L'uso
• Non azionare il dispositivo o staccare subito la spina di alimentazione in caso di danni o se si sospetta un guasto. In questi casi rivolgersi ai tecnici specializzati. • Staccare la spina di alimentazione se non si utilizza il dispositivo. •... -
Page 31: Uso Del Cavo Di Carica Per Adattatore
1. Indicazione tensione batteria 2. Programma di ricarica 6 V 3. Programma di ricarica invernale 4. Programma di ricarica 12 V 5. Programma di ricarica automobile 6. Programma di ricarica motocicletta 7. Spia di controllo stato di carica batteria Figura 2: Display 6.2 Uso del cavo di carica per adattatore Il cavo di carica per adattatore con morsetti (pos. -
Page 32: Carica Della Batteria
6.5 Carica della batteria Collegare il cavo di carica per adattatore con il cavo di carica (pos. D dello schema) del caricabatteria. Ora collegare alla presa il cavo di alimentazione (pos. A dello schema) del caricabatterie. Lo sfondo del display s‘illumina. Se si collega la batteria con i poli invertiti o il caricabatterie non fa contatto, sul display si attiva il messaggio di errore „Er1“. -
Page 33: Scollegamento Del Caricabatteria
Modalità automobile Programma di ricarica per batterie a 12 V, da 14 Ah a 120 Ah, temperature superiori a 0°C Corrente di carica: 4 A massimo Tensione di ricarica: 14,3 V Modalità automobile inverno Programma di ricarica per batterie a 12V, da 14 Ah a 120 Ah, temperature inferiori a 0°C Corrente di carica: 4 A massimo Tensione di ricarica:... -
Page 34: Avvertenze Sulla Tutela Ambientale
8. Avvertenze sulla tutela ambientale L‘imballaggio è realizzato con materiali ecologici, che possono essere smaltiti presso i centri di riciclaggio locali. Non gettare il dispositivo nei rifiuti domestici! I dispositivi elettrici ed elettronici devono essere sepa- rati e destinati al riciclaggio. Per le possibilità di smaltimento delle apparecchiature elettriche, informarsi presso il proprio comune. - Page 36 EAL GmbH Otto-Hausmann-Ring 107 +49 (0)202 42 92 83 0 info@eal-vertrieb.com www.eal-vertrieb.com +49 (0) 202 42 92 83 – 160 42115 Wuppertal, Deutschland © EAL GmbH, 16617, 02. 2019...
Need help?
Do you have a question about the 16617 and is the answer not in the manual?
Questions and answers