Table of Contents
Advertisement
Quick Links
Advertisement
Table of Contents

Related Manuals for Freedom9 freeStor 4P


Summary of Contents for Freedom9 freeStor 4P
- Page 1 KVM-04P 4-Port Keyboard, Video, and Mouse Switch USER’S MANUAL...
- Page 2 Product that are not covered or permitted in the manual for the Product; damages that occur dur- ing shipment, or damages due to power failures or acts of God; cosmetic damage to the Product; the Product if the Product, in freedom9’s sole judgment, has been subjected to abuse, accident, modification, tampering, negligence, faulty installation, lack of reasonable care, repair or service, or misuse or use otherwise than as contemplated in the manual for the Product;...
-
Page 3: Table Of Contents
Table of Contents Chapter 1 Chapter 2 Chapter 3 Chapter 4 Chapter 5 Chapter 6 Introduction ......1 Product features . -
Page 4: Chapter 1: Introduction
Chapter 1: Introduction Thank you for purchasing the KVM-04P Switch. This product will ensure easy and accurate con- trol over 4 computers through a single console. The KVM-04P is compatible with mouse and keyboard with PS/2 type connectors. Older style keyboards or mice can be used with PS/2 adapters if it is PS/2 compatible. -
Page 5: Chapter 2: Hardware Installation
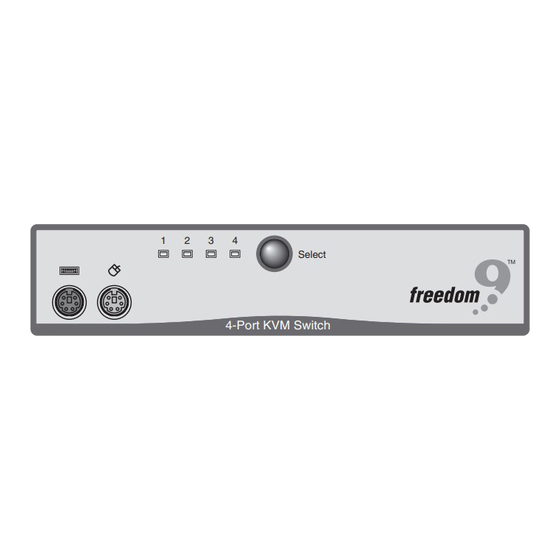
Chapter 2: Hardware installation This section explains how to connect the console and the computers to the KVM-04P switch unit. First, the layout of the front and rear panel will be shown. Front panel layout Console Console PS/2 Keyboard PS/2 Mouse... - Page 6 Step 1 Place the KVM-04P in a convenient location. Its small size makes it easy to place on the desk- top. Do take the length of the cables in consideration when placing the KVM switch unit. Step 2 We will now connect the console devices. Connect your monitor to the KVM-04P. The 15-pin con- nector coming from your monitor must be inserted into the unit on the rear panel.
- Page 7 Chapter 2: Hardware installation Step 4 Now the computer connections will be made with the monitor (VGA) connections. Connect a VGA cable (15-pin HDDB Male / Male) with the Male side to both the computer and to the con- nector labeled VGA on the rear panel of the KVM-04P unit. Repeat this for all computers. Step 5 Now connect the PS/2 mouse cables from your computers to the KVM-04P unit.
-
Page 8: Using The Kvm-04P
Step 8 Attach the power supply to the KVM-04P unit and plug it into a power outlet. You will see the LED for Port 1 light up, and you will hear a beep. Switch on your monitor. Step 9 Now power up all computers simultaneously. The first computer that is connected to port PC1 will be shown on the monitor. -
Page 9: Chapter 3 Using The Kvm-04P
“Select” button on the unit, or make use of the keyboard “Hot key” commands. You may notice that the mouse cannot be used for around 2 seconds when the KVM-04P switch- es to another computer. This is normal and is caused by synchronization. -
Page 10: Optional Cable
Chapter 3: Using the KVM-04P In Auto-Scan mode, the KVM-04P unit will switch to the next computer every 10 seconds. This means that all computers will be shown on the monitor in a row, starting with the first computer after the last one has been shown. -
Page 11: Chapter 4: Troubleshooting
Its rating must be 9V 600mA. • When operating the KVM Switch and you find that the mouse was hung, but the keyboard was working properly, you can press " Scroll Lock + Scroll Lock + M" to wake up... -
Page 12: Video
When operating the KVM Switch and you find that the mouse was hung. What can be the cause? • You can press "Scroll Lock + Scroll Lock +P" to connect it with the KVM Switch, and then you can use the Console keyboard and mouse to control the Notebook. -
Page 13: Chapter 5: Specifications
Chapter 5: Specifications Physical Properties: KVM-04P Width: 185mm (7.28 inches) Height: 46mm (1.81 inches) Depth: 105mm (4.13 inches) Weight: 1500g (3.31 lbs) Operation and Storage parameters: Operating Temperature: 0 to 40 Degrees C Storage Temperature: Humidity: Computer port connections Keyboard: Mouse: Monitor: Console connections... -
Page 14: Chapter 6: Certifications
Chapter 6: Certifications FCC Warning This equipment has been tested and found to comply with the limits for a Class B digital device, pursuant to part 15 of the FCC Rules. These limits are designed to provide reasonable protection against harmful interference in a residential installation. This equipment generates, uses and can radiate radio frequency energy and, if not installed and used in accordance with the instructions, may cause harmful interference to radio communications. - Page 16 © 2005 freedom9 Inc.
Need help?
Do you have a question about the freeStor 4P and is the answer not in the manual?
Questions and answers