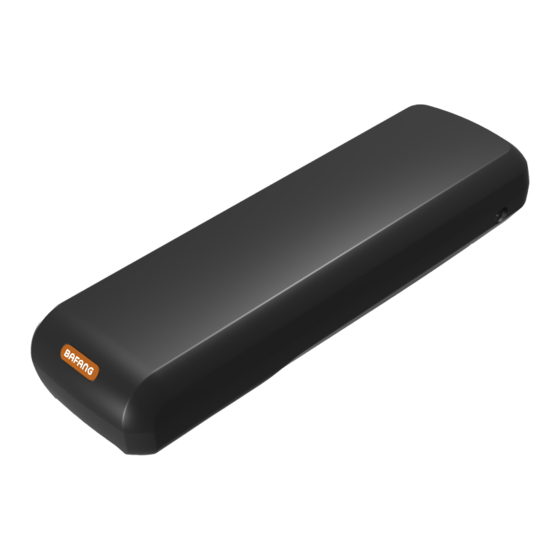
BAFANG BT C01.340.UART Customer's Manual

BAFANG BT C01.340.UART Customer's Manual

E-bike system
Hide thumbs Also See for BT C01.340.UART:

Advertisement

CUSTOMER MANUAL
E-bike system
Original instruction manual
Read carefully before use. Keep for later reference.
BF-CM-S-R02-EN-PRINT A/0,December 2017

Advertisement

Table of Contents
loading

Summary of Contents for BAFANG BT C01.340.UART

  • Page 1 CUSTOMER MANUAL E-bike system Original instruction manual Read carefully before use. Keep for later reference. BF-CM-S-R02-EN-PRINT A/0,December 2017...
  • Page 2: Table Of Contents

    CONTENT CONTENT 1 Important Notice 6.4 Items to be shown on the Display 2 Introduction 6.5 Usual operation 2.1 Overview 6.5.1 Power ON / OFF 3 Safety Instructions 6.5.2 Push-assistance 6.5.3 Light ON / OFF button 3.1 General information 3.2 For your safety 6.5.4 PAS level selection 6.5.5 Clearing your Trip Distance 3.3 Installation and Maintenance...
  • Page 3: Important Notice

    1 IMPORTANT NOTICE Important bolted connection! Please adhere This operating manual contains various points to the exact recommended torque when and pointers, providing important information tightening this connection. The correct about your new pedelec and how to use it, mounting torque is either displayed on the referring to possible damage to property and the component or listed in the “Bolted connections”...
  • Page 4: Introduction

    INTROdUCTION 2 INTRODUCTION This part of the operating instructions gives 2.1 Overview you specific information on how to handle the electrical drive unit components and how to drive a Pedelec. For general information, e. g. for pedelec technology, please refer to the enclosed instructions.
  • Page 5: Safety Instructions

    • It is recommended that you only use genu- pedelec before riding it. If the pedelec starts ine BAFANG parts. off suddenly, accidents may occur. • The pedelec may suddenly fall over and • Make sure the pedelec's lights are on before serious injury may occur if nuts and bolts are riding at night.
  • Page 6: Installation And Maintenance

    SAFETY INSTRUCTIONS 3.3 Installation and instructions concerning use of the product by a person responsible for their safety. Maintenance • do not allow children to play near the product. It is vital that all bolted connections on the • Should you encounter any errors or prob- pedelec have the correct torque in order to lems, consult your nearest dealer.
  • Page 7: Quick Start

    • Natural wear and tear due to normal use Please also consult the additional operating manuals, issued by the individual component and aging is not within our scope of our manufacturers and which were supplied with quality warranty. your pedelec or are available online. Your •...
  • Page 8: Legal Regulations

    SAFETY INSTRUCTIONS Before every ride, please check that: 3.8 Legal Regulations • The lights and bell are working and are safely secured. Please stay informed about the national regulations applicable in your specific country. • The brakes are working safely and are prop- erly secured.
  • Page 9: Electronic Components

    4 ELECTRONIC COMPONENTS In order to prevent a malfunction, the following Replace parts that are defective or worn, such instructions should be observed: as the battery, charger, cable, with original spare parts produced by the manufacturer or parts • Operating Temperature: -15 – 60 °C recommended by the manufacturer.
  • Page 10: Batteries

    Your Pedelec can be supplied with three different types of batteries. detailed specifications can be found in the table below. Model numbers: BT C01.340.UART, BT C01.450. UART, BT C01.600.UART, BT C01.750.UART Risk of fire or explosion if battery is used with an incompatible system.
  • Page 11: Notification

    A special charger provided by BAFANG must be 4.2.2 Notification used to charge these batteries. • The battery should not be left in direct sun- light so as to avoid over-heating, distortion, • do not charge the battery for longer than...
  • Page 12: Caution

    ELECTRONIC COMPONENTS 4.2.3 Caution Do not damage the battery. do not allow the battery to be gouged, Do not disassemble the battery. forged or dropped, as this may cause it to The battery contains protective components over-heat, distort, smoke or burn, and and will internally short-circuit to avoid danger.
  • Page 13: Specifications

    4.2.4 Specifications Basic settings BT C01.340.UART BT C01.450.UART BT C01.600.UART BT C01.750.UART Power 340 Wh 450 Wh 600 Wh 750 Wh 4.5 h with a 2A 6.5 h with a 2A 5.5 h with a 3A 6.5 h with a 3A...
  • Page 14: Hub Motor

    ELECTRONIC COMPONENTS • When you clean the charger, unplug it from the electrical socket first. • When charging takes longer than shown in the specifications table, stop charging. • After charging, remove the battery from the charger and unplug the charger. 4.4 Hub motor Your Pedelec is equipped with a 250 Watt Charger...
  • Page 15: Operation

    5 OPERATION 5.1 Installing the battery 3. Remove the battery from the casing/battery holder. For correct insertion, the battery must be Hold the battery tightly as it is heavy. inserted and locked from the rear of the casing as far as it will go. Without contact with the battery, the electric drive of your pedelec will 5.3 LED capacity and state not work.
  • Page 16: Charging The Battery

    OPERATION LED state NOTES When the system is First LEd flickers ≤ 5 % triggered in operation mode: Press the button for 1 second for One green light 5<L<10% the BMS to display the charge of the battery on Two green lights 10≤...
  • Page 17 Errors – Causes and Solutions Error description Cause Solution Check all connections and whether The operating display does Mains plug not properly con- the charger is properly connected to not light up nected to the power supply the power supply The charging indicator is The battery may have a Contact the manufacturer or your...
  • Page 18: Switching The Electrical System On And Off

    OPERATION 5.5 Switching the electrical You can switch the electrical system of your Pe- delec on and off according to the description on system on and off the control unit, see section "Control element". If the battery of your Pedelec is equipped with an Make sure that the pedals of your Pedelec are on/off switch, you can also press the switch on not weighed down when the system is turned...
  • Page 19: Displays And Settings

    6 DISPLAYS AND SETTINGS 6.1 Display C13.UART battery level indications common to most displays is avoided. • Level indication: this displays the current assistance level (level 0 to level 5). • Fault code prompt. • Push-assistance. • Light control. 6.4 Items to be shown on the Display 6.2 Specifications and Parameters...
  • Page 20: Usual Operation

    dISPLAYS ANd SETTINGS (Min.) → Motor Power(W)→ Calory(C) → Max Lamp status indication Speed(Km/h) → Average Speed(Km/h). State of charge indication Riding record Assistance level indication Speed unit indication Unit indication Setting indication 6.5.2 Push-assistance Speed indication The push-assistance function may only be used "down"...
  • Page 21: Light On / Off Button

    6.5.3 Light ON / OFF button 6.5.5 Clearing your Trip Distance • To switch on the display's backlight and the • To clear your trip distance, hold both the headlight of the Pedelec, hold the UP button MOdE and the dOWN button for 2 seconds: for 2 seconds.
  • Page 22: Unit Conversion "Km / Mile

    dISPLAYS ANd SETTINGS Never change settings while the Pedelec is in motion. 6.6.1 Unit Conversion "km / mile" U represents unit settings • “1” is for miles, “2” is for kilometers. • The default value is “2”. • To convert the units, press the UP or dOWN Backlight Brightness Settings Interface button to increase or decrease until the 6.6.3...
  • Page 23: Error Code Indication

    6.6.4 Error Code Indication If there are errors pertaining to the electronic control system, the error code will appear automatically. Error Code Memory Interface 6.6.6 Exit settings • When in Settings, press the MOdE button to confirm input. Error Code Indication •...
  • Page 24: Error Code Definition

    dISPLAYS ANd SETTINGS 6.7 Error code definition This HMI dP C13.UART can indicate all errors occurring on the pedelec. Error code Error definition Solution 0 x 07 High voltage protection Check the battery voltage 0 x 08 Fault with motor hall sensor inside Have your dealer check the motor stator The motor temperature reaches to the Stop riding and wait until the LEd stop...
  • Page 25: Maintenance And Repairs

    7 MAINTENANCE AND REPAIRS Keep the all components of the electrical system 7.2 Battery wear clean. Clean gently with a damp, soft cloth. The components must not be immersed in water or The battery can run for approx. 500 charging. cleaned with a water jet or steam jet.
  • Page 26: Customer Service

    CUSTOMER SERVICE 8 CUSTOMER SERVICE If you have any questions concerning the electri- cal system, please contact the manufacturer or your specialist dealer. CUSTOMER MANUAL REAR HUB MOTOR SYSTEM...
  • Page 27: Transporting The Pedelec

    9 TRANSPORTING THE PEDELEC Remove the battery before transportation and 9.2 By public transport transport it separately. Cover the contacts with a transport cap to prevent the risk of a short The same regulations apply as when transporting circuit. In the case of a short circuit, there is a a bicycle.
  • Page 28: Disposal Considerations

    dISPOSAL CONSIdERATIONS 10 DISPOSAL CONSIDERATIONS According to European directive 2006/66/EC, If parts of your Pedelec are replaced, please take defective or used batteries must not be used, note of the waste disposal instructions for your and, in accordance with the European directive local waste disposal company.
  • Page 29: Specifications

    Brake: disc-Brake Weight: 3.3 KG Installation Width: 135 mm Max. Housing diameter: 158.5 mm Cabling Shaft Side: Right Spoke Specification: 13 G Battery Primary Settings BT C01.340.UART BT C01.450.UART BT C01.600.UART BT C01.750.UART Rated voltage 43 dCV 43 dCV 43 dCV...
  • Page 30 SPECIFICATIONS Primary Settings BT C01.340.UART BT C01.450.UART BT C01.600.UART BT C01.750.UART Consumption rate ≤ 400 uA ≤ 400 uA ≤ 400 uA ≤ 400 uA during sleep Consumption rate 50 uA 50 uA 50 uA 50 uA during sleep Operating tem- perature during 0 –...
  • Page 31: After-Sales And Warranty Policy

    This also covers defects which already for the specific details. existed at the time of sale/change of ownership. The BAFANG limited warranty does not cover or In fact, if material defects occur within the first apply to the following situations: six months, the assumption is made that these already existed at the time of sale.
  • Page 32: Imprint

    If this warranty statement goes against a cur- required to supply the necessary operating rent Chinese law, the Chinese law shall prevail. instructions. BAFANG reserves the right to modify the terms without prior notice. © Multiplication, reprinting and translation as well as any commercial use (including...
  • Page 33 NOTES CUSTOMER MANUAL REAR HUB MOTOR SYSTEM...
  • Page 34 Bafang Electric (Suzhou) Co., Ltd. Bristol Bicycles No.9 Heshun Rd (Jake's Bikes Ltd.) Suzhou Industrial Park 6A Haymarket Walk 215122, Suzhou China Bristol BS1 3LN sales@bafang-e.com www.bristolbicycles.co.uk www.bafang-e.com company no. 07449533...

Table of Contents