Table of Contents
Advertisement
Quick Links
Please read this manual first to ensure correct installation and operation. This manual should be
retained for future reference. The information in this manual was current when published. The
manufacturer reserves the right to revise and improve its products. All specifications are
therefore subject to change without notice.
PRECAUTIONS
1. Do not install the camera near electric or magnetic fields.
Install the camera away from TV/radio transmitters, magnets, electric motors, transformers
and audio speakers, because the electromagnetic fields generated by these devices may
distort the video image or otherwise interfere with camera functions.
2. Never disassemble the camera beyond the recommendations in this manual, nor apply
materials to it other than those recommended herein.
Improper disassembly or introduction of corrosive materials may result in equipment failure
or other damage.
3. Try to avoid pointing the camera toward the sun.
In some circumstances, direct sunlight may cause permanent damage to the sensor and/or
internal circuits. It may also create unbalanced illumination that may be beyond the camera's
ability to compensate.
4. Keep the power cable away from water and other liquids. Never touch the power cable
with wet hands.
Touching a wet power cable with your hands or touching the power cable with wet hands
may result in electric shock.
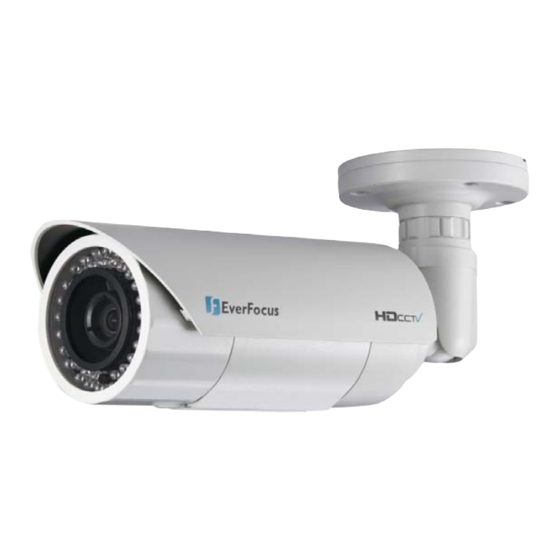
Model No. EZH5242
1080p HDcctv IP66
IR Bullet Camera
User Manual
Advertisement
Table of Contents

Related Manuals for EverFocus HDCCTV EZH5242


Summary of Contents for EverFocus HDCCTV EZH5242
- Page 1 Model No. EZH5242 1080p HDcctv IP66 IR Bullet Camera User Manual Please read this manual first to ensure correct installation and operation. This manual should be retained for future reference. The information in this manual was current when published. The manufacturer reserves the right to revise and improve its products.
- Page 2 Never install the camera in areas exposed to oil, gas or solvents. Oil, gas or solvents may cause equipment failure, electric shock or, in extreme cases, fire. 6. Cleaning For cameras with interchangeable lenses, do not touch the surface of the sensor directly with your hands.
- Page 3 This Product is RoHS compliant. Your EverFocus product is designed and manufactured with high quality materials and components which can be recycled and reused. This symbol means that electrical and electronic equipment, at their end-of-life, should be disposed of separately from your household waste.
-
Page 4: Table Of Contents
TABLE OF CONTENTS 1. INTRODUCTION .......................... 1 1.1 FEATURES ............................2 1.2 PACKAGE CONTENTS ........................2 1.3 SPECIFICATIONS ..........................3 2. CAMERA OVERVIEW ........................5 2.1 DIMENSIONS ........................... 5 2.2 NAMES AND FUNCTIONS OF PARTS ....................5 3. INSTALLATION ..........................6 3.1 WIRING AND MOUNTING ....................... -
Page 5: Introduction
This highly advanced imaging system also incorporates the following state of the art optical enhancement technologies: • EverFocus Tone Reproduction (ETR): Electronically balances lighting in challenging or unbalanced lighting conditions. • Lens Shading Compensation (LSC): Compensates to eliminate artificial shadows caused by attenuation of light as it traverses the outer portions of the lens. -
Page 6: Features
• Provides ICR / 2D & 3D DNR / EFALCONR/SENS-UP (up to 60x) to improve picture clarity in low light scenes • ETR (EverFocus Tone Reproduction) to deliver properly exposed images despite bright light sources, deep shadows and/or unbalanced lighting in the same scene •... -
Page 7: Specifications
Auto White Balance ATW / Push / Manual / Outdoor / Indoor Common Level Adjust 0~100 2D DNR – Off / On; 3D DNR – Off / On EFALCONR [EverFocus Adaptive Luminance Compensated Optimized Noise Reduction] – Off / On... - Page 8 EFECT (EverFocus Enhanced Low / Middle / High Contrast Technology) EFECT improves contrast in smoke, fog and similar conditions] 2X~64X with optional PIP mode Digital Zoom for ease of electronic pan / tilt alignment Motion Identification On screen highlighting of changing areas Custom camera title;...
-
Page 9: Camera Overview
2. CAMERA OVERVIEW 2.1 DIMENSIONS 2.2 NAMES AND FUNCTIONS OF PARTS Speedy-mount ring Sunshield & sunshield screw Front cover Unscrew the front cover of the camera housing to reach the control stick and the lens adjustments. Lock tab & lock tab screw Lens Adjustments ... -
Page 10: Installation
3. INSTALLATION Steps: 1. Wire and mount the camera. See 3.1 2. Adjust the camera position. See 3.2 Warning To prevent electrical shock, turn off the electrical power before making electrical connections. 3.1 WIRING AND MOUNTING 1. Use the template and an appropriate tool to drill 4 holes to attach the Speedy-mount ring. (Note: If the wires from the camera will be routed on the surface, use a pliers or other suitable tool to grasp the filler closing the surface wire slot and twist to remove the filler to open the wire slot. - Page 11 4. If you don’t plan to run the cables along the surface of the wall or anchoring surface, drill a 1” hole for the camera’s two cables in the middle of the circular area “inside” of the Speedy-mount ring. Pull the cables to be connected to power & video cables from the ceiling or wall. Video &...
-
Page 12: Adjusting The Camera
3.2 ADJUSTING THE CAMERA Adjust the viewing angle to the desired direction. With this 3-axis positioning system, installers can capture images from virtually any angle. The camera can be adjusted around these 3 axes: 1st axis Use a hexagon key to loosen this screw to rotate the camera 360° around its long axis. 2nd axis Use a hexagon key to loosen this screw to rotate the camera 90°... - Page 13 Install the Sunshield To install or remove the sunshield, use the hexagon wrench provided to loosen the screw securing the sunshield. Slide the rib on the inside of the sunshield into the rail on the outside of the camera body – from front to back. Tighten this sunshield screw Note: When properly installed, the rear of the sunshield should be even with the rear of the camera body.
-
Page 14: Camera Setup
4. CAMERA SETUP The control stick This camera utilizes an On Screen Display (OSD) user setup menu that can be navigated by a control stick marked by (3 ) in the photo on the right) that is located next to the lens at the front of the camera housing. -
Page 15: Osd Operation
④ SCROLL DOWN Press this button (by pressing the control stick in the “down” direction) to scroll the on-screen cursor downwards between menu items. ⑤ SCROLL UP Press this button (by pressing the control stick in the “up” direction) to scroll the on-screen cursor upwards between menu items. -
Page 16: Configuration With The Osd
5. CONFIGURATION WITH THE OSD Once you have opened the OSD’s main menu on your screen, use the UP and DOWN buttons to scroll to the menu item of your choice. Use the LEFT and RIGHT buttons to toggle between the different modes (right-hand column) of the menu item. - Page 17 Scroll to this field and then scroll left or right to increase or decrease the screen brightness level (0 to 100). ETR ( EverFocus Tone Reproduction) ETR is an advanced form of electronic wide dynamic range expansion used to deliver properly exposed images despite bright light sources, deep shadows and/or unbalanced lighting in the same scene .
-
Page 18: White Balance
right to see a non-flashing RET and a flashing AGAIN sign. Press Enter if you want to change the position of the area selector block, or scroll back to RET and press Enter to return to the previous screen (HSBLC). LEVEL –... -
Page 19: Day & Night
5.4 DAY & NIGHT Use this menu item to select COLOR, B/W, EXTERNAL, or AUTO mode. Use the LEFT and RIGHT buttons to select the mode. Press ENTER to access the selected mode’s setting submenu, where applicable. AUTO mode switches to a B&W feed in low light conditions and then switches back to a Color feed in the daytime. -
Page 20: Nr - Noise Reduction
S-Level: Set up the AGC level to automatically start the 3D NR function. E-Level: Set up the AGC level to automatically stop the 3D NR function. • EFALCONR [EverFocus Adaptive Luminance Compensated Optimized Noise Reduction] –optimized to reduce noise in low light scenes while maximizing image luminance and clarity. -
Page 21: Special
5.6 SPECIAL In this section, the user can configure a variety of special settings. CAM TITLE submenu On the SPECIAL page, scroll to CAM TITLE and scroll sideways to switch it ON, then press ENTER to access this function’s edit page where you can write or edit the camera’s name, which will be displayed in the position you select on this page. - Page 22 SENSITIVITY – Set the sensitivity of the motion detection function. MOTION VIEW – Switch this function on or off. DEFAULT – Press Enter on this field to return to the default values. PRIVACY submenu Switch this function on and press ENTER to configure privacy masks.
-
Page 23: Adjust
5.7 ADJUST SHARPNESS submenu This submenu lets you switch the SHARPNESS function off or on, and lets you select the LEVEL of sharpness. It also lets you switch the RESOLUTION function off or on. MONITOR submenu This submenu lets you choose which monitor type is closest to the type you are using. - Page 24 EverFocus USA - California: EverFocus USA - New York: 1801 Highland Avenue, Unit A, Duarte, CA 91010, 415 Oser Avenue, Unit S, Hauppauge, NY 11788, USA TEL: +1 631 436 5070 TEL: +1 626 844 8888...
Need help?
Do you have a question about the HDCCTV EZH5242 and is the answer not in the manual?
Questions and answers