Table of Contents
Advertisement
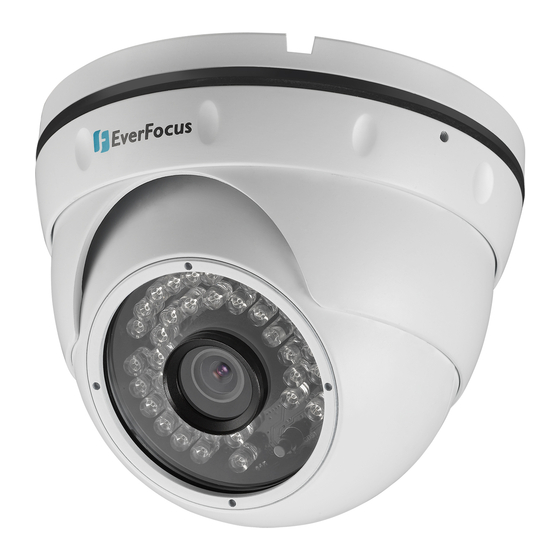
Value IP Series Outdoor Network Camera
2-Megapixel 288 Series / 3-Megapixel 368 Series / 4-Megapixel 468 Series
Quick Installation Guide
EBN288/368/468
EDN288M/368M/468M
EZN288M/368M/468M
EMN468
EMN468W
EZN288/368/468
Copyright © EverFocus Electronics Corp.
Release Date: November, 2017
All the images including product pictures or screen shots in this document are for example only. The images may vary
depending on the product and software version. Information contained in this document is subject to change without notice.
Advertisement
Table of Contents

Related Manuals for EverFocus EBN288


Summary of Contents for EverFocus EBN288
-
Page 1: Quick Installation Guide
EMN468 EMN468W EZN288/368/468 Copyright © EverFocus Electronics Corp. Release Date: November, 2017 All the images including product pictures or screen shots in this document are for example only. The images may vary depending on the product and software version. Information contained in this document is subject to change without notice. -
Page 2: Physical Description
Value IP 288 / 368 / 468 Series 1. Physical Description EBN288/368/468 EDN288M/368M/468M No. Item Name Descriptions Light Sensor Detects lights. Lens Lens. IR LEDs IR LEDs for infrared illumination in night vision applications. Insert a micro SD/SDHC/SDXC card. Please go to the web page of... - Page 3 Press the button to restore the camera to factory default. Insert a micro SD/SDHC/SDXC card. Please go to the web page of the IP camera to see the latest Storage Compatibility Micro SD/SDHC/SDXC Slot List. http://www.everfocus.com.tw EZN288M/368M/468M Sunshield Item Name Descriptions IR LEDs IR LEDs for infrared illumination in night vision applications.
- Page 4 Value IP 288 / 368 / 468 Series Dimensions EBN288/368/468 EDN288M/368M/468M EMN468/468W...
-
Page 5: System Requirements
Before installing, please check that your computer meets the following system requirements. Operating System: Microsoft Windows XP / Vista (32-bit) / 7 (32-bit) Microsoft Internet Explorer 11 or later, Chrome (Windows version 44 and earlier), Firefox version 50 and earlier, EverFocus Browser... -
Page 6: Packing List
EverFocus office or agents for more information. Please also keep the shipping carton for possible future use. 2. Contact the shipper if any items appear to have been damaged in the shipping process. Optional Accessory You can go to the product page on EverFocus’ website to check the related optional accessories. www.everfocus.com.tw... - Page 7 Audio Output (TRS Line-out) (White) Audio Input (TRS Line-in) (Red) Alarm Output / RS-485 (Red) Reset Button Alarm Input (Black) LAN / PoE Cable Video Output (BNC) (Yellow) 12VDC Input EMN468/ EBN288/ EDN288M/ EZN288/ EZN288M/ Cable 468W 368/468 368M/468M 368/468...
- Page 8 For Economic models, the cables provide connections for Network, power and Reset Button. Cables of Economic Models Reset Button Model LAN/PoE 12VDC Reset Button Yes (with a EBN288/368/468 dust-proof cap) 12VDC Input EDN288M/368M/468M EMN468/468W EZN288/368/468 LAN / PoE Cable Yes (with a...
-
Page 9: Installation
User’s Manual in the software CD. 3.1 Mounting and Wiring EBN288/368/468 1. Before screwing the camera to the wall, stick the Sticker on the wall / ceiling to mark the position for installation. Drill four holes on the wall / ceiling according to the supplied Sticker and push the supplied four Screw Anchors into the four holes on the wall / ceiling. - Page 10 Value IP 288 / 368 / 468 Series b. Through the wall / ceiling: run the cables through the hole on the wall / ceiling. Wall or Ceiling 5. Use the supplied four Screws to screw the camera base to the ceiling / wall. 6.
- Page 11 Value IP 288 / 368 / 468 Series b. Insert a RJ-45 network cable (without the RJ-45 connector on the one end) through the Cable Gland and Screw Cap. c. Place the Waterproof Ring into the LAN / PoE cable. Connect the RJ-45 cable to the RJ-45 Connector Cable.
- Page 12 Value IP 288 / 368 / 468 Series 2. Unscrew the camera cover and screw the camera base to the ceiling / wall by using the supplied Screws. 3. Optionally insert the micro SDHC / SDXC card. Please refer to 3.2 Inserting a micro SD Card. 4.
- Page 13 Value IP 288 / 368 / 468 Series 5. Optionally connect the camera to the 12VDC power source using the supplied Power Adapter Pigtail or a power adapter. 6. Access the camera live view. See 5. Accessing the Camera. Or using a video Test-Out cable to connect a monitor to the camera for setting image aim and focus.
- Page 14 Value IP 288 / 368 / 468 Series Tilt Adjustment: Loosen the two tilt screws and adjust the angle by 75° to the desired position, then tighten the tilt screw. Tilt screw 75° 8. Secure the cover back to the camera. EMN468/468W 1.
- Page 15 Value IP 288 / 368 / 468 Series b. Insert a RJ-45 network cable (without the RJ-45 connector on the one end) through the Cable Gland and Screw Cap. c. Place the Waterproof Ring into the LAN / PoE cable. Connect the RJ-45 cable to the RJ-45 Connector Cable.
- Page 16 Value IP 288 / 368 / 468 Series 6. To adjust camera angles. Pan Adjustment: Simply turn left / right of the camera by 175° each side to the desired position. 175° 175° Tilt Adjustment: Adjust the tilt angle between 25° and 90°. 25~90°...
- Page 17 Value IP 288 / 368 / 468 Series 2. You can wire the cables from the side of the camera or through the wall. Wire the cables from the side of the camera Wire the cables through the wall 3. Place the camera’s base against the anchoring surface so that the holes line up. Screw the camera to the wall / ceiling using the supplied Screws.
- Page 18 Value IP 288 / 368 / 468 Series 6. Optionally connect the camera to the 12VDC power source using the supplied Power Adapter Pigtail or a power adapter. 7. Access the camera live view. See 5. Accessing the Camera. Or connect a handheld test monitor to the CVBS wire on the Cable Assembly for adjusting viewing angles.
- Page 19 Value IP 288 / 368 / 468 Series Tilt Adjustment: Loosen the Set Screw using the provided Hexagon Wrench and adjust the angle by 90°. Set Screw Set Screw 90° 90° EZN288/368/468 EZN288M/368M/468M Rotational Adjustment: Loosen the Screw using the provided Hexagon Wrench and rotate the camera by 360°.
-
Page 20: Inserting A Microsd Card
Value IP 288 / 368 / 468 Series 3.2 Inserting a Micro SD Card You can optionally insert a micro SD card to the card slot on the camera module for recording videos. EDN288M/368M/468M Unscrew and then remove the camera cover. Insert a micro SD card into the card slot. - Page 21 Value IP 288 / 368 / 468 Series EZN288M/368M/468M Loosen the two set screws on the bracket. Set Screw Loosen the three screws on the rear housing. Rotate and then remove the rear housing. Loosen the four screws on the IPC board.
- Page 22 Value IP 288 / 368 / 468 Series Insert a micro SD card into the card slot. Put the water-proof ring on the groove that near the edge of the housing. Place the desiccant bag beside the IPC board. Desiccant bag Water-proof ring Screw back the IPC board, secure the rear housing back to the front housing and tighten the set screws on the bracket.
-
Page 23: Accessing The Camera
You can look up the IP address and access the Web interface of the IP camera using the IP Utility (IPU) program, which is included in the software CD. The IP Utility can also be downloaded from EverFocus’ Website: http://www.everfocus.com.tw/HQ/Support/DownloadCenter_p1.aspx (Support >... - Page 24 Value IP 288 / 368 / 468 Series 4. Click Login, the Live View window appears. Note: 1. To enable Remote Live View, Firmware Upgrade and ActiveX Prompt on Internet Explorer, some settings have to be complete. Please refer to 5.2 Settings for Microsoft Internet Explorer.
- Page 25 To set up a static IP: By default, EverFocus’ IP cameras are set up with DHCP. To change the IP setting to static IP, select Static IP from IP Type drop-down list and set up the desired IP Address, for example, 192.168.31.67.
-
Page 26: Network Connections
Value IP 288 / 368 / 468 Series 5. Network Connections You can use one of the methods below to connect the camera to the network. Direct High-Speed Connection In a Direct High-Speed Connection, the camera connects directly to a modem without the need for a router. -
Page 27: Upgrading Firmware
Router Left: Pinout of a straight-through cable. 6. Upgrading Firmware You can upgrade the Firmware using the IP Utility software included in the software CD. The IP Utility can also be downloaded from EverFocus’ Website: http://www.everfocus.com.tw/HQ/Support/DownloadCenter_p1.aspx (Support > Download Center > Keyword Search: IP Utility). Please connect the IP camera on the same LAN of your computer. - Page 28 Value IP 288 / 368 / 468 Series Type the Username and Password. Click the OK button, the Login status displays. Note: 1. The default user ID is user1 and the default password is 11111111 2. If you select more than one camera that has the same user ID / password, you will be able to log in several cameras at once.
- Page 29 TEL: +81 3 5625 8188 www.everfocus.com FAX: +81 3 5625 8189 sales@everfocus.com www.everfocus.co.jp info@everfocus.co.jp Ihr EverFocus Produkt wurde entwickelt Your EverFocus product is designed und hergestellt mit qualitativ and manufactured with high quality hochwertigen Materialien und materials and components which can Komponenten, die recycelt und wieder be recycled and reused.
Need help?
Do you have a question about the EBN288 and is the answer not in the manual?
Questions and answers