Table of Contents
Advertisement
Available languages
Available languages
Quick Links
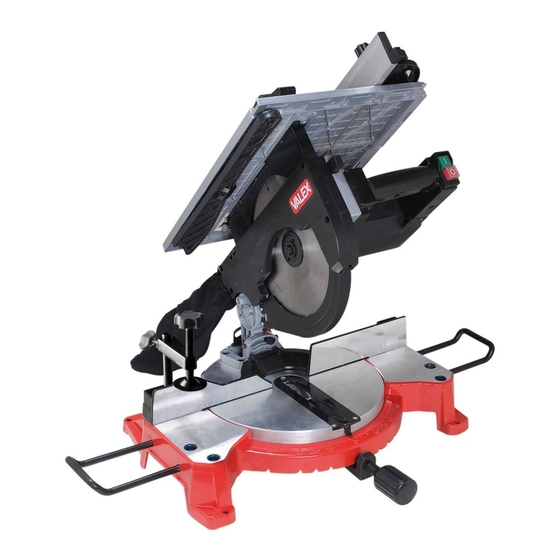
Troncatrice per legno con funzione sega da banco
ISTRUZIONI PER L'USO E ISTRUZIONI DI SICUREZZA
Istruzioni originali
Wood cutting off machine comprising a bench saw
INSTRUCTION MANUAL AND SAFETY INSTRUCTIONS
Original instructions
Tronçonneuse pour bois ayant fonction de scie à table
INSTRUCTIONS POUR L'UTILISATION ET CONSIGNES DE SÉCURITÉ
Instructions d'origine
Tronzadora para madera con función de sierra de banco
INSTRUCCIONES PARA EL USO E INSTRUCCIONES DE SEGURIDAD
Instrucciones originales
Ìç÷áíÞ êïðÞò ãéá îýëï ìå ëåéôïõñãßá óÝãáò ðÜãêïõ
ÅÃ×ÅÉÑÉÄÉÏ ÏÄÇÃÉÙÍ ×ÑÇÓÇÓ ÊÁÉ ÏÄÇÃÉÙÍ ÁÓÖÁËÅÉÁÓ
Ðñùôüôõðåò ïäçãßåò
ATTENZIONE! Prima di usare la macchina, leggete attentamente le istruzioni per l'uso
CAUTION! Before starting the machine, read the operating instructions carefully
ATTENTION! Avant la mise en service de la machine, lire scrupuleusement le mode d'emploi
ATENCIÓN! Antes de usar la máqiuna, leer atentamente las instrucciones de empleo
ÐÑÏÓÏ×Ç! Ðñéí ÷ñçóìïðïéÞóåôå ôï ìç÷Üíçìá äéáâÜóôå ðñïóåêôéêÜ ôéò ïäçãßåò ÷ñÞóçò
TLS250N
1390218
22-06-2015
Advertisement
Table of Contents

Subscribe to Our Youtube Channel
Related Manuals for Valex TLS250N


Summary of Contents for Valex TLS250N
- Page 1 1390218 22-06-2015 TLS250N Troncatrice per legno con funzione sega da banco ISTRUZIONI PER L’USO E ISTRUZIONI DI SICUREZZA Istruzioni originali Wood cutting off machine comprising a bench saw INSTRUCTION MANUAL AND SAFETY INSTRUCTIONS Original instructions Tronçonneuse pour bois ayant fonction de scie à table INSTRUCTIONS POUR L’UTILISATION ET CONSIGNES DE SÉCURITÉ...
- Page 2 - 2 -...
- Page 3 - 3 -...
- Page 4 - 4 -...
- Page 5 - 5 -...
-
Page 6: Rischi Residui
RISCHI RESIDUI RESIDUAL RISkS RISqUES RÉSIDUELS RIESGOS RESIDUALES εναπομενοντες κινδύνούς Queste illustrazioni mostrano i rischi residui nell’uso della macchina. Leggete attentamente il libretto istruzioni della macchina. These illustrations show the main risks involved with using the machine. Read the machine instruction manual carefully. Ces illustrations montrent les principaux risques quand on utilise la machine. -
Page 7: Avvertenze Di Sicurezza Generali
la macchina se la protezione non copre la lama nella posizione di riposo. 24) POSIZIONATE BENE IL PEZZO IN LAVORAZIONE E’ molto importante per la vostra sicurezza che il pezzo in lavorazione sia ben posizio- nato contro la guida poggiapezzo, che sia serrato dalla morsa, e che sia supportato alle due estremità... -
Page 8: Dati Tecnici
avvertenze DI SICUrezza eLettrICHe DeSCrIzIOne MaCCHIna (FIG. a) 1) nOn tOCCate Le PartI In tenSIOne eLettrICa 1 Interruttore troncatrice attenzIOne! Pericolo di scossa elettrica. alcune parti della macchina sono in 2 Interruttore banco sega tensione elettrica. 3 Impugnatura 2) MANTENETE I BAMBINI E GLI ANIMALI LONTANI DAGLI APPARECCHI ELETTRICI 4 Pulsante di sblocco testa troncatrice I bambini e gli animali devono essere tenuti lontani dagli apparecchi collegati alla 5 Protezione motore ripristinabile (se presente) - Page 9 Lama circolare per legno, corpo in acciaio e denti con placchette di metallo duro necessari alla lavorazione che vi accingete ad effettuare. 4) Montate i due supporti laterali (pos.13), la morsa bloccapezzo (pos.14), il sacchetto Diametro est./int.________________________________________ 250/30 mm raccoglitrucioli (pos.30) e, da usarsi solo per il banco sega, il guidapezzo (pos.19). Spessore di taglio __________________________________________ 2,8 mm 5) Avvitate la vite per il fissaggio del piano girevole (pos.11).
-
Page 10: Avviamento E Arresto
Prima di mettere in funzione la macchina, verificate l’integrità dei componenti e controllate che le viteria sia serrata. La macchina è dotata di due interruttori, uno per la modalità troncatrice e uno per la modalità banco sega. AVVIAMENTO TRONCATRICE 1) Approntare la macchina in modalità “troncatrice”. 2) Verificate che le chiavi di servizio siano state riposte. - Page 11 pericolo per l’operatore. - abbassare lentamente e completamente la testa di taglio fino a tagliare il pezzo attenzione! Per la vostra sicurezza è importante che il pezzo sia correttamente - alzare lentamente la testa di taglio e non appena la lama è fuori dal pezzo rilasciare bloccato.
-
Page 12: Manutenzione
DISCO LAMA attenzIOne! Mantenere le mani e il guidapezzo lontano dalla zona di taglio. Verificate prima di ogni utilizzo la sua perfetta integrità, l’assenza di rotture e deforma- - completare il taglio zioni. Periodicamente controllate l’affilatura della lama. - spegnere la macchina. Quando è... -
Page 13: Garanzia
- Rivolgetevi ad un centro assistenza autorizzato. La ditta: Guasto elettrico: Valex - via Lago Maggiore, 24 36015 SCHIO (VI) ITALY - Rivolgetevi ad un centro assistenza autorizzato. Dichiara sotto la propria responsabilità che la macchina: LA TESTA DI TAGLIO NON SI ABBASSA:... -
Page 14: Residual Risks
perpendicular sides such as tables, panels, etc.; do not cut branches, tree trunks or circular sections. Do not cut pieces that contain nails or screws or wrapped in tape, cord or other. Do not cut pieces on a slant. Rest them on the base of the machine. Do not cut in pieces coast but place the long side on the machine base. -
Page 15: Description Of Accessories
7) CHECK THE POWER CABLE 27 Saw bench divider knife The power cable and extension cable (where applicable) must be checked periodically 28 Anti-tilt support and must be checked for signs of damage and wear every time they are used. If they 29 Divider knife fixing screws are not found to be in good condition disconnect them immediately and do not use 30 Dust/chip bag (where fitted) -
Page 16: Cutting Head
SaW BenCH OPeratInG MODe (FIG. a) Machine designed for cutting wooden pieces such as tables, panels etc. featuring flat WarnInG! Before any operational change, turn the switch to the OFF “O”, unplug the and perpendicular sides. The blade is fixed while the piece moves in a straight motion. machine from the electric power supply and wait for the machine to stop completely. -
Page 17: Use Instructions
STOPPING THE CUTTING OFF MACHINE For a single cut it is sufficient to assemble the dust/chip bag (pos.30 if applicable), To stop the machine release the switch (pos. 1). which must be inserted at the bottom on the manifold as shown in fig.A; after cutting empty the bag. - Page 18 TILTED/SLANTED COMBINED CUT (fig. G-H) KNIFE DIVIDER It is a comp onente important for safety and must be adjusted with respect the disc WarnInG! this cut requires the blade to be more exposed, increasing the risk of blade (Fig. N). The thickness of the riving knife must be less than the width of the cut serious injuries: take care of your hands and keep a safe distance.
-
Page 19: Maintenance
THE MACHINE DOES NOT START OR IT STOPS AND DOES NOT RESTART: The company: No power: Valex - via Lago Maggiore, 24 36015 SCHIO (VI) ITALY - Make sure the power cable and extension (if applicable) are not damaged. - Check the power supply system’s main switch. -
Page 20: Normes Générales De Sécurité
débranché et l’aspirateur (non fourni) est éteint. 23) CONTROLE DES PROTECTIONS Contrôlez que les protections de la lame ne sont pas endommagées. La protection inférieure de la lame doit suivre le mouvement de montée/descente de la tête de coupe ; n’utilisez pas la machine si la protection ne couvre pas la lame au repos.
Need help?
Do you have a question about the TLS250N and is the answer not in the manual?
Questions and answers