Table of Contents
Advertisement
Quick Links
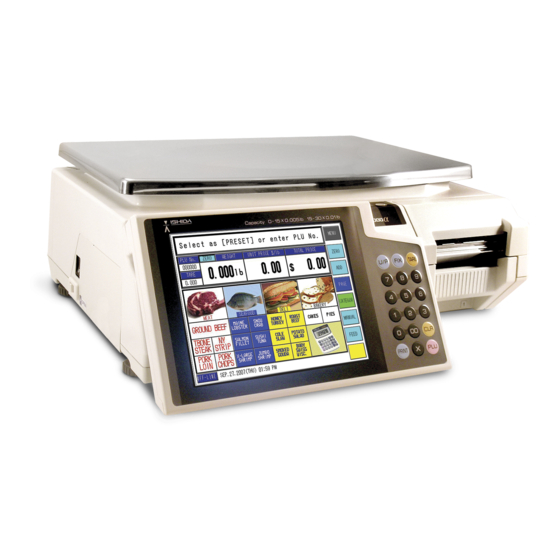
Automatic Scale Register
SR-2000
READ AND UNDERSTAND THIS MANUAL
• Thoroughly read and understand this manual before installing, operating, inspecting, and
servicing the machine.
• Keep this manual in a safe place where you can refer to it whenever necessary.
• Consult your ISHIDA representative if you have any questions or comments.
PN 89061
USER'S MANUAL
CAUTION
α
Advertisement
Table of Contents

Subscribe to Our Youtube Channel
Related Manuals for ISHIDA SR-2000 alpha


Summary of Contents for ISHIDA SR-2000 alpha
- Page 1 • Thoroughly read and understand this manual before installing, operating, inspecting, and servicing the machine. • Keep this manual in a safe place where you can refer to it whenever necessary. • Consult your ISHIDA representative if you have any questions or comments. PN 89061...
- Page 2 2004 ISHIDA Co., Ltd. COPYRIGHT AND COPY PERMISSION This manual shall not be copied without permission. This manual is protected by copyright and is intended solely for use in conjunction with the machine. Please notify us before copying or reproducing this manual in any manner, for any other purpose.
- Page 3 ISHIDA is not liable for any damage, loss or injury that results from incorrect operation, insufficient caution, unauthorized modifications to the machine, or failure to follow the instructions contained in this manual.
- Page 4 SAFETY PRECAUTIONS Meanings of Signal Words This machine is manufactured for use according to proper procedures by a qualified person and only for the purposes described in this manual. The following conventions are used to indicate and classify precautions depending on the level of danger, or seriousness of potential injury. Always heed the information provided in this manual.
- Page 5 SAFETY PRECAUTIONS Precautions for Safe Use • Do not allow the machine, terminals, etc. to come in contact with water. Doing so may result in fire or cause the machine to break down. • Do not give a strong shock to the machine as it is a precision machine.
- Page 6 SAFETY PRECAUTIONS • Handle with care when removing or inserting the cassette. Careless cassette handling may result in injury or cause the cassette to break down. • Do not block off the ventilation opening. Doing so may result in fire or cause the machine to break down.
- Page 7 SAFETY PRECAUTIONS • Do not press the touch panel with an edged thing. Doing so may scratch the panel and cause the machine to break down. • Do not install any other application. Doing so may cause the machine to break down. •...
-
Page 8: Table Of Contents
CONTENTS CONTENTS Chapter 1 BEFORE USING THE MACHINE........... 1-1 PART NAMES AND FUNCTIONS................1-2 Front View........................... 1-2 Rear View ........................... 1-2 Keypad..........................1-3 MACHINE INSTALLATION ..................1-4 Precautions for Installation....................1-4 Level Adjustment......................... 1-5 LABEL ROLL INSTALLATION ................1-6 PAPER ROLL INSTALLATION ................1-8 CLEANING ...................... - Page 9 SAFETY PRECAUTIONS Chapter 3 TOTAL ADJUSTMENT MODE ..........3-1 NUMBER ADD......................3-2 WEIGHING ADD....................... 3-5 NUMBER SUBTRACT ..................... 3-7 WEIGHING SUBTRACT ..................3-10 Chapter 4 TOTAL MODE ................ 4-1 DAILY TOTAL ......................4-2 Total Production ........................4-3 Sales Per Department......................4-4 Sales Per Group .........................
- Page 10 CONTENTS PRESET KEYS REGISTRATION................5-25 PLU Preset Key Registration .....................5-25 PLU Name Edit ........................5-28 Key Color Change......................5-30 Key Layout Change ......................5-32 Function Key Registration ....................5-35 Page Copy .........................5-38 Page Delete ........................5-40 ADVERTISEMENT MESSAGE ................5-42 Message Table Allocation....................5-42 Message Edit ........................5-45 Message Deletion ......................5-47 OPERATOR NAME REGISTRATION ..............
-
Page 11: Chapter 1 Before Using The Machine
Chapter 1 BEFORE USING THE MACHINE Chapter BEFORE USING THE MACHINE SR-2000α User’s Manual (No. 0000A) -
Page 12: Part Names And Functions
Chapter 1 BEFORE USING THE MACHINE PART NAMES AND FUNCTIONS This section explains the name of each part and the function of this machine. As this manual uses the following names to give further explanation, remember the part names described here, and read the following pages. -
Page 13: Keypad
Chapter 1 BEFORE USING THE MACHINE Keypad Used to change a unit price. Also used to change a fixed price product to a unit price product. Used to change a fixed price. Also used to change a unit price product to a fixed price product. Used to subtract a tare weight. -
Page 14: Machine Installation
Chapter 1 BEFORE USING THE MACHINE MACHINE INSTALLATION Precautions for Installation • Install the machine horizontally to use. Accurate measurements cannot be performed if it is not installed horizontally. • Do not connect the machine power input with an AC power supply exceeding the rated voltage. Doing so may cause the machine to break down and/or may result in danger such as electric shock. -
Page 15: Level Adjustment
Chapter 1 BEFORE USING THE MACHINE Level Adjustment Be sure to turn off the power switch before placing the machine on a stable platform, and adjust the machine inclination by turning the four level adjusters so that the level bubble is located at the center of the window. -
Page 16: Label Roll Installation
Chapter 1 BEFORE USING THE MACHINE LABEL ROLL INSTALLATION Raise the Thermal Head Cover, and pull the Cassette to draw out of the main body. Load a new label roll around the Roll Holder and raise the Roll Confirm that the label Stopper to fix the roll position. - Page 17 Chapter 1 BEFORE USING THE MACHINE Slide the Label Guide to fit the paper width. Push the Cassette straight into the main body to return to its original Push the Cassette slowly so as not to get position, and lower the Thermal your fingers caught Head Cover.
-
Page 18: Paper Roll Installation
Chapter 1 BEFORE USING THE MACHINE PAPER ROLL INSTALLATION Raise the Thermal Head Cover, and pull the Cassette to draw out of the main body. Load a new paper roll around the Roll Holder and raise the roll Confirm that the paper stopper to fix the roll position. - Page 19 Chapter 1 BEFORE USING THE MACHINE Push the Cassette straight into the main body to return to its original Push the Cassette position, and lower the Thermal slowly so as not to get your fingers caught Head Cover. between the Cassette and the main body.
-
Page 20: Cleaning
Chapter 1 BEFORE USING THE MACHINE CLEANING Cautions for Using Cleaning Fluid Use a soft cloth and a neutral detergent to clean the machine. Do not use thinner, benzene, etc. Doing so may damage the original safety functions. For some parts, use cleaning fluid (isopropyl alcohol). Read the cautions below before using the cleaning fluid. -
Page 21: Air Intake Filter Cleaning
Chapter 1 BEFORE USING THE MACHINE Air Intake Filter Cleaning Clean the air intake filter at least once a month in order to be able to use the machine in good conditions. Raise the operation panel as shown in the figure. Hold the both end of the filter case, and pull it out. -
Page 22: Operation Panel And Main Body Cleaning
Chapter 1 BEFORE USING THE MACHINE Operation Panel and Main Body Cleaning This section explains about cleaning the operation panel and narrow spaces of the main body. Use a cloth or cotton swab for cleaning narrow spaces. Remove stains at the top of operation panel as shown in the Use a soft cloth or the figure. -
Page 23: Chapter 2 Operation Mode
Chapter 2 OPERATION MODE Chapter OPERATION MODE Operation Mode is used to perform various sales operations. The initial screen appears on the display when the machine is turned on. To access to the initial screen from the Main Menu screen, touch [OPERATION] on the Main Menu screen. -
Page 24: Operation Flow
Chapter 2 OPERATION MODE OPERATION FLOW Operating procedure in the Operation Mode is shown as per below. SR-2000α User’s Manual (No. 0000A) -
Page 25: Basic Screens
Chapter 2 OPERATION MODE BASIC SCREENS Initial Screen SR-2000α User’s Manual (No. 0000A) -
Page 26: Plu Select Screen
Chapter 2 OPERATION MODE PLU Select Screen PLU preset keys can be freely laid out through the preset key registration. Weighing Product Screen Function preset keys (-$, -%, Special, POP, Total display, Void, etc.) can be freely laid out through the preset key registration. -
Page 27: Weighing Product Sales
Chapter 2 OPERATION MODE WEIGHING PRODUCT SALES Confirm that the Initial screen is displayed. When the PLU is registered in the preset key, touch the corresponding product category key. Example: Category Meat When the PLU is not registered in the preset key, enter the desired PLU number and press the PLU key on the keypad. - Page 28 Chapter 2 OPERATION MODE Place a product on the weighing platter. Then, the total price is automatically calculated. Example: Net weight “0.820 lb” When discounting the price (Percent discount, Amount See section discount, Special price), perform 2.6“Discount the discount procedure. Operations”...
-
Page 29: Fixed Price Product Sales
Chapter 2 OPERATION MODE FIXED PRICE PRODUCT SALES Confirm that the Initial screen is displayed. When the PLU is registered in the preset key, touch the corresponding product category key. Example: Category Meat When the PLU is not registered in the preset key, enter the desired PLU number and press the PLU key on the keypad. - Page 30 Chapter 2 OPERATION MODE When discounting the price (Percent discount, Amount See section 2.6 discount, Special price), perform “Discount Operations” the discount procedure. for more detailed procedure. Example: $0.50 discount When changing the data temporarily, perform the temporary See section 2.7 data change procedure.
-
Page 31: Tare Weight Subtraction
Chapter 2 OPERATION MODE TARE WEIGHT SUBTRACTION Tare weight subtraction is performed prior to weighing a product. When the tare weight subtraction is required, select one of the following procedures to perform. Actual Tare Weight When the tare weight is unknown, weigh the tare to subtract the weight. Place the tare on the weighing platter. -
Page 32: Preset Tare Keys
Chapter 2 OPERATION MODE Preset Tare Keys When the TARE preset key is registered, simply touch the corresponding preset key. Touch the TARE preset key on the screen. Example: TARE Preset key with “0.020 lb” 2-10 SR-2000α User’s Manual (No. 0000A) -
Page 33: Discount Operations
Chapter 2 OPERATION MODE 2.6 DISCOUNT OPERATIONS Amount Discount Selling price of the displayed PLU can be temporarily discounted by amount. Example: Discount the selling price $10.23 by $0.50. Enter the discount amount using the keypad, and touch [-$] on the To perform amount screen. -
Page 34: Temporary Data Change
Chapter 2 OPERATION MODE TEMPORARY DATA CHANGE This section explains about each function that can change the data temporarily. Unit Price Change Unit price that is set to a PLU can be temporarily changed when a weighing product is sold. Unit price change Example: Change the unit price from $12.48 to $12.00 cannot be performed... -
Page 35: Fixed Price Product Change To Weighing Product
Chapter 2 OPERATION MODE Fixed Price Product Change to Weighing Product Fixed price product can be temporarily sold with a weighing unit price. Example: Change the fixed price product $3.68 to the weighing product with the unit price $3.68. Confirm that the fixed price product screen is displayed. - Page 36 Chapter 2 OPERATION MODE Enter a new date using the keypad, and touch the desired date field to change. Example: New date “August 5, 2004” Touch [BACK] to return the display to the previous screen. 2-14 SR-2000α User’s Manual (No. 0000A)
-
Page 37: Pop Message Print
Chapter 2 OPERATION MODE 2.8 POP MESSAGE PRINT Unit Price Change A message printed on the label is temporarily changed. Touch [POP] on the screen. To perform the POP message print, [POP] key must have been preset on the function screen. -
Page 38: Void Last Transaction
Chapter 2 OPERATION MODE 2.9 VOID LAST TRANSACTION Void operation can be performed immediately after the previous label has been issued. Touching [VOID] will cancel the previous transaction, and the added price of the previous product is subtracted from the total. The transaction is finished and the label is issued as shown on the To perform the void... -
Page 39: Daily Total Display
Chapter 2 OPERATION MODE 2.10 DAILY TOTAL DISPLAY During sales operation, the sales total of that day can be confirmed on the screen Confirm that a PLU data screen is displayed. Touch [Total Display] on the screen. To perform the Daily Total Display, [Total Display] key must have been preset on the... -
Page 40: Automatic / Advanced Labeling
Chapter 2 OPERATION MODE 2.11 AUTOMATIC / ADVANCED LABELING Automatic labeling can be performed both for weighing products and fixed price products. However, advanced labeling can be performed only for fixed price products. Automatic Labeling for Weighing Products Confirm that [PREPACK] is selected on the screen. -
Page 41: Automatic Labeling For Fixed Price Products
Chapter 2 OPERATION MODE Automatic Labeling for Fixed Price Products Confirm that [PREPACK] is selected on the screen. If not, touch [MANUAL] to change to [PREPACK]. Enter the PLU number (Weighing product) and press the PLU key on the keypad. Example: PLU No. -
Page 42: Advanced Labeling For Fixed Price Products
Chapter 2 OPERATION MODE Advanced Labeling for Fixed Price Products Confirm that [PREPACK] is selected on the screen. If not, touch [MANUAL] to change to [PREPACK]. Enter the PLU number (Fixed price product) and press the PLU key on the keypad. Example: PLU No. -
Page 43: Chapter 3 Total Adjustment Mode
Chapter 3 TOTAL ADJUSTMENT MODE Chapter TOTAL ADJUSTMENT MODE Total Adjustment Mode is used to add or subtract product data to or from the sales total. To enter this mode from the initial screen, touch [MENU] to access to the Main Menu screen first, and touch [TOTAL ADJUST] to access to the Total Adjustment Add/Subtract Menu screen. -
Page 44: Number Add
Chapter 3 TOTAL ADJUSTMENT MODE NUMBER ADD When a product is to be added after checkout, input the quantity, weight, and/or price of the product to be added to the sales total. Touch a desired addition type on the screen to select. There are four number addition menu screens. - Page 45 Chapter 3 TOTAL ADJUSTMENT MODE Enter the quantity, weight, and total price to be added to the sales total and touch [NUMBER SET], [WEIGHT SET], and [PRICE SET] respectively. Example: quantity “2 pieces” Example: Weight “2.450 lb” Example: Price “$5.16” When a discount operation is required, touch one of the following See Section 2.6 in...
- Page 46 Chapter 3 TOTAL ADJUSTMENT MODE The confirmation screen appears for execution. Touch [EXECUTE] to execute these additions. Then, the label will be issued. SR-2000α User’s Manual (No. 0000A)
-
Page 47: Weighing Add
Chapter 3 TOTAL ADJUSTMENT MODE WEIGHING ADD When a product is to be added after checkout, actually weigh the product to calculate the total price to be added to the sales total. Touch a desired addition type on the screen to select. There are four weighing addition menu screens. - Page 48 Chapter 3 TOTAL ADJUSTMENT MODE Place the product on the weighing platter, then the total price is calculated based on the actual weight. When a discount operation is required, touch one of the following See Section 2.6 in buttons to select. Chapter 2 “Discount Operations”...
-
Page 49: Number Subtract
Chapter 3 TOTAL ADJUSTMENT MODE NUMBER SUBTRACT When a product is to be subtracted after checkout, input the quantity, weight, and/or price of the product to be subtracted from the sales total. Touch a desired subtraction type on the screen to select. There are five number subtraction menu screens. - Page 50 Chapter 3 TOTAL ADJUSTMENT MODE Enter the PLU number using the keypad and press the PLU key to call. Example: PLU number “5” Enter the quantity, weight, and total price to be subtracted from the sales total and touch [NUMBER SET], [WEIGHT SET], and [PRICE SET] respectively.
- Page 51 Chapter 3 TOTAL ADJUSTMENT MODE The entered data is displayed in the corresponding INPUT data field and the result is displayed in the corresponding CALCULATION data field. Touch [SUB] (Subtraction) on the screen. The confirmation screen will appear for execution. Touch [EXECUTE] to execute these subtractions.
-
Page 52: Weighing Subtract
Chapter 3 TOTAL ADJUSTMENT MODE WEIGHING SUBTRACT When a product is to be subtracted after checkout, actually weigh the product to calculate the total price for subtraction. Touch a desired subtraction type on the screen to select. There are five weighing subtraction menu screens. - Page 53 Chapter 3 TOTAL ADJUSTMENT MODE Enter the PLU number using the keypad and press the PLU key to call. Example: PLU number “5” Place the product on the weighing platter, then the total price is calculated based on the actual weight.
- Page 54 Chapter 3 TOTAL ADJUSTMENT MODE 3-12 SR-2000α User’s Manual (No. 0000A)
-
Page 55: Chapter 4 Total Mode
Chapter 4 TOTAL MODE Chapter TOTAL MODE Total Mode is used to obtain . To enter the Total Mode from various transaction totals the initial screen, touch [MENU] to access to the Main Menu screen first, then touch [TOTAL] to access to the Total Menu screen. Note: If a password is programmed for accessing to the Total Mode, enter the 6-digit password using the keypad before touching [TOTAL]. -
Page 56: Daily Total
Chapter 4 TOTAL MODE DAILY TOTAL Daily Total is performed at the end of the day to obtain the total of various transactions performed on that day. SR-2000α User’s Manual (No. 0000A) -
Page 57: Total Production
Chapter 4 TOTAL MODE Total Production Total production data transacted on that day is totaled. Used to feed a label to the proper peeling position. Touch [TOTAL PRODUCTION] on the screen. Press the PRINT key on the keypad to issue a label. Then, touch [MENU] to return the display to the Daily Total Menu. -
Page 58: Sales Per Department
Chapter 4 TOTAL MODE Sales Per Department Sales data transacted on that day is totaled for each department. Used to scroll up for the previous page. Used to select the previous item. Used to select the next item. Used to scroll down for the next page. Touch [SALES PER DEPT.] on the screen. -
Page 59: Sales Per Group
Chapter 4 TOTAL MODE Sales Per Group Sales data transacted on that day is totaled for each group. Touch [SALES PER GROUP] on the screen. Press the PRINT key on the keypad to issue a label. Then, touch [MENU] to return the display to the Daily Total Menu. SR-2000α... -
Page 60: Sales By Plu
Chapter 4 TOTAL MODE Sales By PLU Sales data transacted on that day is totaled for each PLU. Touch [SALES BY PLU] on the screen. Press the PRINT key on the keypad to issue a label. Then, touch [MENU] to return the display to the Daily Total Menu. SR-2000α... -
Page 61: Gross Profit By Plu
Chapter 4 TOTAL MODE Gross Profit By PLU Gross profit data transacted on that day is totaled for each PLU. Touch [GROSS PROFIT BY PLU] on the screen. Press the PRINT key on the keypad to issue a label. Then, touch [MENU] to return the display to the Daily Total Menu. SR-2000α... -
Page 62: Markdown Item
Chapter 4 TOTAL MODE Markdown Item Sales data transacted on that day is totaled for each markdown product. Touch [MARK-DOWN ITEM] on the screen. Press the PRINT key on the keypad to issue a label. Then, touch [MENU] to return the display to the Daily Total Menu. SR-2000α... -
Page 63: Designated Plu
Chapter 4 TOTAL MODE Designated PLU Sales data transacted on that day is totaled for each designated PLU. Touch [DESIGNATE PLU] on the screen. Enter the desired PLU number and press the PLU key to call up the data. Example: PLU number “1” Press the PRINT key on the keypad to issue a label. -
Page 64: Plu Analysis
Chapter 4 TOTAL MODE PLU Analysis PLU sales data transacted on that day is analyzed according to the selected conditions. Touch [PLU ANALYSIS] on the screen. Enter the report size and touch [SET]. When “0” is set, all Example: Report size “100” PLUs are selected. - Page 65 Chapter 4 TOTAL MODE Touch the desired analysis type to select. PLU number order Greater price order Greater weight order Greater quantity order Smaller price order Smaller weight order Smaller quantity order Touch [DETAILS] to display the desired PLU analysis on the screen. Press the PRINT key on the keypad to issue a label.
- Page 66 Chapter 4 TOTAL MODE Repeat steps 2 through 6 above for more analysis. Touch [RETURN] to return the display to the Daily Total PLU Analysis screen. Then, touch [MENU] to return the display to the Daily Total Menu. 4-12 SR-2000α User’s Manual (No. 0000A)
-
Page 67: Hourly Analysis
Chapter 4 TOTAL MODE Hourly Analysis A day is delimited every hour, and the daily sales data either in price or quantity is displayed for each hourly zone in graphs. Touch [HOURLY ANALYSIS] on the screen. SR-2000α User’s Manual (No. 0000A) 4-13... - Page 68 Chapter 4 TOTAL MODE The Daily Total Hourly Analysis screen appears on the screen. Touch either [PCS] or [PRICE] to select. Example: Select [PCS] Press the PRINT key to issue the label. Example: Select [PRICE] Press the PRINT key on the keypad to issue a label. Touch [MENU] to return the display to the Daily Total Menu.
-
Page 69: Sales Per Sell Impossible Plu
Chapter 4 TOTAL MODE Sales per Sell Impossible PLU Sell-impossible PLU data found on that day is totaled. Touch [SALES PER SI PLU] on the screen. Press the PRINT key on the keypad to issue a label. Touch [MENU] to return the display to the Daily Total Menu. SR-2000α... -
Page 70: Sales Per Expired Plu
Chapter 4 TOTAL MODE Sales per Expired PLU Expired PLU data found on that day is totaled. Touch [SALES PER EX PLU] on the screen. Press the PRINT key on the keypad to issue a label. Touch [MENU] to return the display to the Daily Total Menu. 4-16 SR-2000α... -
Page 71: Sales Per Discard Plu
Chapter 4 TOTAL MODE Sales per Discard PLU Discard PLU data found on that day is totaled. Touch [SALES PER DS PLU] on the screen. Press the PRINT key on the keypad to issue a label. Touch [MENU] to return the display to the Daily Total Menu. SR-2000α... -
Page 72: Sales Per Rewrap Plu
Chapter 4 TOTAL MODE Sales per Rewrap PLU Rewrapped PLU data transacted on that day is totaled. Touch [SALES PER RW PLU] on the screen. Press the PRINT key on the keypad to issue a label. Touch [MENU] to return the display to the Daily Total Menu. 4-18 SR-2000α... -
Page 73: Weekly Total
Chapter 4 TOTAL MODE WEEKLY TOTAL Weekly Total is performed to obtain the total of various transactions performed for a week. SR-2000α User’s Manual (No. 0000A) 4-19... -
Page 74: Sales Per Day
Chapter 4 TOTAL MODE Sales per Day Total sales data is totaled for each day of the week. Touch [SALES PER DAY] on the screen. Press the PRINT key on the keypad to issue a label. Touch [MENU] to return the display to the Daily Total Menu. 4-20 SR-2000α... -
Page 75: Hourly Analysis
Chapter 4 TOTAL MODE Hourly Analysis A day is delimited every hour, and the weekly sales data either in price or quantity is displayed for each hourly zone in graphs. Used to call the previous day of the week. Used to call the next day of the week. SR-2000α... - Page 76 Chapter 4 TOTAL MODE Touch [HOURLY ANALYSIS] on the screen. The Hourly Analysis of Week screen appears on the screen. Touch either [PCS] or [PRICE] to select. Example: Select [PCS] Press the PRINT key on the keypad to issue a label. Example: Select [PRICE] Press the PRINT key on the keypad to issue a label.
-
Page 77: Cumulative Total
Chapter 4 TOTAL MODE CUMULATIVE TOTAL Cumulative Total is performed to obtain accumulated transactions for a specified period. SR-2000α User’s Manual (No. 0000A) 4-23... -
Page 78: Various Totals
Chapter 4 TOTAL MODE Various Totals The following 6 cumulative totals are available. The operating procedure for each total is same as that of Daily Total. CUMULATIVE GRAND TOTAL PROD. CUMULATIVE GRAND TOTAL PROD. See page 4-3 for operating procedure. See page 4-4 for operating procedure. - Page 79 Chapter 4 TOTAL MODE CUM. TOTAL DESIGNATE PLU See page 4-9 for operating procedure. TOTAL PER PLU ANALYSIS See page 4-10 for operating procedure. SR-2000α User’s Manual (No. 0000A) 4-25...
-
Page 80: Days Total
Chapter 4 TOTAL MODE 31 DAYS TOTAL 31 Days Total is performed to obtain total data for the past 31 days. 4-26 SR-2000α User’s Manual (No. 0000A) - Page 81 Chapter 4 TOTAL MODE Touch [31 DAYS TOTAL] on the screen. The Hourly Analysis of Week screen appears on the screen. Touch either [PCS] or [PRICE] to select. Example: Select [PCS] Press the PRINT key on the keypad to issue a label. Example: Select [PRICE] Press the PRINT key on the keypad to issue a label.
-
Page 82: Non-Movement Plu
Chapter 4 TOTAL MODE NON-MOVEMENT PLU Non-Movement PLU is performed to obtain the list of the PLU data that has not been sold for the specified period. Touch [NON-MOVEMENT PLU] on the screen. Enter the 8-digit date (MMDDYYYY) and touch [DATE SET] on the screen. Example: Date set “JUNE-01-2004”... - Page 83 Chapter 4 TOTAL MODE Press the PRINT key on the keypad to issue a label. Touch [MENU] to return the display to the Daily Total Menu. SR-2000α User’s Manual (No. 0000A) 4-29...
-
Page 84: Preset Report
Chapter 4 TOTAL MODE PRESET REPORT Preset Report is to combine various preset totals when the report is issued. This report is available for Daily and Cumulative totals. Touch [PRESET REPORT] on the screen. Touch either [DAILY JOIN REPORT] or [CUMULATE JOIN REPORT] to select. -
Page 85: Total Clear
Chapter 4 TOTAL MODE TOTAL CLEAR Total Clear operation is used to clear the specified total data. Touch [TOTAL CLEAR] on the screen. Touch a desired report type to select. Used to clear Daily Totals. Used to clear Weekly Totals. Used to clear 31 days Totals. - Page 86 Chapter 4 TOTAL MODE 4-32 SR-2000α User’s Manual (No. 0000A)
-
Page 87: Chapter 5 Programing Mode
Chapter 5 PROGRAMING MODE Chapter PROGRAMING MODE Programing Mode is used to register various preset data required for normal operations. To enter the Registration Menu screen from the initial screen, touch [MENU] first, and touch [PROGRAMING] to access to the Registration Menu screen. -
Page 88: Plu Data Registration
Chapter 5 PROGRAMING MODE PLU DATA REGISTRATION Starting PLU Data Registration Touch [PLU FILE / PRICE CHANGE] on the screen. The PLU File Registration screen appears on the display When a desired PLU is found on the current screen, touch the corresponding field to select. - Page 89 Chapter 5 PROGRAMING MODE The PLU Data Registration (1/3) screen appears on the display. Touch [PAGE] to access to other PLU Data Registration screens. Try to find a desired item on one of three screens on the right. SR-2000α User’s Manual (No. 0000A)
-
Page 90: Plu Data Registration 1/3
Chapter 5 PROGRAMING MODE PLU Data Registration 1/3 Entry examples are shown below. Select necessary items to register. Item Operation PLU NAME 1. Touch on the screen. 2. Enter desired characters and edit the text. See Appendix “Text Editing” for further detailed edit operations. 3. - Page 91 Chapter 5 PROGRAMING MODE Touch on the screen to access to the selection screen. Then, touch one of the following buttons to select. Normal price Special price Amount discount (-$) Percent discount (-%) When [NORMAL] is selected in the Markdown Flag selection above, numeric data entry is not possible.
- Page 92 Chapter 5 PROGRAMING MODE Touch on the screen to access to the selection screen. Then, touch one of the following buttons to select. When referring to the set reference data When printing the pack date on the label When not printing the pack date on the label Touch (Sell-by Date Print) on the screen to access to the selection screen.
- Page 93 Chapter 5 PROGRAMING MODE Touch on the screen to access to the selection screen. Then, touch one of the following buttons to select. When referring to the set reference data Example: POS flag “2” Example: Barcode “123” Touch on the screen to access to the selection screen. Then, touch one of the following buttons to select.
-
Page 94: Plu Data Registration 2/3
Chapter 5 PROGRAMING MODE PLU Data Registration 2/3 Entry examples are shown below. Select necessary items to register. Item Operation Example: Extra message 1 number “3” Touch on the screen to access to the selection screen. Then, touch one of the following buttons to select. When referring to the reference data setting When printing the pack time on the label When not printing the pack time on the label... - Page 95 Chapter 5 PROGRAMING MODE Touch on the screen to access to the selection screen. Then, touch one of the following buttons to select. When referring to the reference data setting When not printing the safe handling on the label When printing the safe handling on the label Example: Safe handling image number “4”...
-
Page 96: Plu Data Registration 3/3
Chapter 5 PROGRAMING MODE PLU Data Registration 3/3 Entry examples are shown below. Select necessary registration items to enter. Item Operation Example: Department code “3” Example: Group code “2” Example: Item code “7232” Touch on the screen to access to the selection screen Then, touch one of the following buttons to select. - Page 97 Chapter 5 PROGRAMING MODE Example: Tax number “2” Example: Cost price “$2.88” Example: POP message number “1” SR-2000α User’s Manual (No. 0000A) 5-11...
-
Page 98: Finishing Plu Data Registration
Chapter 5 PROGRAMING MODE Finishing PLU Data Registration Touch [RETURN] on the screen. The confirmation screen appears on the display for saving. Touch [EXECUTE] to save the data. The data is saved, and the screen returns to the PLU File Registration screen. -
Page 99: Plu Price Change
Chapter 5 PROGRAMING MODE PLU PRICE CHANGE The registered PLU price data can be changed on the PLU File Registration screen. Confirm that the Registration Menu screen is displayed. Touch [PLU FILE / PRICE CHANGE] on the screen. The PLU File Registration screen appears on the display. - Page 100 Chapter 5 PROGRAMING MODE Enter the price using the keypad and press the [U/P] (Unit Price) key When the unit price is or the [FIX] key to change the set, the fixed price price. becomes “0”. When the fixed price is set, the unit price Example: Unit price $2.50 becomes “0”.
-
Page 101: Plu Name Registration
Chapter 5 PROGRAMING MODE PLU NAME REGISTRATION Confirm that the Registration Menu screen is displayed. Then, touch [PLU NAME] on the screen. The text edit screen appears on the display. It is also possible to call the PLU number by Then, enter the desired PLU touching the [PLU No.] number and press the PLU key on... -
Page 102: Campaign Message Registration
Chapter 5 PROGRAMING MODE CAMPAIGN MESSAGE REGISTRATION The campaign message can be registered. Message numbers 1 through 6 are default settings as follows: Therefore, messages can be registered within the range from 7 through 999. Confirm that the Registration Menu screen is displayed. - Page 103 Chapter 5 PROGRAMING MODE Enter a desired PLU number and press the PLU key to register as a campaign product. Example: PLU number “1” Then, touch the corresponding Markdown Mode field. The selection screen appears on the display. Then, touch the desired campaign type to select.
- Page 104 Chapter 5 PROGRAMING MODE Enter the campaign start time using the keypad, and touch the corresponding field to register. Example: Start time “10:00” Then, enter the campaign start date using the keypad, and touch the corresponding field to register. Example: Start date “July 21, 2004”...
- Page 105 Chapter 5 PROGRAMING MODE The Campaign Registration screen appears on the display. Repeat steps 2 through 10 for more registrations. Touch [MENU] to return the display to the Registration Menu screen. SR-2000α User’s Manual (No. 0000A) 5-19...
-
Page 106: Store Name And Address Registration
Chapter 5 PROGRAMING MODE STORE NAME AND ADDRESS REGISTRATION The store name and address can be registered. Store name and address are printed on label or receipt based on this setting. Store Name Touch [STORE NAME] on the Registration Menu screen. The Store Name/Address Registration screen is displayed. - Page 107 See Appendix “Text Editing”. Then, enter the characters using the screen keys and edit the text. Example: Store name “ISHIDA” Touch [RETURN] on the screen. The confirmation screen is displayed for saving. The confirmation screen appears on the display for saving.
-
Page 108: Store Address
Chapter 5 PROGRAMING MODE Store Address Example: Registration of the address “KYOTO, JAPAN”. Touch [ADDRESS] then [EDIT] on the screen. The text edit screen appears on the display. See Appendix “Text Editing”. Then, enter the address. Example: Address “Kyoto, Japan” Touch [RETURN] on the screen. -
Page 109: Print Selection Of Store Name/Address
Chapter 5 PROGRAMING MODE Print Selection of Store Name/Address Enter the store number, then touch [STORE] display field on the screen. Example: Store number “10” The store data to be printed on the label is selected. Touch [MENU] on the screen. The store name and address will be printed on the label as shown below. -
Page 110: Date/Time Registration
Chapter 5 PROGRAMING MODE DATE/TIME REGISTRATION Confirm that the Registration Menu screen is displayed. Then, touch [DATE/TIME] on the screen. The Time and Date Setting screen appears on the display. Then, enter the desired date using the keypad, and touch the DATE field to register. -
Page 111: Preset Keys Registration
Chapter 5 PROGRAMING MODE PRESET KEYS REGISTRATION PLU Preset Key Registration Confirm that the Registration Menu screen is displayed. Then, touch [PRESET KEYS] on the screen. The Preset Key Registration screen (with category keys) appears on the display. Then, touch [PAGE] on the screen. The Preset Key Registration screen (with PLU buttons) appears on the display. - Page 112 Chapter 5 PROGRAMING MODE Touch the Key Type dada field on the screen. The first page of preset key list appears on the display. Overwriting a data to an existing PLU preset When a data exists on the desired key is not possible. preset key, the data must be In this case, delete the deleted first in order to register a...
- Page 113 Chapter 5 PROGRAMING MODE Touch the Key Type dada field on the screen. The first page of preset key list appears on the display. Touch [PLU] on the screen to select. The Preset Key Registration screen (with PLU preset keys) appears on the display.
-
Page 114: Plu Name Edit
Chapter 5 PROGRAMING MODE PLU Name Edit Confirm that the Registration Menu screen is displayed. Then, touch [PRESET KEYS] on the screen. The Preset Key Registration screen (with PLU preset keys) appears on the display. Then, touch [EDIT] on the screen. Touch the desired PLU preset key. - Page 115 Chapter 5 PROGRAMING MODE The confirmation screen appears for saving. Then, touch [EXECUTE] to save the data. The edited text appears on the selected preset key. Repeat steps 3 through 6 above for more registrations. SR-2000α User’s Manual (No. 0000A) 5-29...
-
Page 116: Key Color Change
Chapter 5 PROGRAMING MODE Key Color Change Confirm that the Registration Menu screen is displayed. Then, touch [PRESET KEYS] on the screen. The Preset Key Registration screen (with PLU preset keys) appears on the display. Then, touch [KEY COLOR] on the screen. - Page 117 Chapter 5 PROGRAMING MODE Touch [BACK] on the screen to return to the Preset Key Registration screen (with PLU preset keys). Touch a desired PLU preset key to apply the selected colors. When the same coloring is applied to other PLU preset keys, repeatedly touch desired buttons.
-
Page 118: Key Layout Change
Chapter 5 PROGRAMING MODE Key Layout Change Confirm that the Registration Menu is displayed. Then, touch [PRESET KEYS]. The Preset Key Registration screen (with product category keys) appears on the display. Then, touch [PAGE] on the screen. The Preset Key Registration screen (with PLU preset keys) appears on the display. - Page 119 Chapter 5 PROGRAMING MODE Touch [LARGE], [MEDIUM], or [SMALL] to select the key size. Quadruple size Double size Single size Example: Single size to double size. Example: Double size to Quadruple size. When trying to make a key larger, confirm that the covering keys are all blank.
- Page 120 Chapter 5 PROGRAMING MODE Repeat steps 4 and 5 above for more registrations. Touch [MENU] on the screen. 5-34 SR-2000α User’s Manual (No. 0000A)
-
Page 121: Function Key Registration
Chapter 5 PROGRAMING MODE Function Key Registration Various function keys can be allocated on the preset keys. Available function keys are shown in the following 3 pop-up screens. SR-2000α User’s Manual (No. 0000A) 5-35... - Page 122 Chapter 5 PROGRAMING MODE Confirm that the Registration Menu is displayed. Then, touch [PRESET KEYS]. The Preset Key Registration screen (with product category keys) appears on the display. Then, touch [PAGE] on the screen. The Preset Key Registration screen (with PLU preset keys) appears on the display.
- Page 123 Chapter 5 PROGRAMING MODE The preset key list appears on the display. When the desired function is not found in this list, repeatedly touch [PAGE] until it appears on the list. Touch the desired function field to select. Example: Select [TARE]. For a function key that requires numeric entry, enter a numeric data using the keypad, and touch the...
-
Page 124: Page Copy
Chapter 5 PROGRAMING MODE Page Copy Confirm that the Registration Menu is displayed. Then, touch [PRESET KEYS] on the screen. The Preset Key Registration screen (with product category keys) appears on the display. Then, touch [PAGE EDIT] on the screen. Touch [PAGE] or [FUNC] to find out the original page to be copied. - Page 125 Chapter 5 PROGRAMING MODE The new page appears on the display. Then, touch [PAGE EDIT] on the screen. Enter the original page number and touch [COPY] on the screen. Example: Copy page 3 to the new page The confirmation screen appears on the display for copying.
-
Page 126: Page Delete
Chapter 5 PROGRAMING MODE Page Delete Confirm that the Registration Menu is displayed. Then, touch [PRESET KEYS] on the screen. The Preset Key Registration screen (with product category keys) appears on the display. Then, touch [PAGE EDIT] on the screen. Touch [PAGE] or [FUNC] to find out the page to be deleted. - Page 127 Chapter 5 PROGRAMING MODE Touch [DELETE] on the screen. The confirmation screen appears on the display for deletion. Then, touch [EXECUTE] on the screen. Repeat steps 3 through 6 above for more deletions. Touch [MENU] on the screen to finish this procedure. SR-2000α...
-
Page 128: Advertisement Message
Chapter 5 PROGRAMING MODE ADVERTISEMENT MESSAGE Advertisement messages can be displayed on the customer display Message Table Allocation Confirm that the Registration Menu is displayed. Then, touch [AD MSG] (Advertisement Message) on the screen to select. The Advertisement Message Registration screen appears on the display. - Page 129 Chapter 5 PROGRAMING MODE Touch one of the following buttons to select the display method. A message flashes on the customer display. A message scrolls on the customer display. Touch one of the following buttons to select the character size. Standard character size Wide character size Touch one of the following buttons...
- Page 130 Chapter 5 PROGRAMING MODE Allocate the advertisement message numbers to each desired field. Example: Message No. “1” on Basic Touch [NORMAL SCREEN] to change the key display to [TOTAL SCREEN]. Repeat steps 2 through 8 above for Total Screen allocation. 5-44 SR-2000α...
-
Page 131: Message Edit
Chapter 5 PROGRAMING MODE Message Edit Confirm that the Registration Menu is displayed. Then, touch [AD MSG] (Advertisement Message) on the screen to select. The Advertisement Message Registration screen appears on the display. Then, enter the scroll number using the keypad, and touch the Scroll No. - Page 132 Chapter 5 PROGRAMING MODE When the text editing is complete, touch [RETURN] on the screen. See Appendix “Text Editing” for more detailed information. The confirmation screen appears on the display for saving. Then, touch [EXECUTE] to save the registered message. 5-46 SR-2000α...
-
Page 133: Message Deletion
Chapter 5 PROGRAMING MODE Message Deletion Confirm that the Registration Menu is displayed. Then, touch [AD MSG] (Advertisement Message) on the screen to select. The Advertisement Message Registration screen appears on the display. Then, enter the scroll number using the keypad, and touch the Scroll No. - Page 134 Chapter 5 PROGRAMING MODE The confirmation screen appears for deletion. Then, touch [EXECUTE] on the screen. 5-48 SR-2000α User’s Manual (No. 0000A)
-
Page 135: Operator Name Registration
Chapter 5 PROGRAMING MODE OPERATOR NAME REGISTRATION Confirm that the Registration Menu is displayed. Then, touch [OPERATORS] on the screen to select. The Operator Registration screen appears on the display. Touch a desired field to select. Example: Operator No. “0003” Touch [EDIT] on the screen. - Page 136 Chapter 5 PROGRAMING MODE The text edit screen appears on the display. See Appendix “Text Editing” for more Enter the desired characters and detailed information. edit the text. When the text editing is complete, touch [RETURN] on the screen. 5-50 SR-2000α...
-
Page 137: Nutrition Registration
Chapter 5 PROGRAMING MODE 5.10 NUTRITION REGISTRATION Confirm that the Registration Menu is displayed. Then, touch [NUTRITION] on the screen to select. The Nutrition Registration screen appears on the display. Then, enter the nutrition number using the keypad, and press the PLU key. - Page 138 Chapter 5 PROGRAMING MODE The Nutrition Data Registration screen appears on the display. Enter a numeric data for each numeric field and touch the corresponding field to register. Example: Total calories “100” Repeat step 5 above for further required items. When the registration is complete, touch [RETURN] on the screen.
-
Page 139: Extra Message 1 - 3
Chapter 5 PROGRAMING MODE 5.11 EXTRA MESSAGE 1 - 3 Confirm that the Registration Menu is displayed. Then, touch [EXTRA MSG] on the screen to select. The Extra Message Registration screen appears on the display. Then, enter the message number and press the PLU key on the keypad. - Page 140 Chapter 5 PROGRAMING MODE Touch [MENU] on the screen 5-54 SR-2000α User’s Manual (No. 0000A)
-
Page 141: Coupon Message
Chapter 5 PROGRAMING MODE 5.12 COUPON MESSAGE Confirm that the Registration Menu is displayed. Then, touch [COUPON MSG] on the screen to select. The Coupon Message Registration screen appears on the display. Then, enter the message number and press the PLU key on the keypad. - Page 142 Chapter 5 PROGRAMING MODE Touch [MENU] on the screen. 5-56 SR-2000α User’s Manual (No. 0000A)
-
Page 143: Free Message 1 - 5
Chapter 5 PROGRAMING MODE 5.13 FREE MESSAGE 1 - 5 Any message such as cooking recipe, calorie, etc. can be freely registered. Confirm that the Registration Menu is displayed. Then, touch [FREE MSG] on the screen to select. The Free Message Registration screen appears on the display. - Page 144 Chapter 5 PROGRAMING MODE Touch [MENU] on the screen. 5-58 SR-2000α User’s Manual (No. 0000A)
-
Page 145: Department Name Registration
Chapter 5 PROGRAMING MODE 5.14 DEPARTMENT NAME REGISTRATION Department name (fresh meat, fresh fish, daily dishes, etc.) can be registered. Confirm that the second page of Registration Menu is displayed. Then, touch [DEPARTMENT] on the screen to select. The Department Registration screen appears on the display. - Page 146 Chapter 5 PROGRAMING MODE Repeat steps 2, 3 and 4 above for further registrations. Touch [MENU] on the screen. 5-60 SR-2000α User’s Manual (No. 0000A)
-
Page 147: Group Name Registration
Chapter 5 PROGRAMING MODE 5.15 GROUP NAME REGISTRATION Group name such as beef and pork, etc. can be registered. Confirm that the second page of Registration Menu is displayed. Then, touch [GROUP] on the screen to select. The Group Registration screen appears on the display. - Page 148 Chapter 5 PROGRAMING MODE Repeat steps 2, 3 and 4 above for further registrations. Touch [MENU] on the screen. 5-62 SR-2000α User’s Manual (No. 0000A)
-
Page 149: Pop Message
Chapter 5 PROGRAMING MODE 5.16 POP MESSAGE POP message can be registered within the range from message number 7 through 999. Message number 1 through 6 are default settings as follows: Confirm that the second page of Registration Menu is displayed. Then, touch [POP MESSAGE] on the screen to select. - Page 150 Chapter 5 PROGRAMING MODE The text edit screen appears on the display. See Appendix “Text Editing” for more Enter the desired characters and detailed information. edit the text. When the text editing is complete, touch [RETURN] on the screen. The confirmation screen appears on the display for saving.
-
Page 151: Check Label
Chapter 5 PROGRAMING MODE 5.17 CHECK LABEL Confirm that the second page of Registration Menu is displayed. Then, touch [CHECK LABEL] on the screen to select. The Check Label screen appears on the display. Enter Start PLU number using the keypad and touch the corresponding [SET]. -
Page 152: Appendix Text Editing
APPENDIX TEXT EDITING APPENDIX Text editing is explained by quoting the following PLU Name Registration screen as an example. Single Function Buttons Button Function Used to confirm the specified character style on the screen. Used for return the display to the Registration Menu screen. Used to copy the original data to the current data. -
Page 153: Multiple Function Buttons
APPENDIX Multiple Function Buttons Button Function Used to emphasize the characters with Touch the TYPE1 button to select Bold, Reverse, Underline, or Frame. the emphasizing type, then enter the characters. Touching this button changes the display in the following order. When emphasizing the characters later, touch the INSERT/SELECT →...
Need help?
Do you have a question about the SR-2000 alpha and is the answer not in the manual?
Questions and answers