Table of Contents
Advertisement
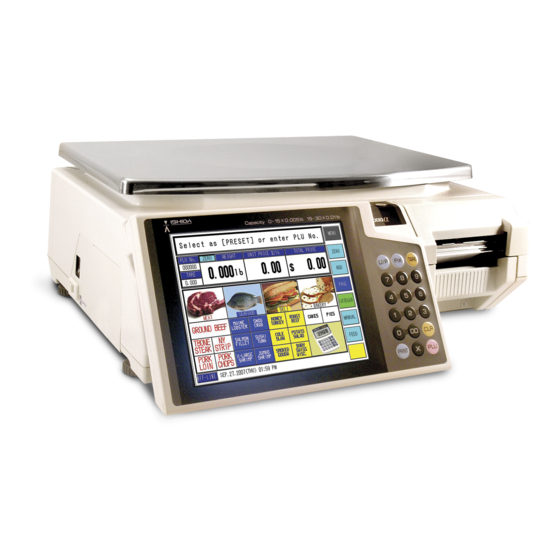
For those familiar with the Ishida SR-2000a Touch Screen scale, this document may be used as
a quick reference guide. Simply refer to the Table of Contents below and go to the appropriate
page for instructions. It may also be used as a source of detailed step-by-step instructions to
setup and configure the scale.
I.
Check and Update Firmware............................................................................................................... 2
II.
Clear Memory: Standard and Special ................................................................................................. 4
III.
Install RF card ..................................................................................................................................... 7
IV.
Configure IP Address, Subnet Mask, etc. ........................................................................................... 8
V.
Load i-View Backup File.................................................................................................................... 11
VI.
Setting Up Label Cassette(s) ............................................................................................................ 13
VII.
Setting Up Label Specifications ........................................................................................................ 14
VIII. Enable Ad (Display) Messages: ........................................................................................................ 16
IX.
Load PLU File Via ScaleLink Pro ...................................................................................................... 17
X.
Create Keyboards: Categories, Presets, and Function Keys............................................................ 18
A. Importing Key Images into ScaleLink Pro................................................................................... 18
B. Assigning Images to Keys .......................................................................................................... 18
C. Assigning Category Keys............................................................................................................ 19
D. Assigning Function Keys ............................................................................................................ 19
XI.
Appendix............................................................................................................................................ 21
1. Label sizes .................................................................................................................................. 21
Rev 1, September 2006
Ishida SR-2000a Touch Screen Scale and Printer
Quick Setup Instructions
1 / 21
SR-2000a Quick Setup
Advertisement
Table of Contents

Related Manuals for ISHIDA SR-2000a


Summary of Contents for ISHIDA SR-2000a
-
Page 1: Table Of Contents
Ishida SR-2000a Touch Screen Scale and Printer Quick Setup Instructions For those familiar with the Ishida SR-2000a Touch Screen scale, this document may be used as a quick reference guide. Simply refer to the Table of Contents below and go to the appropriate page for instructions. -
Page 2: Check And Update Firmware
The SR-2000a uses Compact Flash (CF) memory cards to store both the firmware and images. All dealers doing any work with the SR-2000a are going to need at least a CF card adapter. The adapter accepts the CF card and is then inserted into a PCMCIA slot on a notebook computer. - Page 3 Ishida SR-2000a Touch Screen Scale and Printer Quick Setup Instructions Figure 1. Scale Firmware CF Memory Card Location & Eject Button Figure 2. PCMCIA Card Adapter and Compact Flash (CF) Memory Card 3 / 21 Rev 1, September 2006 SR-2000a Quick Setup...
-
Page 4: Clear Memory: Standard And Special
8. Press MENU two times. 9. Skip to step 13 if working with an original 1 Meg SR-2000a. Note: Any SR-2000a with serial number 5031600 or higher has 2 Meg of memory. 10. Select MEMORY CLEAR. 11. Perform the only the first memory clear: SRAM Clear. - Page 5 Ishida SR-2000a Touch Screen Scale and Printer Quick Setup Instructions 15. After Special RAM Clear, it is necessary to set and adjust the following. a. Calibrate Touch Panel From Test Menu select KEY CHECK TOUCH PANEL ADJUST ii. Follow screen directions: [three "+" marks] Note: do not follow the final step to Initialize, this will reset the calibration.
- Page 6 Ishida SR-2000a Touch Screen Scale and Printer Quick Setup Instructions Screen 2. Memory Cleared Screen 3. SRAM -- Formatted to Max Memory (2 Meg) 6 / 21 Rev 1, September 2006 SR-2000a Quick Setup...
-
Page 7: Install Rf Card
Quick Setup Instructions Screen 4. Printer Memory Initialized III. Install RF card If the SR-2000a will be part of a wireless communication network the Symbol RF PCMCIA card must be installed. p/n 88313 Symbol PCMCIA RF card (LA-4121) 1. With the SR-2000a in OFF position remove left side white access panel. -
Page 8: Configure Ip Address, Subnet Mask, Etc
IV. Configure IP Address, Subnet Mask, etc. This section covers setting the scale's IP Address, Subnet Mask, etc. Instructions are also included for wireless configuration when the SR-2000a is equipped with the Symbol PCMCIA Wireless card. 1. Press MENU button (Supervisor). - Page 9 Ishida SR-2000a Touch Screen Scale and Printer Quick Setup Instructions 12. After scale reboots reenter LAN setting page (steps 1 -- 5 above). 13. Press PAGE to set wireless data. See Screen 6. 14. Set Comm Mode = INFRASTRUCTURE 15. Set WEP Encryption mode •...
- Page 10 Ishida SR-2000a Touch Screen Scale and Printer Quick Setup Instructions Screen 5. Ethernet Setting Data Screen 6. RF Setting Data 10 / 21 Rev 1, September 2006 SR-2000a Quick Setup...
-
Page 11: Load I-View Backup File
Add an identifying name to the Link Name field such as "Meat #1". Select OK, CLOSE. 3. Select the Backup & Restore tab. 4. Highlight the SR-2000a in the left-side window. 5. In the Restore box (lower, right-side) select SELECT. 6. Navigate to the desired backup file, select OPEN. - Page 12 Ishida SR-2000a Touch Screen Scale and Printer Quick Setup Instructions IMPORTANT - The items listed below are not included in the i-View back and must be set separately. Refer to the following sections for details to make these settings. •...
-
Page 13: Setting Up Label Cassette(S)
Ishida SR-2000a Touch Screen Scale and Printer Quick Setup Instructions VI. Setting Up Label Cassette(s) Although the Label Formats are restored by i-View, the Label Cassette settings are not. 1. Press MENU button (Supervisor). 2. Enter System Menu: 495344 PLU key. -
Page 14: Setting Up Label Specifications
Ishida SR-2000a Touch Screen Scale and Printer Quick Setup Instructions VII. Setting Up Label Specifications Two labels: 64x47mm and Continuous, require special settings to print properly. All other labels should be set to use the default Label Spec "01". 1. Press MENU button (Supervisor). - Page 15 Ishida SR-2000a Touch Screen Scale and Printer Quick Setup Instructions Screen 11. Label Specification for 64x47mm Label 15 / 21 Rev 1, September 2006 SR-2000a Quick Setup...
-
Page 16: Enable Ad (Display) Messages
Ishida SR-2000a Touch Screen Scale and Printer Quick Setup Instructions VIII. Enable Ad (Display) Messages: Although the Advertising (Scrolling) Message are restored by i-View, the settings for which messages to display and when are not. 1. Press MENU button (Supervisor). -
Page 17: Load Plu File Via Scalelink Pro
4. Verify the SR-2000a Status is "Connected". 5. Select the Send/Receive tab. See Screen 13. 6. From the Scale drop down menu select the SR-2000a . 7. From the Send/Receive Data drop down menu select PLU Select Send to Scale. -
Page 18: Create Keyboards: Categories, Presets, And Function Keys
1. Open ScaleLink Pro (version 3.24c or later). 2. Add the SR-2000a if necessary. Note: See section IX. "Load PLU File Via ScaleLink Pro" for details to add an SR-2000a. 4. From the Scales menu select SR-2000a Images. 5. Select Add. -
Page 19: Assigning Category Keys
Setting up Category keys is a two step process. First, Category keys are created on the Category Key Page then one Group key is assigned to each Preset Key Page to complete the link. 1. From the Scales menu select Memo/SR-2000a Presets. 2. If prompted, select the desired scale. 3. Select the Category Key Page. - Page 20 Ishida SR-2000a Touch Screen Scale and Printer Quick Setup Instructions Screen 14. Sample Category Screen with Categories and PLU Presets Screen 15. Sample Function Key Screen 20 / 21 Rev 1, September 2006 SR-2000a Quick Setup...
-
Page 21: Appendix
22: 64x59mm - COOL label 23: 64mm - Continuous with Reduced Safe Handling 24: 64x73mm - Safe Handling with Logo Revised SR-2000a Demo Program Label Formats - continuous strip: 2: 64x47mm - Standard UPC 6: 64x145mm - Bakery with Nutrition (with TransFat), landscape...
Need help?
Do you have a question about the SR-2000a and is the answer not in the manual?
Questions and answers