Table of Contents
Advertisement
Quick Links
Advertisement
Table of Contents

Related Manuals for AEG CCB6642ABM


Summary of Contents for AEG CCB6642ABM
- Page 1 CCB6642ABM User Manual Cooker USER MANUAL...
-
Page 2: Table Of Contents
14. ENERGY EFFICIENCY..................... 34 FOR PERFECT RESULTS Thank you for choosing this AEG product. We have created it to give you impeccable performance for many years, with innovative technologies that help make life simpler features you might not find on ordinary appliances. Please spend a few minutes reading to get the very best from it. - Page 3 ENGLISH manufacturer is not responsible for any injuries or damages that are the result of incorrect installation or usage. Always keep the instructions in a safe and accessible location for future reference. 1.1 Children and vulnerable people safety WARNING! Risk of suffocation, injury or permanent disability.
- Page 4 This appliance is not intended to be used on a ships, • boats or vessels. Do not install the appliance behind a decorative door • in order to avoid overheating. Do not install the appliance on a platform. •...
-
Page 5: Safety Instructions
ENGLISH Ensure that the appliance is switched off before • replacing the lamp to avoid the possibility of electric shock. If the mains power supply cable is damaged, it must • be replaced by the manufacturer, its Authorised Service Centre or similarly qualified persons to avoid an electrical hazard. - Page 6 2.2 Electrical Connection • Do not change the specification of this appliance. WARNING! • Make sure that the ventilation Risk of fire and electric openings are not blocked. shock. • Do not let the appliance stay unattended during operation.
- Page 7 ENGLISH • Discoloration of the enamel or • Make sure the cavity and the door are stainless steel has no effect on the wiped dry after each use. Steam performance of the appliance. produced during the operation of the • Use a deep pan for moist cakes. Fruit appliance condensates on cavity walls juices cause stains that can be and can cause corrosion.
-
Page 8: Product Description
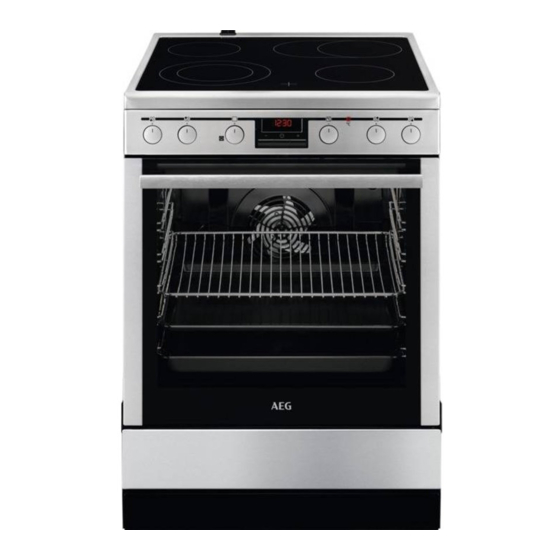
3. PRODUCT DESCRIPTION 3.1 General overview Knob for the oven functions Display Knob for the temperature Temperature indicator / symbol Knobs for the hob Heating element Lamp Shelf support, removable Cavity embossment Shelf positions 3.2 Cooking surface layout Cooking zone 1200 W... -
Page 9: Hob - Daily Use
ENGLISH 4.1 Initial Cleaning Press again and again until the indicator for the Time of Day function Remove all accessories and removable flashes. shelf supports from the oven. To set a new time, refer to "Setting the Refer to "Care and cleaning" chapter. time". -
Page 10: Hob - Hints And Tips
5.3 Residual heat indicator To activate the outer ring: turn the knob clockwise through a light resistance WARNING! . Then turn the knob There is a risk of burns from counterclockwise to the correct heat residual heat. setting. To deactivate the outer ring: turn the The indicator comes on when a cooking knob to the off position. -
Page 11: Hob - Care And Cleaning
ENGLISH Heat setting Use to: Time Hints (min) 6 - 7 Gentle fry: escalope, veal cor- as nec- Turn halfway through. don bleu, cutlets, rissoles, essary sausages, liver, roux, eggs, pancakes, doughnuts. 7 - 8 Heavy fry, hash browns, loin 5 - 15 Turn halfway through. - Page 12 Symbol Oven function Application Pizza Setting To bake food on one shelf position for a more in- tensive browning and a crispy bottom. Conventional Cooking To bake and roast food on one shelf position. True Fan Cooking To add humidity during the cooking. To get the PLUS right colour and crispy crust during baking.
- Page 13 ENGLISH Released humidity can cause burns: Push the deep pan between the guide bars of the shelf support. • Do not open the appliance door when using the function: True Fan Cooking PLUS. • Open the appliance door with care after using the function: True Fan Cooking PLUS.
-
Page 14: Oven - Clock Functions
Put the baking tray or deep pan on the telescopic runners. Put the wire shelf on the telescopic runners so that the feet point downwards. Put the wire shelf on the deep pan. Put the wire shelf and the deep pan on the telescopic runners. - Page 15 ENGLISH 9.3 Clock functions table Clock function Application TIME OF DAY To set, change or check the time of day. DURATION To set how long the appliance operates. To set when the appliance deactivates. TIME DELAY To combine DURATION and END function. MINUTE MINDER To set countdown time.
-
Page 16: Oven - Hints And Tips
4. Turn the knob for the oven functions 2. Press and hold and the knob for the temperature to The clock function goes out after some the off position. seconds. 9.8 Cancelling the clock functions 1. Press the again and again until the necessary function indicator starts to flash. - Page 17 ENGLISH Baking results Possible cause Remedy The cake is too dry. The oven temperature is The next time you bake, set a too low. higher oven temperature. The baking time is too long. The next time you bake, set a shorter baking time.
- Page 18 Food Temperature (°C) Time (min) Shelf posi- tion Short bread / Pastry Stripes 20 - 35 Biscuits made with sponge mixture 150 - 160 15 - 20 Pastries made with egg white, merin- 80 - 100 120 - 150...
- Page 19 ENGLISH Food Temperature (°C) Time (min) Shelf posi- tion 2 positions Biscuits made with egg white, mer- 80 - 100 130 - 170 2 / 4 ingues Macaroons 100 - 120 40 - 80 2 / 4 Biscuits made with yeast dough 160 - 170 30 - 60 2 / 4...
- Page 20 Food Temperature (°C) Time (min) Shelf posi- tion Buttered almond cake / Sugar cakes 20 - 30 190 - 210 Fruit flans (made with yeast dough / 35 - 55 sponge mixture) Fruit flans made with short pastry 170 - 190...
- Page 21 ENGLISH Food Temperature (°C) Time (min) Shelf posi- tion Sweet bakes 180 - 200 40 - 60 Fish bakes 180 - 200 40 - 60 Stuffed vegetables 180 - 200 40 - 60 1) Preheat the oven. 10.5 Pizza Setting Food Temperature (°C) Time (min) Shelf posi-...
- Page 22 Cakes in baking tray Food Temperature (°C) Time (min) Shelf posi- tion Swiss roll 20 - 30 Brownie 30 - 40 Cakes in tin Food Temperature (°C) Time (min) Shelf posi- tion Soufflè 30 - 40 Sponge flan base...
- Page 23 ENGLISH Vegetarian Food Temperature (°C) Time (min) Shelf posi- tion Mixed vegetables in pouch 400 g 25 - 35 Omelette 20 - 30 Vegetables on tray 700 g 25 - 35 10.7 True Fan Cooking PLUS Bakery Food Temperature Water in Preheating Time (min) Shelf...
- Page 24 Food Temperature Water in Preheating Time (min) Shelf (°C) the cavity time (min) posi- emboss- tion ment (ml) Bread rolls 20 - 25 Homemade piz- 15 - 20 Focaccia 20 - 30 Vegetables 15 - 25 Rice 15 - 26...
- Page 25 ENGLISH 10.9 Conventional Roasting Beef Food Quantity Temperature Time (min) Shelf po- (°C) sition Pot roast 1 - 1.5 kg 200 - 230 105 - 150 Pork Food Quantity Temperature Time (min) Shelf po- (°C) sition Shoulder, neck, ham 1 - 1.5 kg 210 - 220 90 - 120 joint...
- Page 26 Poultry Food Quantity Temperature Time (min) Shelf posi- (°C) tion Poultry portions 200 - 250 g each 220 - 250 20 - 40 Duck 1.5 - 2 kg 210 - 220 80 - 100 Goose 3.5 - 5 kg...
- Page 27 ENGLISH Poultry Food Quantity Temperature Time (min) Shelf posi- (°C) tion Poultry portions 200 - 250 g each 200 - 220 30 - 50 Duck 1.5 - 2 kg 180 - 200 80 - 100 Goose 3.5 - 5 kg 160 - 180 120 - 180 Turkey...
-
Page 28: Oven - Care And Cleaning
Food Function Temper- Time (min) Accesso- Shelf ature ries position (°C) Apple pie, 2 tins (ø True Fan Cooking 70 - 80 Tray 20 cm) on the grid, PLUS diagonally shifted. Fatless sponge cake, Conventional 30 - 45 Grid 1 tin (ø... - Page 29 ENGLISH 11.2 Stainless steel or aluminium ovens Clean the oven door with a damp cloth or sponge only. Dry it with a soft cloth. Do not use steel wool, acids or abrasive materials as they can damage the oven surface. Clean the oven control panel with the same precautions.
- Page 30 11.6 Removing and cleaning The back lamp the door glasses The lamp glass cover is at The door glass in your the back of the cavity. product can be different in type and shape from the 1. Turn the lamp glass cover examples you see in the counterclockwise to remove it.
-
Page 31: Troubleshooting
ENGLISH 12. TROUBLESHOOTING WARNING! Refer to Safety chapters. 12.1 What to do if... Problem Possible cause Remedy You cannot activate the ap- The appliance is not connec- Check if the appliance is cor- pliance. ted to an electrical supply or rectly connected to the elec- it is connected incorrectly. -
Page 32: Installation
Problem Possible cause Remedy The water comes out of the There is to much water in the Deactivate the oven and cavity embossment. cavity embossment. make sure that the appliance is cold. Wipe the water with a cloth or sponge. Add the correct amount of water to the cavity embossment. - Page 33 ENGLISH 13.3 Levelling of the appliance CAUTION! Make sure you install the anti-tilt protection at the correct height. Make sure that the surface behind the appliance is smooth. 1. Set the correct height and area for the appliance before you attach the anti-tilt protection.
-
Page 34: Energy Efficiency
14. ENERGY EFFICIENCY 14.1 Product information for hob according to EU 66/2014 Model identification CCB6642ABM Type of hob Hob inside Freestanding Cooker Number of cooking zones Heating technology Radiant Heater... - Page 35 ENGLISH 14.3 Product Fiche and information for ovens according to EU 65-66/2014 Supplier's name Model identification CCB6642ABM Energy Efficiency Index 95.3 Energy efficiency class Energy consumption with a standard load, conven- 0.95 kWh/cycle tional mode Energy consumption with a standard load, fan-forced 0.82 kWh/cycle...
- Page 36 Do not dispose of product to your local recycling facility or contact your municipal office. appliances marked with the symbol with the household waste. Return the...
- Page 37 ENGLISH...
- Page 38 www.aeg.com...
- Page 39 ENGLISH...
- Page 40 www.aeg.com/shop...
Need help?
Do you have a question about the CCB6642ABM and is the answer not in the manual?
Questions and answers