
Related Manuals for LUNA OPTICS LN-G2-B50


Summary of Contents for LUNA OPTICS LN-G2-B50
- Page 1 LN-G2-B50 GEN-2 HD DIGITAL TECHNOLOGY DAY & NIGHT BINOCULAR 6-30x50 INSTRUCTION MANUAL IMPORTANT: Please read this manual in its entirety prior to using this device!
- Page 2 DIGITAL DAY/NIGHT VISION: 1. Your new binocular operates with batteries. Unlike a daylight binocular, where you see the image due to light traveling through the glass and the prisms, the digital night vision device works by processing the image with the internal CMOS sensor and projecting the image onto an LCD screen.
-
Page 3: Operation
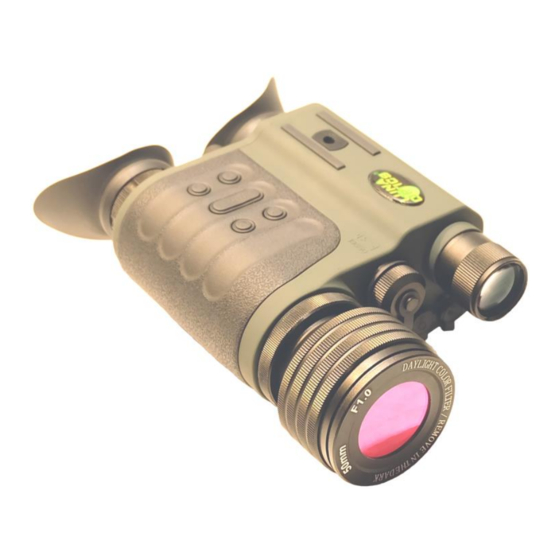
YOUR PACKAGE INCLUDES THE FOLLOWING: 1. LN-G2-B50 Digital Binocular 2. 8GB Micro SD-card (installed into the SD-card slot) 3. Color Enhancing Filter (Daylight use only for vivid colors) 4. Carry case with shoulder strap 5. Padded neck strap 6. DC adapter with US plug (EU plug adapter included for International customers) (110V/240V compatible) 7. - Page 4 LN-G2-B50 DIGITAL DAY/NIGHT VISION BINOCULAR Glossary: 1 – Objective Lens Focusing Wheel 9 – IR Beam Brightness Wheel 2 – Video Record Button 10 – Accessory Mount 3 – Still Image (PIC) Button 11 – USB / Micro-SD Card Ports 4 –...
-
Page 5: Installing The Batteries
INSTALLING THE BATTERIES: Your digital day/night vision unit operates on 2xCR123 batteries commonly available in retail shops and online. NOTE: it is possible to use rechargeable RCR123 batteries, but their peak voltage cannot exceed 4.5V each battery! WARNING: if 2xCR123 batteries are supplied with the unit – they are not rechargeable –... -
Page 6: Brightness Adjustment
SETTING UP DATE AND TIME: Turn the unit ON. After image appears, press and hold for 2 seconds the IR/Menu Button (6). Menu will appear on the image screen. Select date/Time option with Image button (4) and activate it with IR/Menu button (6). Default date format is MM/DD/YYYY. - Page 7 magnification is 30x. You can see the zoom level in the left lower corner of the image screen once you start pressing the IMAGE button on the + side. To decrease the image magnification, press the IMAGE button on the – side. USING INFRARED ILLUMINATOR: Your digital viewer is equipped with a built-in powerful Infrared illuminator light.
- Page 8 TAKING PICTURES AND RECORDING HD VIDEOS: WE STRONGLY RECOMMEND MOUNTING YOUR DEVICE ONTO A STEADY TRIPOD WHEN RECORDING VIDEO OR TAKING STILL IMAGES – PARTICULARLY WHEN WATCHING DISTANT OBJECTS AND/OR UTILIZING ZOOM FUNCTION Your digital binocular has the ability to take pictures and record HD videos onto the external Micro-SD card.
- Page 9 DATA VIEWING AND DATA TRANSFER OPTIONS: It is possible to view the images and videos directly on the unit’s micro-display. To do so, while the unit is operating press the Power button (5) momentarily just once. You will be able to switch between images and videos by pressing IMAGE button (4) in either + or –...
- Page 10 eyepiece and observe the WI-FI link name and Password. The Wi-Fi link is the first line of the screen and the password is on the second line. 3. Find the device Wi-Fi signal on your phone (same as shown on the unit’s display) and select it.
-
Page 11: Troubleshooting
A pop-up window will appear. You can label your partition (such as “Luna Optics Monocular” or any other name you desire (it’s optional) and then make sure to select “FAT32” as the File System. Then click “OK”. -
Page 12: Technical Specifications
Power_______________2 x 3V Lithium (CR123A) / or 5V/2A Power Bank Operating Time _______________________________2.5-3hrs (CR123A) Dimensions______________180mm x 120mm x 60mm (7.2”x4.7”x2.3”) Weight__________________________________________ 725g (1.6lbs) Warranty_______________________________________________1yr --------------------------------------------------------------------------------------------------------- LUNA OPTICS, INC. 300 Hawthorn Dr., Fate, TX 75087 (USA) E-mail: info@lunaoptics.com Web: www.lunaoptics.com © 2020...
Need help?
Do you have a question about the LN-G2-B50 and is the answer not in the manual?
Questions and answers