
Subscribe to Our Youtube Channel
Related Manuals for Zeta Premier EXPro


Summary of Contents for Zeta Premier EXPro
- Page 1 www.acornfiresecurity.com EXPro Installation Manual INSTALLATION MANUAL www.acornfiresecurity.com...
-
Page 2: Table Of Contents
www.acornfiresecurity.com EXPro Installation Manual Contents INTRODUCTION ............................4 HANDLING THE PCBS .......................... 4 USING THIS MANUAL .......................... 4 ABOUT THE EXPRO ..........................4 INDICATIONS & CONTROLS ........................6 INDICATIONS ............................6 CONTROLS ............................8 MOUNTING THE FIRE ALARM PANEL ...................... 9 PLANNING CABLE ENTRY ........................ - Page 3 www.acornfiresecurity.com EXPro Installation Manual CHANGE PASSWORD ........................21 RESOUND ............................21 PANEL OPERATION ..........................22 NORMAL OPERATION ........................22 FIRE ALARM CONDITION ........................22 WHAT TO DO IN THE EVENT OF A FIRE..................22 RESETTING FROM AN ALARM CONDITION .................. 22 MANUAL EVACUATION ........................
-
Page 4: Introduction
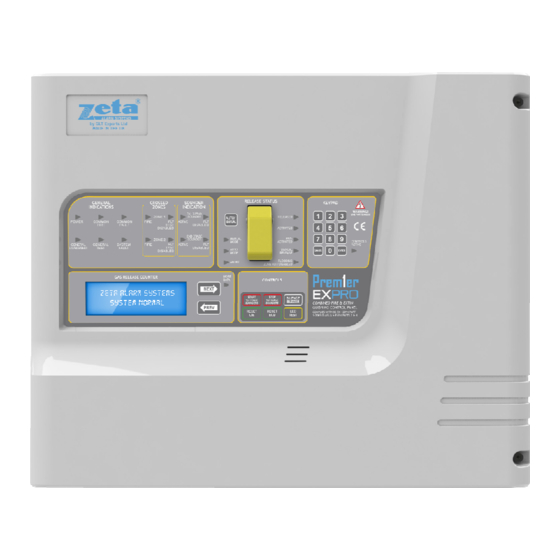
ABOUT THE EXPRO The Premier EXPRO is a 2 zone, 1 area extinguishing panel. It is designed to operate in Environmental Class A (temperature range of - 5 °C to + 40 °C) It has 2 zones dedicated to the extinguishing section. These are known as crossed or co-incidence zones. - Page 5 EXPro Installation Manual The Premier EXPRO will enter the activated (second stage alarm) condition within 1 second of the second crossed zone signalling an alarm. Released condition The Premier EXPRO will enter the released condition (bottle output activated) within 1...
-
Page 6: Indications & Controls
EXPro Installation Manual INDICATIONS & CONTROLS INDICATIONS Here is the fascia for the Premier EXPRO panel. Figure 1. EXPro fascia layout Each function has its own indication LED. There are Alarm (Active), Fault, Test & Disablement LEDs for most panel inputs and outputs. For most functions, more than one LED will light (e.g. zone 1 fire... - Page 7 www.acornfiresecurity.com EXPro Installation Manual The EXPRO has the following LED indicators:- General indication LED Colour Function / Meaning Power Green Power healthy Common Fire Indicates when the panel is in an alarm condition Common Fault Yellow Indicates when the panel is in a fault condition General Disablement Yellow...
-
Page 8: Controls
www.acornfiresecurity.com EXPro Installation Manual CONTROLS Label Start 1 Stage Sounders Used to start the 1 stage sounders Stop 1 Stage Sounders Used to silence the 1 stage sounders Silence Buzzer Used to silence the internal buzzer in a fault or alarm condition Reset Used to reset the fire detection zone... -
Page 9: Mounting The Fire Alarm Panel
MOUNTING THE FIRE ALARM PANEL The Premier EXPRO comes with cable entry point on the top edge of the control panel. It is strongly recommend that the PCB is removed before the entry holes are drilled. With the PCB removed it also makes it easier while fixing the back box to the wall. -
Page 10: Electrical Connections
www.acornfiresecurity.com EXPro Installation Manual ELECTRICAL CONNECTIONS CONNECTING TO THE MAINS The mains supply to the panel is fixed wiring, using Fire resisting 2-core + screen cable (between 1mm² and 2.5mm²), fed from an isolating double pole switch fused spur, fused at 3A. IT SHOULD NOT BE CONNECTED THROUGH AN RCD. -
Page 11: Connecting The Batteries
EXPro Installation Manual CONNECTING THE BATTERIES The Premier EXPRO requires 2 x 12V sealed lead acid (SLA) batteries The two batteries are wired in SERIES. The +ve of one battery is connected to the RED battery lead The –ve of the other battery is connected to the BLACK battery lead The –ve of the first battery is connected to the +ve of the second battery using the link wire... -
Page 12: Detectors And Sounders
Figure 5. Wiring the detectors WIRING THE SOUNDERS The Premier EXPRO has 2 first stage / fire sounder circuits, each rated at 150mA. Each sounder circuit must be fitted with 18KΩ end of line resistor. The EXPRO also has 1 x second stage sounder circuit rated at 250mA. -
Page 13: Other Connections
STAGE FIRE RELAYS The Premier EXPRO has one first stage & one second stage volt free change over relay that operates on an alarm. It is rated at 1amp, SELV. The relay remains operated until the panel has been reset. -
Page 14: Bottle Output
EXPro Installation Manual BOTTLE OUTPUT The bottle output on the Premier EXPRO is used to drive a gas release solenoid. It is fused @ 1amp. Bottle + Bottle - Solenoid Valve Figure 8. Wiring diagram for the solenoid valve (Bottle output) -
Page 15: Panel Menus
www.acornfiresecurity.com EXPro Installation Manual PANEL MENUS To access the panel requires the user code to be entered (the default code is 2222). Once the Controls Active LED is on you will now be able to start and stop the first stage sounders, reset, silence the inter buzzer and access the relays configuration menu. - Page 16 www.acornfiresecurity.com EXPro Installation Manual Use the NEXT and PREV button to cycle through items that can be disabled, pressing OK toggles the item between the enabled/disabled states: Zone 1 Prevents the panel from responding to an alarm in zone 1 Zone 2 Prevents the panel from responding to an alarm in zone 2 Gas Fired input...
- Page 17 www.acornfiresecurity.com EXPro Installation Manual *** Zone In Test *** Zone 1 Time Left: 15:00 The panel will automatically exit from a test condition after 15 minutes. The test condition can be manually exited from the test menu. Change Time: Allows the user / engineer to set the system clock. SET UP TIME 12:00 Approved Document No: GLT-212-7-1...
-
Page 18: Configuring The Panel
EXPro Installation Manual CONFIGURING THE PANEL The Premier EXPRO has been designed to be easy to set up. Zones 1 & 2 are configured as a double knock pair, so do not need to be configured as such. ENGINEERING MENU Accesses the engineering menu, the engineering menu requires the engineers’... - Page 19 www.acornfiresecurity.com EXPro Installation Manual option 5, Then as for the countdown timer select option 3 timers and press the next key until the Release timer option is shown. Press enter to set the release time using the keypad and then press enter to save the new time.
-
Page 20: Relays Menu
www.acornfiresecurity.com EXPro Installation Manual RELAYS MENU The relays menu allows the user/engineer to set the normal condition of the output relays. - Relay config - ENTER to Toggle Stage Relay NO _/_ The relay outputs can be set between normally open (NO, default) and normally closed (NC). The on-board relays that can be configured in this manner are 1 stage relay, 2 stage relay,... -
Page 21: Sounder
www.acornfiresecurity.com EXPro Installation Manual SOUNDER The EXPRO has two sounder sequences, Standard and Brazilian. In most instances the Standard sounder sequence should be used, the Brazilian option is provided to comply with local Brazilian regulations. Standard stage stage sounders on Stage stage sounders on, 2 stage sounders pulsed... -
Page 22: Panel Operation
7. Record findings in the fire alarm log book. RESETTING FROM AN ALARM CONDITION After the relevant action has been taken, the Premier EXPro fire alarm panel can be reset by the following:- 1. Gain user access to the panel by entering the password (default 2222) 2. -
Page 23: Manual Evacuation
www.acornfiresecurity.com EXPro Installation Manual MANUAL EVACUATION The first stage sounders can be started by activating the controls and pressing the START/STOP Stage Sounder Button. The first stage relay is NOT operated by this action. The common fire & first stage sounder active LEDs will light. FIRST STAGE ALARM On detection of a “FIRE”... -
Page 24: Manual Mode
www.acornfiresecurity.com EXPro Installation Manual MANUAL MODE In this mode operation, Zone Fire and Fault alarms are still in operation, and first & second stage sounders will operate, but the bottle output to the extinguishing agent will not operate. RESET To reset panel from a first stage alarm condition, activate the controls and press START/STOP SOUNDERS, followed by SILENCE BUZZER, then RESET. -
Page 25: Access Levels
www.acornfiresecurity.com EXPro Installation Manual ACCESS LEVELS Access level Accessed by Access method Functions accessed General public Default state View panel LED test Manual release Responsible person User level Start/stop sounders password Silence buzzer (default: 2222) Reset panel Disable sections of the system Put the panel into test mode Set the default relay states View logs... -
Page 26: Battery Calculation
www.acornfiresecurity.com EXPro Installation Manual BATTERY CALCULATION DEVICE CURRENT CONSUMPTION EXPRO PANEL IN VARIOUS STATES State Current Consumption Mains fail, Buzzer silenced 52mA Mains fail, Buzzer active 57mA Mains failed, 1 Stage Alarm 110mA Mains failed, 2 Stage Alarm 150mA Bottle released, Gas fired 167mA EXPANSION BOARDS Option... -
Page 27: Example Battery Size Calculation
The bottle output activates 1A for 5 minutes = 57mA = 0.057A = 48h = Premier EXPro Alm + 8x Maxitone Sounder + 1 detector in alarm = 110mA + (8 x 25mA) + 40mA = 0.110A + 0.2A + 0.04A = 0.35A = 0.5h = 0.084h (5 minutes) -
Page 28: Connections
www.acornfiresecurity.com EXPro Installation Manual CONNECTIONS The following figures show the connections for the EXPro Figure 9. Top connections Figure 10. Bottom connections TERMINAL DESCRIPTION Conn Label Description Compatible Equipment Zone 1 First Crossed Zone Conventional Smoke/Heat Detector Zone 2 Second Crossed Zone Conventional Smoke/Heat Detector Gas Fired Gas Fired Input (from bottle) -
Page 29: Panel Specification
www.acornfiresecurity.com EXPro Installation Manual PANEL SPECIFICATION ENCLOSURE SPECIFICATION Description Value Enclosure Size (L x W x D mm) 310 x 369 x 113 Top Cable Entries ELECTRICAL SPECIFICATIONS Electrical Description Minimum Nominal Maximum Mains Voltage -15% 230 / 115 VAC 50-60Hz +10% Battery Voltage 2 x 12V SLA... -
Page 30: Design Specifications
Detection & Fire Alarm Systems – Power Supply Equipment FIRE ALARM CONTROL SECTION. As well as meeting the requirements of EN54-2:1998 A1 + A2, the Premier EXPro also has the following options with requirements:- Clause 7.8 Output to fire alarm devices (Option with requirements) Clause 10 Test Condition (Option with requirements) EXTINGUISHING CONTROL S ECTION. - Page 31 www.acornfiresecurity.com EXPro Installation Manual The extinguishing control section also has the following ancillary functions not required by the Standard:- Serial repeater output Automatic mode relay Manual only mode relay Abort relay First Stage Alarm Relay (common with fire alarm section) ...
- Page 32 www.acornfiresecurity.com EXPro Installation Manual Manual Modification History ***Do Not Print this Page when creating PDF Of the manual*** Issue Date Changes 19/8/2013 First release of manual 14/10/2013 Corrected wrong reference to user manual. Added set time instructions. Added Access level info. 16/7/2014 Added Environment Class A.
Need help?
Do you have a question about the Premier EXPro and is the answer not in the manual?
Questions and answers