Advertisement
Advertisement
Table of Contents

Summary of Contents for PerkinElmer OMNI Bead Ruptor Elite
- Page 1 Bead Ruptor Elite Bead Mill Homogenizer User Manual...
- Page 2 Data herein has been verified and validated. It is believed adequate for the intended use of the instrument. If the instrument or procedures are used for purposes over and above the capabilities specified herein, confirmation of the validity and suitability should be obtained; otherwise OMNI International does not guarantee results and assumes no obligation or liability.
- Page 3 WEEE Compliance Statement Valid for customers in EU countries We are committed to being a good corporate citizen. As part of that commitment, we strive to maintain an environmentally conscious manufacturing operation. The European Union (EU) has enacted a directive on product recycling (Waste Electrical and Electronic Equipment, WEEE).
- Page 4 Copyright This manual is published by OMNI International a PerkinElmer company, 935 Cobb Place Blvd, Kennesaw, GA 30144 USA. Copyright 2020, OMNI International, Inc. All rights reserved, including but not limited to those rights to reproduce this publication or parts thereof. Reproduction of this publication or parts thereof, or the products it describes, by any means or in any form is expressly prohibited without the written permission of OMNI International.
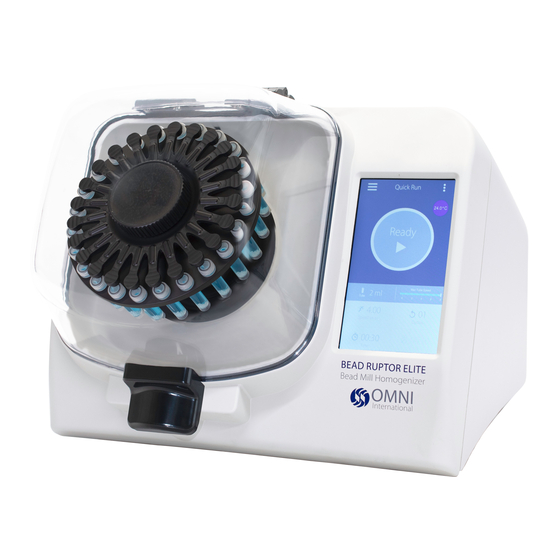
- Page 5 Overview 220 volts 1. Lid 5. Touch Screen 2. Drive Hub 6. 120V/230V Fuse 3. Tube Carriage 7. ON/Off Switch 4. Lid Latch 8. Power Cord Port The Bead Ruptor Elite Bead Mill consists of the following: Description Quantity Bead Ruptor Elite Bead Mill Assembly Universal Finger Plate Power Cord, US, EU, UK, AU...
-
Page 6: Loading Sample Tubes
Loading Sample Tubes Place Tube Carriage (sold A minimum of four tubes are separately) on Drive Hub. required and must be spaced evenly*. Place Finger Plate on Drive Hub. Screw down to secure tubes. Close the lid until the locking handle clicks into place. -
Page 7: General Operation
General Operation Getting Started 1. Menu 2. Home 3. Search 4.Configure Language Setting - Select Menu - Select Configure - Select Language To navigate through menu Choose from French, English, German, Italian, or Spanish - Select Home... -
Page 8: Programming Mode
Overview Bacteria - 30 mL 28°C Ready Max Tube Speed 30 ml Tube 4.50 00:30 00:30 1. Menu 6. Processing chamber temperature 2. Program Name 7. Run / Pause 3. Tube Setting 8. Tube Speed Limit 4. Speed 9. Number of Cycles 5. -
Page 9: Manual Programming
Manual Programming - Select Run Variable To adjust variable - Ok to Save Parameter Operating Range Speed / Energy From 0.8 m/s to 8 m/s From 0:01 to 9:59 in Time increments of 1 second Number of Cycles 1 to 10 D Dwell/ Pause between Runs 0:00 to 9:59 Save Program... -
Page 10: Troubleshooting
Troubleshooting Error Cause Possible Solution 1. Check that nothing prevents the lid from closing. The lid is not latched properly 2. Press lid and ensure the handle is locked properly. Unclosed Lid 1. Turn off the unit. Detection system is faulty 2. - Page 12 935 Cobb Place Blvd. Kennesaw, GA 30144 800.776.4431 • 770.421.0058 www.omni-inc.com PN: 03-241E Rev. C...


Need help?
Do you have a question about the OMNI Bead Ruptor Elite and is the answer not in the manual?
Questions and answers