
Related Manuals for Parker SC80


Summary of Contents for Parker SC80
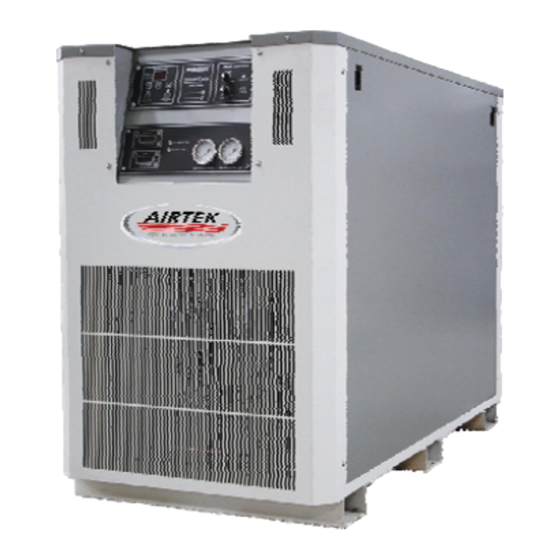
- Page 1 Airtek Division SMART CYCLE / COLD TRAP REFRIGERATED AIR DRYERS OPERATORS MANUAL: MODELS SC/CT80 — SC/CT3000 SERVICE DEPARTMENT 1-800-451-6023...
- Page 2 Table of Contents Section 1.0 EQUIPMENT DATA SHEET Section 2.0 GETTING STARTED Section 3.0 DRYER INSTALLATION Section 4.0 CONTROLS Section 5.0 SENSORS, CONTROLS & RELAYS Section 6.0 START UP PROCEDURE Section 6.0 ROUNTINE MAINTENANCE Section 7.0 DIAGNOSTIC CODES Section 8.0 TROUBLE SHOOTING Section 9.0 MAINTENACE SCHEDULE...
- Page 3 ection 1.0 – EQUIPMENT DATA SHEET Air Dryer as Built Specifications S rial No. Model: DESCRIPTION VALUE UNIT ---------------Dryer Design Max Air Flow SCFM Comments: ------- --------Dryer Design Max Air PSI PSI/BAR ------Dryer Design Max Inlet Temperature ºF/ºC REFRIGERANT --------------------------Supply Voltage VOLT CHARGE: Lbs.
- Page 4 Section 2.0 - Getting Started Before unpacking/uncrating your new dryer, inspect the carton/crate for damage. Note any damage on the freight bill. File notice of concealed damage if: there are any dents in the cabinets the air and drain pipes are not straight there is any sign of oil on the skid or floor the refrigerant gauges show NO pressure File these claims with the carrier immediately!
- Page 5 Section 3.0 – DRYER INSTALLATION NEVER work on unit under pressure NEVER work on unit when power is connected. DO NOT over pressurize unit. DO NOT pass air through the unit until it has been stabilized (operating 2 - 15 minutes). The larger the dryer, the longer it takes to stabilize. The dryer is considered stabilized when the refrigeration suction gauge reads between 28 to 35 PSI.
- Page 6 Install a bypass line and gate valve to permit isolation of the dryer from the air system. This is done to provide easy service and/or removal of the dryer without interruption of air to the system. Fig. 2 (Models 80- 300)
- Page 7 USE TWO (2) WRENCHES WHEN CONNECTING DRYER TO PIPING. THIS WILL PREVENT DAMAGE TO INTERNAL AIR LINES. Electrical Connections To be performed by a qualified person only. Risk of serious injury or death. Before connecting electrical power to the dryer check for correct voltage and phase at the connection box.
- Page 8 Section 4.0 - Controls REFRIGERANT DRYER CONTROLLER FEATURES AND OPERATIONS...
- Page 9 (1) Dew Point Controller and Display. Directly controls dew point and provides consistent digital display of the dew point. Factory set at 38ºF. During Actual display mode, displays the dew point temperature from 20ºF to 99ºF or -6ºC to 37ºC. During DP SET mode, the unit displays dew point set points from 36ºF to 50ºF in 2º...
- Page 10 (9) Drain Control Settings. The DP5050-L series control panel will operate by either a “Level Float” or “Timed” interval. If the dryer is equipped with a Level Float (electrical connections to terminal J9), the drain will respond to the float signal on demand to operate the drain.
- Page 11 Panel C (12) High Ambient Temp Display. Should not be above 100ºF. High ambient temperature can cause head pressure tripping of refrigeration system and could result in non-warranty damage to refrigeration compressor. This display is used for water temperature in water cooled units. (13) High Inlet Temp Display.
- Page 12 Section 5.0 – Sensors, Controls and Relays Drain Relay (K1) Opens the drain valve according to drain controls. Suction Relay (K2) Turns on according to the mode and dew point conditions and opens the suction or liquid line valve when opened. Unloader Relay (K3) Turns on according to the modes and dew point and opens the unloader valve when active.
- Page 13 Section 6.0 – START UP PROCEDURE There should be NO air flow through the dryer before or during start up. It is recommended that the dryer be installed with bypass piping to better service the unit. SC/CT 80-100 1. Plug in unit. 2.
- Page 14 9. If the storage conditions were adverse, the refrigeration compressor may make a loud may make a loud metallic hammering noise. If this happens, turn the dryer off at the panel and wait 60 seconds. Then turn the dryer back on. Repeat this procedure until the refrigeration compressor runs smoothly.
- Page 15 Section 7.0 – ROUTINE MAINTENANCE Routine Maintenance The air cooled condenser on your dryer must be kept clean. Inspect on a regular basis for dirt or debris that might accumulate. Remove any debris immediately. Although the filter on your dryer is connected to a drain timer it is recommended that the drain and solenoid be checked weekly.
- Page 16 Section 8.0 – TROUBLE SHOOTING & & & & º º º º º º...
- Page 17 Section 9.0 – MAINTENANCE SCHEDULE The maintenance chart below indicates the components that should be checked while performing routine maintenance on the dryer. The chart also indicates how often a specific check should be done REFRIGERATED SERIES MAINTENANCE SCHEDULE TIME WEEKLY MONTHLY ANNUALLY...
- Page 18 replace it. Ensure that air pressure is removed from the machine prior to removing the filter element. On units that have the Control Center option installed the filter differential can be checked on the control board. The coalescing element should be changed annually. To change the filter element: •...
- Page 19 Compressor Oil Level The oil level in the compressor should be checked daily. The refrigeration system should never need oil unless the system is leaking or has been recently repaired. If it is determined that the system needs oil, do the following: •...
- Page 20 Section 11.0 – MAINTENANCE CHARTS Maintenance Log Date Service Performed Parts Replaced Initials...
- Page 21 Section 11.0 – MAINTENANCE CHARTS, cont. Element Replacement Log Part No. Date Initials...
- Page 22 Section 12.0 – ASSOCIATED DRAWINGS...
- Page 38 Section 13.0 – WARRANTY AND PRODUCT REGISTRATION WARRANTY REGISTRATION FORM IMPORTANT! Mail or Fax (716-685-1010) Today! Fold and Seal and your Service Warranty will be registered immediately. We are here to help. For more information on service or installation call the Service Department at 1-888-606-9303 Model # Serial # Company...
Need help?
Do you have a question about the SC80 and is the answer not in the manual?
Questions and answers