Table of Contents
Advertisement
Quick Links
Advertisement
Table of Contents

Related Manuals for Esse 600T


Summary of Contents for Esse 600T
- Page 1 600T Heat Storage Range Cooker Instruc�on Manual UK & I Version...
-
Page 2: Table Of Contents
CONTENTS 1. GENERAL HEALTH & SAFETY......................3 2. WELCOME TO YOUR ESSE ......................4 3. PRODUCT OVERVIEW........................5 4. OPERATING INSTRUCTIONS ......................6 THE DOORS.............................6 SLUMBER ............................7 THE CONTROLS ..........................7 THE OVENS .............................8 THE STEAM VENTS..........................9 THE GRILL............................10 THE HOTPLATE..........................11 HEAT UP TIMES..........................11 ESSE ACCESSORIES AND COOKWARE ...................12 INSIDE DOOR LINERS ........................12... -
Page 3: General Health & Safety
1. GENERAL HEALTH & SAFETY All ESSE heat storage range cookers are designed and manufactured to be simple and efficient to use, and we’ve taken great care to ensure that they meet the applicable safety requirements, when appropriately installed and used. Before use, ensure you are familiar with the following:... -
Page 4: Welcome To Your Esse
Before you switch on your ESSE for the first time, ensure that your installer has installed the cooker inline with the ‘Installation’ section of this manual, and that the protective plastic film has been removed from the inside face of the two doors. -
Page 5: Product Overview
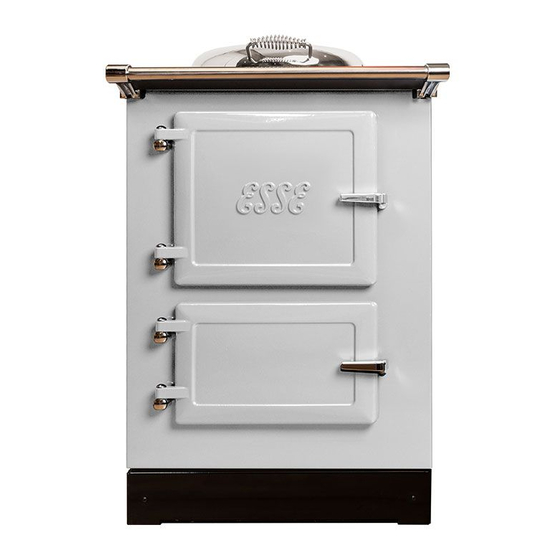
3. PRODUCT OVERVIEW Bolster lid Steam vents Hotplate Control panel Top oven & grill Bottom oven Key features and parts INCLUDED WITH YOUR ESSE ✔ ✔ Oven Shelves (X3) Oven Glove and Apron ✔ ✔ Grill Pan Control Box Feet (X2) ✔... -
Page 6: Operating Instructions
4. OPERATING INSTRUCTIONS 4. OPERATING INSTRUCTIONS THE DOORS The two cast iron doors are opened by lifting the chrome catch upwards, then swinging the door forwards. Take care not to allow the door to swing open freely and clash with adjacent cabinets / surfaces. -
Page 7: Slumber
‘slumber’, which will allow the cooker to heat up to cooking temperature more quickly, whilst managing power consumption and running costs. Keeping your ESSE in slumber will also allow you to enjoy all the benefits which an ambient heat source brings. -
Page 8: The Ovens
4. OPERATING INSTRUCTIONS THE OVENS Your 600T incorporates two cooking ovens, all of which incorporate ESSE’s patented wrap around elements. The heating elements provide a unique even heat source from front to back and top to bottom, so there’s no need to rotate oven trays, or adjust shelf heights. As a result, during cooking the bottom of each oven can also be used to place oven trays on to. -
Page 9: The Steam Vents
4. OPERATING INSTRUCTIONS THE STEAM VENTS All cookers produce steam when in use. Your ESSE incorporates two ‘steam vents’ located at the rear of the top surface. The steam vents can be adjusted to either retain or release the steam, depending upon what you are cooking in the ovens. -
Page 10: The Grill
4. OPERATING INSTRUCTIONS THE GRILL The door must be left fully open when using the grill. The grill is located within the top oven. When in use, the grill overrides the oven, so the top oven elements will switch off when the grill is turned on. (The two bottom ovens and hotplate remain unaffected by the grill being in use). -
Page 11: The Hotplate
4. OPERATING INSTRUCTIONS THE HOTPLATE For your peace of mind, we fully test your ESSE cooker in our factory before it leaves us, so as result, you may see some slight discolouration of the hotplate. The hotplate can be used completely independently from the ovens, and the temperature can be fully adjusted with the control dial. -
Page 12: Esse Accessories And Cookware
4. OPERATING INSTRUCTIONS ESSE ACCESSORIES AND COOKWARE Your 600T came supplied with an ESSE Roasting Dish, Grill Pan, Oven Glove and Apron. However, additional ESSE cookware is available to purchase, through our cookware website at www.esse.com/cookware Our cookware range includes great items for use with your ESSE, including a Cast Iron Casserole Dish, Cast Iron Griddle Pan, Stainless Steel Kettle and Bolster Lid Covers. - Page 13 Over time, the rope seals on the doors will soften, and may need replacing. Rope seals Replacement rope and bonding silicone are available through your retailer, or online at www.esse.com...
-
Page 14: Warranty
ESSE replacement parts should be used, or your warranty may become invalid. WARRANTY Your ESSE heat storage range cooker has been built to the highest standard using premium materials, and comes with a two year manufacturer’s warranty. Register your ESSE online at www.esse.com/warranty-registration. -
Page 15: Troubleshooting
4. OPERATING INSTRUCTIONS TROUBLESHOOTING Problem Cause Solution • Ensure the grill dial is turned • The gill has not been switched on. clockwise to the desired setting, and the indicator light is glowing red. Grill not working • The grill is set to automatically •... -
Page 16: Planning The Installation
We do not recommend using extension cables with this appliance. REQUIRED SPACE To best receive your new ESSE, we strongly recommend that you take care to ensure that the space is properly prepared. ESSE heat storage range cookers are hand crafted, so small variations in size can occur. - Page 17 5. INSTALLATION INSTRUCTIONS However, if your ESSE will be positioned next to a combustible surface, (such as an unprotected solid wood work surface), we strongly recommend you increase this distance to 20mm, to reduce the risk of the worktop cracking.
-
Page 18: Power Supply
5. INSTALLATION INSTRUCTIONS POWER SUPPLY Your ESSE 600T is simple and easy to install, with one13 Amp plug. As a result, your ESSE can simply be plugged into a standard 13A plug socket. 13 Amp model The sockets should be positioned to the side of your ESSE, not behind it, (as the additional depth will require your ESSE to be positioned further forward) –... -
Page 19: Ventilation
At this time please examine the cooker for any damage to the surface finishes and glass hob. In the unlikely event of any damage being observed on your ESSE cooker, or should any of the supplied accessories be missing, please contact your retailer for advice. - Page 20 ESSE Engineering Ltd., Long lng, Barnoldswick, Lancashire, BB18 6BJ Website and On-line Store www.esse.com R2 210928...
Need help?
Do you have a question about the 600T and is the answer not in the manual?
Questions and answers