Table of Contents
Advertisement
Quick Links
Advertisement
Table of Contents

Related Manuals for Esse 1000X


Summary of Contents for Esse 1000X
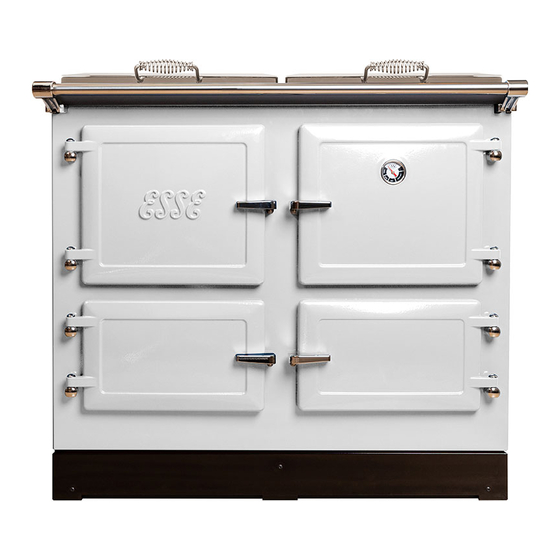
- Page 1 1000X Heat Storage Range Cooker Instruction Manual UK & I Version...
-
Page 2: Table Of Contents
CONTENTS 1. GENERAL HEALTH & SAFETY......................3 2. WELCOME TO YOUR ESSE ......................4 3. PRODUCT OVERVIEW........................5 4. OPERATING INSTRUCTIONS ......................6 THE DOORS.............................6 SLUMBER ............................7 THE CONTROLS ..........................7 THE CLOCK AND TIMER ........................8 THE OVENS ...........................12 THE STEAM VENTS........................13 THE GRILL............................14 THE HOTPLATE..........................16 HEAT UP TIMES..........................17... -
Page 3: General Health & Safety
1. GENERAL HEALTH & SAFETY All ESSE heat storage range cookers are designed and manufactured to be simple and efficient to use, and we’ve taken great care to ensure that they meet the applicable safety requirements, when appropriately installed and used. Before use, ensure you are familiar with the following:... -
Page 4: Welcome To Your Esse
At ESSE, we work hard to continuously look for ways to improve our products, and as such, we reserve the right to change specifications and make modifications to the appliance described within this manual,at any time. -
Page 5: Product Overview
Induction hob Steam vents Hotplate Control panel Simmerplate Top oven & grill Slow cook oven Bottom oven Key features and parts INCLUDED WITH YOUR ESSE Oven Shelves (X4) Oven Glove and Apron ✔ ✔ Grill Pan Wire Brush ✔ ✔... -
Page 6: Operating Instructions
4. OPERATING INSTRUCTIONS 4. OPERATING INSTRUCTIONS THE DOORS The four cast iron doors are opened by lifting the chrome catch upwards, then swinging the door forwards.Take care not to allow the door to swing open freely and clash with adjacent cabinets / surfaces. -
Page 7: Slumber
However, when not in use, we recommend setting each cooking area to ‘slumber’, which will allow the cooker to heat up to cooking temperature more quickly, whilst managing power consumption and running costs. Keeping your ESSE in slumber will also allow you to enjoy all the benefits which an ambient heat source brings. -
Page 8: The Clock And Timer
‘Control Dial’ (5) until the correct time is reached. Release the ‘Clock Set’ button. Your ESSE is factory set for the temperature of the hotplate and two main ovens to be controlled manually, using the four temperature control dials hidden behind the top left door. When the Manual Operation LED (7) glows orange, your ESSE is set to ‘Manual Control’. - Page 9 (unless the individual temperature control dial is set to 0°C), which both provides a gentle background heat to the room, and reduces the heat up time of the hotplate / oven(s). Your ESSE will then automatically increase the temperature of the hotplate / oven(s), to the desired temperature, at the desired time of day.
- Page 10 4. OPERATING INSTRUCTIONS Push and hold down both the ‘On Time’ (2) and ‘Off Time’ (3) buttons simultaneously. The screen will flash ‘ON’, to show that manual operation has been activated. The hotplate / oven(s) respective LEDs will turn red and the orange ‘Manual Operation LED’...
- Page 11 that your ESSE is once again set to manual operation. Your ESSE is now in manual operation, so remember to adjust the temperature control dials to 0°C, slumber or any other desired temperature. The timer incorporates a countdown alarm, which can be set to count down any period of time.
-
Page 12: The Ovens
4. OPERATING INSTRUCTIONS THE OVENS Your 1000X incorporates three cooking ovens, all of which incorporate ESSE’s patented wrap around elements. The heating elements provide a unique even heat source from front to back and top to bottom, so there’s no need to rotate oven trays, or adjust shelf heights. As a result, during cooking the bottom of each oven can also be used to place oven trays on to. -
Page 13: The Steam Vents
The Oven Gauge, with temperature guide THE STEAM VENTS All cookers produce steam when in use. Your ESSE incorporates two ‘steam vents’ located at the rear of the top surface. The steam vents can be adjusted to either retain or release the steam, depending upon what you are cooking in the ovens. -
Page 14: The Grill
4. OPERATING INSTRUCTIONS For example… Steam vent closed If you are cooking something which will benefit from retaining the moisture, (such as baking a sponge cake), the steam vent can be left closed, to keep the moisture within the oven. Steam vent open If you are cooking something which would benefit from the moisture escaping, (such as roast potatoes), the steam vents can be swung open, to... - Page 15 4. OPERATING INSTRUCTIONS The supplied grill pan should be positioned on a wire shelf, which can be fitted on any of the four heights of oven shelf runners. Typically the top shelf runner is used for grilling, but take care to ensure that the food to be grilled does not touch the grill element.
-
Page 16: The Hotplate
4. OPERATING INSTRUCTIONS THE HOTPLATE For your peace of mind, we fully test your ESSE cooker in our factory before it leaves us, so as result, you may see some slight discolouration of the hotplate. The hotplate can be used completely independently from the ovens, and the temperature can be fully adjusted with the control dial. -
Page 17: Heat Up Times
4. OPERATING INSTRUCTIONS HEAT UP TIMES Your 1000X is designed to be permanently left on, ensuring the cooker is ready to provide the unique surround heat for perfect cooking and baking, provided by an ESSE. Keeping at least one of the ovens on Slumber will dramatically reduce the heat up times of the ovens and hotplate, prevent a build-up of moisture, (which can lead to rusting), whilst also providing a gentle warmth to your kitchen. -
Page 18: The Induction Hob
4. OPERATING INSTRUCTIONS THE INDUCTION HOB The induction hob functions entirely independently from the hotplate, and all the controls are located on the induction top. Induction Hob controls Power On / Off Bottom Left Zone Display Lock Top Left Zone Display Lock Active Indicator Top Right Zone Display Bottom Left Zone Selection... - Page 19 4. OPERATING INSTRUCTIONS Using pans on the induction hob To get the best out of your induction hob, it’s crucial to only use the correct material, size and shape of pans. The correct Due to the way induction hob technology works, it is critical that only pans of material the correct material are used.
- Page 20 4. OPERATING INSTRUCTIONS Unlocking and locking When power is first given to the induction hob, it will beep three times and a series of numbers will be shown in each of the induction zone controls, indicating the version of the software built into the induction hob.
- Page 21 4. OPERATING INSTRUCTIONS STEP 3 STEP 4 Then use the ‘+’ and ‘-‘ buttons to scroll If further induction zones are to be used, through to the desired setting from 1 – 9, repeat this process on the other induction (and on to Power Boost, if required).
- Page 22 4. OPERATING INSTRUCTIONS Pan detection The induction hob has a built in pan detection system, which only supplies power to the induction zone, if an appropriate pan has been detected. If no appropriate pan has been detected, a flashing ‘U’ will be shown in the induction zone control, indicating that no power is being supplied to the induction zone.
- Page 23 4. OPERATING INSTRUCTIONS Residual Heat Display The technology used within your induction hob means the pan is heated directly, and not the glass. However, the hot pan transfers heat back down to the glass during use, leaving residual heat within the glass, even when the pan has been removed.
- Page 24 Pan Placement On your 1000X, we recommend only using one pan on each induction zone. However, it is important to ensure that the pans do not touch in two or more places when placed on active inductions zones. Doing so will create an extended induction field, which may cause permanent damage to your pans.
-
Page 25: Esse Accessories And Cookware
See the ‘Installation Instructions’ section of this manual for more information on installing your 1000X. ESSE ACCESSORIES AND COOKWARE Your 1000X came supplied with an ESSE Roasting Dish, Grill Pan, Oven Glove and Apron. However, additional ESSE cookware is available to purchase, through our cookware website at www.esse.com/cookware. -
Page 26: Cleaning & Maintenance
& towel rail. General cleaning In general, most of your ESSE can be kept clean using a soft lint-free cloth and soapy water, and then immediately drying with a cloth. We recommend any liquid or food spills are cleaned up immediately, so as not to bake onto the cooker, or discolour the surface material. -
Page 27: Warranty
ESSE replacement parts should be used, or your warranty may become invalid. WARRANTY Your ESSE heat storage range cooker has been built to the highest standard using premium materials, and comes with a two year manufacturer’s warranty. Register your ESSE online at www.esse.com/warranty-registration. -
Page 28: Troubleshooting
4. OPERATING INSTRUCTIONS TROUBLESHOOTING Problem Cause Solution • Ensure the grill dial is turned • The gill has not been switched on. clockwise to the desired setting, and the indicator light is glowing red. Grill not working • The grill is set to automatically •... -
Page 29: Installation Instructions
We do not recommend using extension cables with this appliance. REQUIRED SPACE To best receive your new ESSE, we strongly recommend that you take care to ensure that the space is properly prepared. ESSE heat storage range cookers are hand crafted, so small variations in size can occur. - Page 30 5. INSTALLATION INSTRUCTIONS However, if your ESSE will be posi�oned next to a combus�ble surface, (such as an unprotected solid wood work surface), we strongly recommend you increase this distance to 20mm, to reduce the risk of the worktop cracking.
-
Page 31: Power Supply
The sockets should be positioned to the side of your ESSE, not behind it, (as the additional depth will require your ESSE to be positioned further forward) – Preferably, have the sockets to the left of your 1000X, which is closer to the mains cable port on your ESSE. -
Page 32: Unpacking The Appliance
At this time please examine the cooker for any damage to the surface finishes and glass hob. In the unlikely event of any damage being observed on your ESSE cooker, or should any of the supplied accessories be missing, please contact your retailer for advice. -
Page 33: Switching The Cooker On For The First Time
Once the power supply is connected, you will hear a beep from the induction hob, and the cooling fan will temporarily activate, before switching itself off. The inbuilt clock will initially show ‘ESSE’, before defaulting to ‘12.00’. The instructions to set the clock can then be followed, as shown in the Operating Instructions section of this manual. -
Page 34: Notes
5. INSTALLATION INSTRUCTIONS 6. NOTES 6. NOTES6. NOTES... - Page 35 5. INSTALLATION INSTRUCTIONS 6. NOTES 6. NOTES...
- Page 36 ESSE Engineering Ltd., Long lng, Barnoldswick, Lancashire, BB18 6BJ Website and On-line Store www.esse.com R2210928...
Need help?
Do you have a question about the 1000X and is the answer not in the manual?
Questions and answers