Table of Contents
Advertisement
Quick Links
Advertisement
Table of Contents

Subscribe to Our Youtube Channel
Related Manuals for Esse 1000 WN


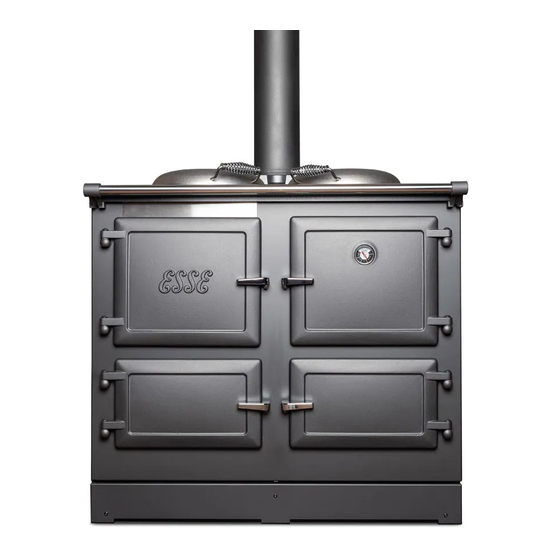
Summary of Contents for Esse 1000 WN
- Page 1 1000 W Heat Storage Range Cooker Instruction Manual...
-
Page 2: Table Of Contents
THE IMPORTANCE OF A HEALTHY FLUE ..............30 CLEANING THE FLUE WAYS - EVERY 3 MONTHS ........... 31 CLEANING THE EXIT FLUE - EVERY 6 MONTHS ............. 34 CARING FOR YOUR ESSE COOKER ................. 36 REPLACEMENT PARTS .................... 38 GUARANTEE ......................39 NOTES ........................ -
Page 3: Statutory Warnings
1000 WN & 1000 WD Installation & Commissioning Instructions STATUTORY WARNINGS Please read these instructions carefully for full information on the safe installation, use and care of your new ESSE appliance. We cannot accept responsibility for damage to persons or items due to poor or incorrect installation of this appliance. -
Page 4: Technical Information
This appliance must be correctly installed in accordance with the manufacturer’s instructions by a suitably qualified person. ESSE does not accept responsibility for damage to persons or items resulting from poor or incorrect installation of this appliance. Do not let children near the oven during use to avoid the danger of burns or injury. Use of the appliance by the elderly or infirm should be supervised. -
Page 6: Spacing And Dimensions
SPACING AND DIMENSIONS FIGURE 1: 1000 W COOKER DIMENSIONS... -
Page 7: Chimney & Flue Information
CHIMNEY & FLUE INFORMATION The successful operation of the cooking appliance relies on the adequate performance of the chimney to which it is connected. The following chimney guidelines must be followed: • It should be installed in accordance with BS EN 105287-1:2007. •... - Page 8 The chimney/flue to which this appliance is being connected must be swept and examined for soundness prior to installation. Remedial action should be taken if required, seeking expert advice if necessary. Where the chimney is believed to have served an open fire installation it is possible that a higher flue gas temperature from a closed appliance may loosen deposits that were firmly adhered, with the consequent risk of flue blockage.
- Page 9 FIGURE 2: CHIMNEY & FLUE PERFORMANCE LOW FLUE DRAUGHT SYMPTOMS: DIFFICULT TO LIGHT AND SMOKE COMING INTO THE ROOM CAUSE REMEDY Cold chimney. Line the chimney. Chimney too short. Extend the chimney. Down draught. Relocate/extend chimney terminal. Fit an anti-down draught cowl. Chimney diameter too large.
-
Page 10: Unpackaging Your New Cooker
UNPACKAGING YOUR NEW COOKER Unpack your new ESSE Cooker, removing all of the outer packing and accessories from the top and bottom ovens, including protective film on the door liners. At this time please examine the cooker for any damage to the finish and hob. -
Page 11: Commisioning Checklist
COMMISIONING CHECKLIST To assist with any potential guarantee claim please complete the following information: To be completed by the installer. Dealer the appliance was purchased from: Name: Address: Telephone Number: ESSENTIAL information: Date Installed: Model Description: Serial Number: Installation Engineer: Company Name: Address: Telephone Number:... - Page 12 FIGURE 4: 1000 WN PRODUCT FICHE...
- Page 13 FIGURE 5: 1000 WD PRODUCT FICHE...
- Page 14 FIGURE 6: MINIMUM CLEARANCES TO COMBUSTIBLES FOR THE ESSE 1000 WOOD APPLIANCE.
-
Page 15: Installation
INSTALLATION You must be aware of the following safety requirements & regulations: This appliance shall be installed in accordance with the regulations in force. Read the instructions before installing or using this appliance. The cooker must be installed in accordance with: All relevant British Standards / Codes of Practice and the relevant Building / IEE regulations Location of the Oven This appliance is designed for domestic cooking only. - Page 16 Explain all controls and flue way access for cleaning. Placing the cooker The 1000 W can be lifted from the pallet it is delivered on utilising ESSE lifting wheels issued to ESSE retailers. These allow the cooker to be wheeled into position in the home.
-
Page 17: Flue Draught Test
FLUE DRAUGHT TEST • Measure and record flue draught. • Check ventilation. • Check there is no extractor fan, other appliance or other flue interferes. • With D model, check plumbing circuit This test is only a guide as an apparently poor flue may improve once the appliance is installed, lit and the flue is warmed. -
Page 18: Hot Water System
HOT WATER SYSTEM A. There are two connections, both 1” BSP Female on the left hand side. General notes follow below. B. The D boiler is of stainless steel construction for use on an open vented direct or indirect system. General Notes on Water Systems: 1. -
Page 19: Safety Notes
1000 WN & 1000 WD Operation Instructions SAFETY NOTES Please refer to ‘Installation’ section of this manual to ensure the appliance has been correctly installed and is connected to a suitable flue. Failure to do so will seriously inhibit the cooker’s performance and could be potentially fatal. -
Page 20: Introduction
INTRODUCTION Your ESSE 1000 W is a combination appliance providing a hot plate, 3 ovens of different temperatures, room heat and in the case of the WD model domestic hot water. The firebox behind the top left door has an inner glass door for viewing the fire, which also houses the air controls. -
Page 21: Before Using Your Cooker
BEFORE USING YOUR COOKER Ensure that any plastic film used to protect surfaces has been removed from the bolster lids and from the inside of oven doors. The hotplate has been coated with oil at the factory to prevent rusting and therefore will require wiping with a damp cloth and drying with a tea towel or kitchen roll. - Page 22 FIGURE 9: INNER FIRE DOOR AND AIR CONTROLS LEFT CLOSED PRIMARY AIR CONTROL IGNITION CONTROL RIGHT OPEN Open the outer cast iron door to reveal the glass door and set primary and ignition air controls to open position. Open the glass door and set the fire using rolled up paper, on top of which small sticks of dry kindling wood has been placed.
-
Page 23: Cooking On The Hotplate
COOKING ON THE HOTPLATE The hotplate is a heavy iron casting, machined flat on the cooking surface. Heat up from cold or low can be achieved quite quickly with a fast burning fire. Leave the bolster lids down to allow the hotplate to warm up. Once hot, the hotplate will retain temperature for long periods even as the fire burns down. - Page 24 the door is opened although the oven itself will not lose temperature as quickly. The dial can take a short time to register the correct temperature once the door is again closed. FIGURE 10B: COOKER LAYOUT The ovens are all of equal depth and each is equipped with wire shelves which can be set to the desired height.
-
Page 25: Ash Removal
FIGURE 12: THERMODIAL AND APPROXIMATE TEMPERATURES. FIGURE 13: COOKER TOOL ASH REMOVAL ASH REMOVAL When burning wood, only remove small amounts of ash from the fire bed, leaving ideally 30mm depth of ash in the bottom for best performance. -
Page 26: Types Of Fuel
TYPES OF FUEL Seasoning and storing firewood. Wood, which has recently been cut and is still full of sap and moisture is known as "green" wood. Greenwood will generally burn poorly and inefficiently, because it can have over 50% water in its cells. It may be hard to light, smoulder, not put out any heat and cause more than the usual amount of creosote to build up in your chimney. -
Page 27: The Wood Burning Process
THE WOOD BURNING PROCESS Understanding what happens when wood is burnt will enable you to burn wood in a more environmentally friendly way, reduce the maintenance required for your chimney and get more out of your wood. There are 3 stages in the wood burning process: Evaporation When you light the cooker a lot of energy will be needed at first to boil away any... -
Page 28: Operating Tips
well worth the effort. Only empty excess ash periodically and always leave a bed of ash on which to light the next fire. OPERATING TIPS By taking time to get to know your cooker, following our maintenance guidelines and using good quality firewood you should enjoy trouble free operation of your wood fired cooker. -
Page 29: What Type Of Wood Is Best
WHAT TYPE OF WOOD IS BEST? The difference between 'hard' and 'soft' woods is the density of their cells or fibres. As a general rule, the deciduous trees (those that lose their leaves in the autumn) are usually thought of as hardwoods and the evergreen trees (such as pines, firs and spruce) as the softwoods. - Page 30 There is also the matter of seasoning to be considered. When you buy wood, it will usually have been cut in the winter of the year you buy it. Hard woods tend to take longer than softwoods to fully dry out. Softwoods cut in the previous winter should, with proper storage, be ready to burn the next autumn, whereas many hardwoods may take a bit longer than that.
-
Page 31: The Importance Of A Healthy Flue
THE IMPORTANCE OF A HEALTHY FLUE The successful operation of your range cooker is entirely dependent on the adequate performance (pull) of the chimney or flue to which it is connected. The following maintenance guidelines will not have the desired impact unless the flue is also maintained and cleaned regularly. -
Page 32: Cleaning The Flue Ways - Every 3 Months
CLEANING THE FLUE WAYS - EVERY 3 MONTHS Always carry out cleaning procedures when the cooker is out and has been allowed to cool sufficiently to avoid burns. With time and experience you will be able to gauge the intervals between flueway cleaning more accurately. It will vary depending on the quality of your firewood and performance of your flue. - Page 33 Flue box and Flueway FIGURE 16: ACCESS THE REAR FLUEWAY VIA THE FLUEBOX. Remove the front of the flue connector box and insert the flue brush from left to right, angling the brush down at 45°. Once you find the flue way entrance push the brush down until it stops then gently but firmly pull back and forth 3 or 4 times then remove the brush.
- Page 34 Right Side Flueway FIGURE 18: ACCESS THE RIGHT SIDE FLUEWAY VIA THE TOP OF THE COOKER. There are two methods to clean the right side flueway. The first is to insert the brush at a shallow angle as shown above. The brush will need to turn 90° into the flueway so steady pressure will be needed to help the brush head round the bend.
-
Page 35: Cleaning The Exit Flue - Every 6 Months
Cleaning the Flueway Between the Ovens Remove the inspection cover in the base of the main oven and insert the flue rake, raking from side to side and making sure the rake reaches the back and the side of the flue boxes. Vacuum the soot. FIGURE 20: REMOVAL OF BASE PLATE TO ACCESS THE FLUEWAY IN BETWEEN THE OVENS. - Page 36 FIGURE 22: LOCATION OF MAIN FLUE INSPECTION HATCH.
-
Page 37: Caring For Your Esse Cooker
CARING FOR YOUR ESSE COOKER Your ESSE cooker is easy to keep clean. The cast iron hotplate helps to clean itself, by carbonising cooking spills and splashes. Just brush off the carbon dust. For stubborn stains, don’t be afraid to use a wire brush on the cast iron hotplate and inside the ovens. - Page 38 Replacing the Firebox Door Glass: The firebox door glass can be changed easily if damaged or broken. FIGURE 23: MAKE-UP OF THE INNER FIRE DOOR. 1. When the cooker is cool, open the firebox outer door and the firebox inner door. 2.
-
Page 39: Replacement Parts
REPLACEMENT PARTS FIGURE 24: FIREBOX CONSUMABLE PARTS. FIGURE 25: NON-FIREBOX PARTS... -
Page 40: Guarantee
ESSE engineer to inspect the appliance and carry out any work that may be deemed necessary. If the fault is not due to faulty manufacture but some other cause i.e. -
Page 41: Notes
NOTES... -
Page 42: Hot Chocolate Pudding Recipe
HOT CHOCOLATE PUDDING RECIPE For over a decade ESSE has partnered with River Cottage HQ’s award winning cookery school in Devon, UK. Hugh Fearnley-Whittingstall has shared a best-loved favourite recipe for fellow ESSE cooking stove owners to enjoy creating. Hot Chocolate Pudding... - Page 43 Set aside to cool a little. Preheat the oven to 190°C/ESSE Dial Guide HOT. (Aim for the dial reading to be at the low end of HOT). Butter a small oven dish.
- Page 44 ESSE Engineering Limited Long Ing Lane, Barnoldswick Lancashire, BB18 6BJ Website and On-line Store: www.esse.com 1000X R1 230213...
Need help?
Do you have a question about the 1000 WN and is the answer not in the manual?
Questions and answers