Advertisement
© 2009, Videolarm, Inc. All Rights Reserved
W M 2 0 G
Outdoor Dime Housing Brackets and Mounts
Installation and Operation Instructions for the following models:
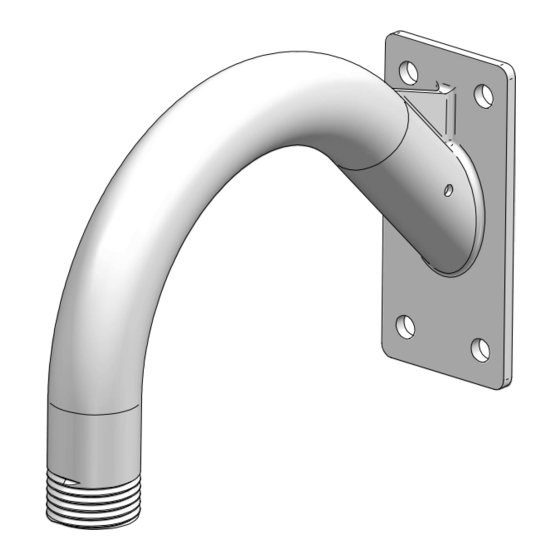
WM20G Aluminum gooseneck wall brackets, includes 1½"
NPTHARDWARE:
(Hardware NOT included)
Before attempting to connect or operate this product,
please read these instructions completely.
© 2009, Videolarm, Inc. All Rights Reserved
www.videolarm.com
CERTIFIED
81-IN5208
01-12-2009
Advertisement
Table of Contents

Related Manuals for Moog Videolarm WM20G


Summary of Contents for Moog Videolarm WM20G
- Page 1 © 2009, Videolarm, Inc. All Rights Reserved Outdoor Dime Housing Brackets and Mounts www.videolarm.com Installation and Operation Instructions for the following models: WM20G Aluminum gooseneck wall brackets, includes 1½” NPTHARDWARE: CERTIFIED (Hardware NOT included) Before attempting to connect or operate this product, 81-IN5208 please read these instructions completely.
-
Page 2: Important Safeguards
IMPORTANT SAFEGUARDS SAFETY PRECAUTIONS Read these instructions. Keep these instructions. CAUTION Heed all warnings RISK OF ELECTRIC SHOCK DO NOT OPEN Follow all instructions. Do not use this apparatus near water. CAUTION: TO REDUCE THE RISK OF Clean only with damp cloth. ELECTRIC SHOCK, DO NOT REMOVE Do not block any of the ventilation openings. -
Page 3: Limited Warranty
LIMITED WARRANTY FOR VIDEOLARM INC. PRODUCTS VIDEOLARM INC. warrants this Product to be free from defects in material or workmanship,as follows: PRODUCTCATEGORY PARTS LABOR All Enclosures and Electronics Five (5) Years Five (5) Years Pan/Tilts Three (3) Years **6 months if used in autoscan Three (3) Years **6 months if used in autoscan /tour operation /tour operation... - Page 4 Wrap Teflon tape around the pipe threads Securely mount bracket to wall. Pull wiring to ensure a tight seal. through bracket and position grommet as shown. • Con seguridad soporte del montaje a emparedar. Tire del cableado • La cinta del Teflon del abrigo alrededor de la pipa rosca a través del soporte y del ojal de la posición según lo demostrado.
- Page 5 Loop the lanyard over the set screw to Make the appropriate wiring connections temporarily hold housing. from the dome to the pendant. • Coloque el acollador sobre el tornillo de presión para • Hacer las conexiones de cableado de la cúpula de la celebrar temporalmente la cubierta.
-
Page 6: Product Registration/Warranty
Product Registration/Warranty Thank you for choosing Videolarm. We value your patronage and are solely committed to providing you with only the highest quality products available with unmatched customer service levels that are second-to-none in the security industry. Should a problem arise, rest assure that Videolarm stands behind its products by offering some of the most impressive warranty plans available: 3 Years on all Housings, Poles, Power Supplies, and Accessories and 5 Years on all camera systems (SView, QView, Warriors), and InfraRed Illuminators.
Need help?
Do you have a question about the WM20G and is the answer not in the manual?
Questions and answers