Table of Contents
Advertisement
Quick Links
© 2012, Moog Videolarm, Inc. All Rights Reserved
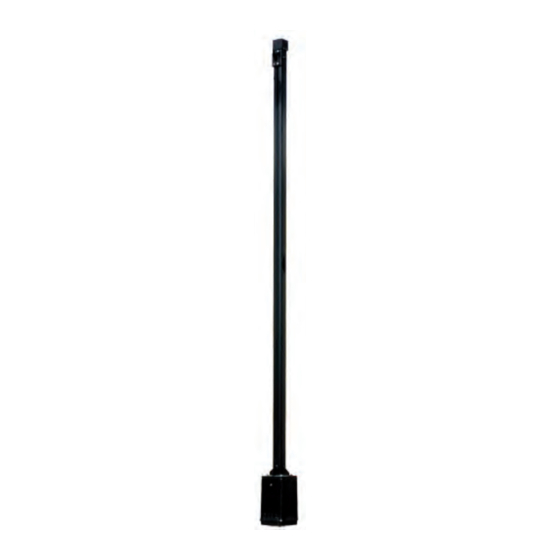
P V 1 6 / P V 1 8
PolEvators
Installation and Operation Instructions for the following models:
PV16N
16 Foot Lowering Pole includes flexible shaft
PV18N
18 Foot Lowering Pole includes 16 foot aluminum pole with 2 foot
transformer base, nema box, transformer and flexible shaft
Before attempting to connect or operate this product, please read these instructions completely.
www.moogvideolarm.com
81-IN5230
06-06-2012
Advertisement
Table of Contents

Subscribe to Our Youtube Channel
Related Manuals for Moog Videolarm PV16


Summary of Contents for Moog Videolarm PV16
- Page 1 © 2012, Moog Videolarm, Inc. All Rights Reserved P V 1 6 / P V 1 8 PolEvators www.moogvideolarm.com Installation and Operation Instructions for the following models: PV16N 16 Foot Lowering Pole includes flexible shaft PV18N 18 Foot Lowering Pole includes 16 foot aluminum pole with 2 foot transformer base, nema box, transformer and flexible shaft 81-IN5230 06-06-2012 Before attempting to connect or operate this product, please read these instructions completely.
- Page 1 © 2012, Moog Videolarm, Inc. All Rights Reserved P V 1 6 / P V 1 8 PolEvators www.moogvideolarm.com Installation and Operation Instructions for the following models: PV16N 16 Foot Lowering Pole includes flexible shaft PV18N 18 Foot Lowering Pole includes 16 foot aluminum pole with 2 foot transformer base, nema box, transformer and flexible shaft 81-IN5230 06-06-2012 Before attempting to connect or operate this product, please read these instructions completely.
-
Page 2: Safety Precautions
IMPORTANT SAFEGUARDS SAFETY PRECAUTIONS Read these instructions. Keep these instructions. CAUTION Heed all warnings RISK OF ELECTRIC SHOCK DO NOT OPEN Follow all instructions. Do not use this apparatus near water. CAUTION: TO REDUCE THE RISK OF Clean only with damp cloth. ELECTRIC SHOCK, DO NOT REMOVE Do not block any of the ventilation openings. -
Page 2: Safety Precautions
IMPORTANT SAFEGUARDS SAFETY PRECAUTIONS Read these instructions. Keep these instructions. CAUTION Heed all warnings RISK OF ELECTRIC SHOCK DO NOT OPEN Follow all instructions. Do not use this apparatus near water. CAUTION: TO REDUCE THE RISK OF Clean only with damp cloth. ELECTRIC SHOCK, DO NOT REMOVE Do not block any of the ventilation openings. - Page 3 If Purchaser believes that the Product is defective in material or workmanship, then written notice with an explanation of the claim shall be given promptly by Purchaser to Moog Videolarm. All claims for warranty service must be made within the warranty period.
- Page 3 If Purchaser believes that the Product is defective in material or workmanship, then written notice with an explanation of the claim shall be given promptly by Purchaser to Moog Videolarm. All claims for warranty service must be made within the warranty period.
-
Page 4: Important Safeguards
IMPORTANT SAFEGUARDS Content of Box Please read these instructions carefully before proceeding,and heed all cautions. English 1. At 150 lbs. the PolEvator™ is capable of being erected by 2 adults with not lifting equipment. However, to prevent personal injury or damage to the pole, EXTREME CAUTION should be used when lifting the pole. -
Page 4: Important Safeguards
IMPORTANT SAFEGUARDS Content of Box Please read these instructions carefully before proceeding,and heed all cautions. English 1. At 150 lbs. the PolEvator™ is capable of being erected by 2 adults with not lifting equipment. However, to prevent personal injury or damage to the pole, EXTREME CAUTION should be used when lifting the pole. - Page 5 Anchor Jig Assembly Anchor Jig Assembly Anchor Jig Kit Parts List Figure 1 Sold Separately Sold Separately 1 " 6" * 1 1/2" Single Straps Cross Strap 3/4" Flat Washers 1. Thread two (2) nuts onto each of the (4) bolts (Figure 1). The end with 6"...
- Page 5 Anchor Jig Assembly Anchor Jig Assembly Anchor Jig Kit Parts List Figure 1 Sold Separately Sold Separately 1 " 6" * 1 1/2" Single Straps Cross Strap 3/4" Flat Washers 1. Thread two (2) nuts onto each of the (4) bolts (Figure 1). The end with 6"...
- Page 6 Anchor Jig Assembly Figure 5 Anchor Jig Assembly Figure 4 Sold Separately Sold Separately " 11 " di ame te r " Before using the Anchor Jig verify that the center to center dimensions between the bolts are even. If not, adjust accordingly.
- Page 6 Anchor Jig Assembly Figure 5 Anchor Jig Assembly Figure 4 Sold Separately Sold Separately " 11 " di ame te r " Before using the Anchor Jig verify that the center to center dimensions between the bolts are even. If not, adjust accordingly.
- Page 7 Part 1: Site Preparation Figure 9 Part 1: Site Preparation Figure 8 FOR ANCHOR BOLT INSTALLATIONS: Prepare the concrete per manufacturer's directions. Pour concrete per manufacrurer’s directions. See Figure 8 for dimensions The concrete must have a compressive strength of of the bolt pattern and suspend appropriate bolts in the concrete around 3000 psi, and must be fabricated following ACI318-89 the wiring conduit.
- Page 7 Part 1: Site Preparation Figure 9 Part 1: Site Preparation Figure 8 FOR ANCHOR BOLT INSTALLATIONS: Prepare the concrete per manufacturer's directions. Pour concrete per manufacrurer’s directions. See Figure 8 for dimensions The concrete must have a compressive strength of of the bolt pattern and suspend appropriate bolts in the concrete around 3000 psi, and must be fabricated following ACI318-89 the wiring conduit.
- Page 8 PV18N PV16N Carefully tilt the transformer base(PV18N ONLY) / POLEVATOR™ assembly into an upright position. Align the bolts on the Anchor Jig with the slots on the transformer base(PV18N ONLY) / POLEVATOR. • Cuidadosamente inclinan transformador base (montaje)/POLEVATOR™ de PV18N SOLAMENTE en una posición vertical. Alinean perno en ancla plantilla con ranura en transformador base ()/POLEVATOR de PV18N SOLAMENTE.
- Page 8 PV18N PV16N Carefully tilt the transformer base(PV18N ONLY) / POLEVATOR™ assembly into an upright position. Align the bolts on the Anchor Jig with the slots on the transformer base(PV18N ONLY) / POLEVATOR. • Cuidadosamente inclinan transformador base (montaje)/POLEVATOR™ de PV18N SOLAMENTE en una posición vertical. Alinean perno en ancla plantilla con ranura en transformador base ()/POLEVATOR de PV18N SOLAMENTE.
- Page 9 PV18N ONLY Remove the Access Opening Plate with Security Tool provided • Quite la placa de la abertura del acceso con la herramienta de la seguridad proporcionada • Funcione con el arnés de cableado del poste en la caja de la •...
- Page 9 PV18N ONLY Remove the Access Opening Plate with Security Tool provided • Quite la placa de la abertura del acceso con la herramienta de la seguridad proporcionada • Funcione con el arnés de cableado del poste en la caja de la •...
- Page 10 Note : Drill must be in FORWARD to lower the Carriage Plate. • Ate el extremo de la caña del maleficio del eje flexible a un taladro. Ate el extremo de la impulsión cuadrada del eje flexible al eje impulsor. •...
- Page 10 Note : Drill must be in FORWARD to lower the Carriage Plate. • Ate el extremo de la caña del maleficio del eje flexible a un taladro. Ate el extremo de la impulsión cuadrada del eje flexible al eje impulsor. •...
- Page 11 • Do not add more than 35lbs or extend out more than 12” . Use 3/8 x 16 screws to the appropriate length for mounting. • Mount the housing Bracket / Dome to pole per • No agregue más que 35lbs ni extienda hacia fuera más de 12”. Utilice 3/8 x 16 tornillos a la longitud apropiada para el manufacturer instructions.
- Page 11 • Do not add more than 35lbs or extend out more than 12” . Use 3/8 x 16 screws to the appropriate length for mounting. • Mount the housing Bracket / Dome to pole per • No agregue más que 35lbs ni extienda hacia fuera más de 12”. Utilice 3/8 x 16 tornillos a la longitud apropiada para el manufacturer instructions.
- Page 12 NEMA Box Wiring Diagram Description Connector Board Midspan Communication Surge GND, N, L _______ RX-RX+TX+TX- ALR- ALR+ For Analog use ONLY GND, N, L 115/240 Transformer Wiring Brown 115V 50/60hz Green Brn/Wht 24VAC at 3.5 a Black Green (*) Connect directly to incoming line. 115V 50/60hz *( Standard wiring from factory set for 110 VAC input.
- Page 12 NEMA Box Wiring Diagram Description Connector Board Midspan Communication Surge GND, N, L _______ RX-RX+TX+TX- ALR- ALR+ For Analog use ONLY GND, N, L 115/240 Transformer Wiring Brown 115V 50/60hz Green Brn/Wht 24VAC at 3.5 a Black Green (*) Connect directly to incoming line. 115V 50/60hz *( Standard wiring from factory set for 110 VAC input.
- Page 13 Precautions and Care Lubricate stripping with heavy-duty silicone lubricant. (As standard maintenance) A different type of lubricate might result negatively when combined.
- Page 13 Precautions and Care Lubricate stripping with heavy-duty silicone lubricant. (As standard maintenance) A different type of lubricate might result negatively when combined.
-
Page 14: Product Registration/Warranty
Product Registration/Warranty Thank you for choosing Moog Videolarm. We value your patronage and are solely committed to providing you with the highest quality products available and superior customer service. Should a problem arise, rest assure that Moog Videolarm stands behind its products by offering impressive warranty plans: 3 Years on all Housings, Poles, Power Supplies, and Accessories and 5 Years on camera systems (SView, QView, Warriors), and InfraRed Illuminators. Register Your Products Online Take a few moments and validate your purchase via the Online Product Registration Form at www.videolarm.com/productregistration.jsp Register your recent Moog Videolarm purchases and benefit from the following: • Simple and Trouble-Free RMA process • Added into customer database to receive product updates / news • Eliminate the need to archive original purchase documents: Receipts, Purchase Orders, etc…... -
Page 14: Product Registration/Warranty
Product Registration/Warranty Thank you for choosing Moog Videolarm. We value your patronage and are solely committed to providing you with the highest quality products available and superior customer service. Should a problem arise, rest assure that Moog Videolarm stands behind its products by offering impressive warranty plans: 3 Years on all Housings, Poles, Power Supplies, and Accessories and 5 Years on camera systems (SView, QView, Warriors), and InfraRed Illuminators. Register Your Products Online Take a few moments and validate your purchase via the Online Product Registration Form at www.videolarm.com/productregistration.jsp Register your recent Moog Videolarm purchases and benefit from the following: • Simple and Trouble-Free RMA process • Added into customer database to receive product updates / news • Eliminate the need to archive original purchase documents: Receipts, Purchase Orders, etc…...
Need help?
Do you have a question about the PV16 and is the answer not in the manual?
Questions and answers