Table of Contents
Advertisement
PRODUCT HOLDING
CABINET
MODELS
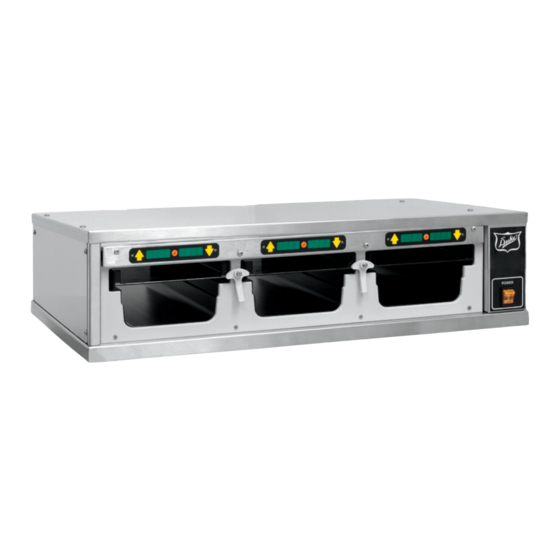
FWM3-13
FWM3-14
FWM3-21
FWM3-22
FWM3-23
FWM3-24
FWM3-41
FWM3-42
FWM3-51
Please read this manual completely before attempting
This manual is Copyright © 2015 Duke Manufacturing Co. All rights reserved.
Reproduction without written permission is prohibited. Duke is a registered
to install, operate or service this equipment
trademark of the Duke Manufacturing Co.
Duke Manufacturing Co.
2305 N. Broadway
St. Louis, MO 63102
Phone: 314-231-1130
Toll Free: 1-800-735-3853
Fax: 314-231-5074
www.dukemfg.com
Installation and
Operation Manual
P/N 156237U
02/03/2015
Advertisement
Table of Contents

Subscribe to Our Youtube Channel
Related Manuals for Duke FWM3-13


Summary of Contents for Duke FWM3-13
- Page 1 Please read this manual completely before attempting to install, operate or service this equipment This manual is Copyright © 2015 Duke Manufacturing Co. All rights reserved. Reproduction without written permission is prohibited. Duke is a registered trademark of the Duke Manufacturing Co.
- Page 2 Installation and Operation of Product Holding Cabinets...
-
Page 3: Table Of Contents
Installation and Operation of Product Holding Cabinets TABLE OF CONTENTS ELECTRICAL WARNINGS ....................4 MANUFACTURER’S INTRODUCTION ................6 SPECIFICATIONS ......................7 Model FWM3-13 ......................7 Model FWM3-14 ......................8 Model FWM3-21 ......................9 Model FWM3-22 .......................10 Model FWM3-23 ....................... 11 Model FWM3-24 .......................12 Model FWM3-41 .......................13 Model FWM3-42 .......................14... -
Page 4: Electrical Warnings
Installation and Operation of Product Holding Cabinets ELECTRICAL WARNINGS THIS MANUAL HAS BEEN PREPARED FOR PERSONNEL QUALIFIED TO INSTALL ELECTRICAL EQUIPMENT, WHO SHOULD PERFORM THE INITIAL FIELD STARTUP AND ADJUSTMENTS OF THE EQUIPMENT COVERED BY THIS MANUAL. READ THIS MANUAL THOROUGHLY BEFORE OPERATING, INSTALLING OR PERFORMING MAINTENANCE ON THE EQUIPMENT. - Page 5 Installation and Operation of Product Holding Cabinets : Before performing any service that involves electrical connection or disconnection and/or exposure to electrical components, always perform the Electrical LOCKOUT/TAGOUT Procedure. Disconnect all circuits. Failure to comply with this procedure can cause property damage, injury or death. : Before removing any sheet metal panels or servicing this equipment, always perform the Electrical LOCKOUT/TAGOUT Procedure.
-
Page 6: Manufacturer's Introduction
Because the compartments are sealed and formed to the shape of the pan, no disassembly is required for cleaning and product changes. The unique design of the Duke Product Holding Unit allows single temperature operation for all existing product groups. This 180°F(82°C) approved temperature is preset at the factory. This reduces the likelihood of inconsistent performance between restaurant locations. -
Page 7: Specifications
Installation and Operation of Product Holding Cabinets SPECIFICATIONS MODEL FWM3-13 MODEL SHIPPING AC Voltage Watts Amps FREQUENCY WEIGHT (V ~) (Hz) FWM3-13-100 75 lbs (34,1Kg) 6.0 (6,0) FWM3-13-120 75 lbs (34,1Kg) 5.0 (5,0) FWM3-13-208 75 lbs (34,1Kg) 4.0 (4,0) FWM3-13-230 75 lbs (34,1Kg) 4.0 (4,0) -
Page 8: Model Fwm3-14
Installation and Operation of Product Holding Cabinets MODEL FWM3-14 MODEL SHIPPING AC Voltage Watts Amps FREQUENCY WEIGHT (V ~) (Hz) FWM3-14-100 111 lbs (50,5Kg) 8.0 (8,0) FWM3-14-120 111 lbs (50,5Kg) 7.0 (7,0) FWM3-14-208 111 lbs (50,5Kg) 1200 6.0 (6,0) FWM3-14-230 111 lbs (50,5Kg) 1200 5.0 (5,0) -
Page 9: Model Fwm3-21
Installation and Operation of Product Holding Cabinets MODEL FWM3-21 MODEL SHIPPING AC Voltage Watts Amps FREQUENCY WEIGHT (V ~) (Hz) FWM3-21-100 67 lbs (30,5Kg) 4.0 (4,0) FWM3-21-120 67 lbs (30,5Kg) 4.0 (4,0) FWM3-21-208 67 lbs (30,5Kg) 3.0 (3,0) FWM3-21-230 67 lbs (30,5Kg) 3.0 (3,0) FWM3-21-240 67 lbs (30,5Kg) -
Page 10: Model Fwm3-22
Installation and Operation of Product Holding Cabinets MODEL FWM3-22 MODEL SHIPPING AC Voltage Watts Amps FREQUENCY WEIGHT (V ~) (Hz) FWM3-22-100 91 lbs (41,4Kg) 8.0 (8,0) FWM3-22-120 91 lbs (41,4Kg) 7.0 (7,0) FWM3-22-208 91 lbs (41,4Kg) 1200 6.0 (6,0) FWM3-22-230 91 lbs (41,4Kg) 1200 5.0 (5,0) -
Page 11: Model Fwm3-23
Installation and Operation of Product Holding Cabinets MODEL FWM3-23 MODEL SHIPPING AC Voltage Watts Amps FREQUENCY WEIGHT (V ~) (Hz) FWM3-23-100 113 lbs (51,4Kg) 1200 12.0 (12,0) FWM3-23-120 113 lbs (51,4Kg) 1200 10.0 (10,0) FWM3-23-208 113 lbs (51,4Kg) 1800 9.0 (9,0) FWM3-23-230 113 lbs (51,4Kg) 1800... -
Page 12: Model Fwm3-24
Installation and Operation of Product Holding Cabinets MODEL FWM3-24 MODEL SHIPPING AC Voltage Watts Amps FREQUENCY WEIGHT (V ~) (Hz) FWM3-24-100 141 lbs (69,1Kg) 1600 16.0 (16,0) FWM3-24-120 141 lbs (69,1Kg) 1600 13.0 (13,0) FWM3-24-208 141 lbs (69,1Kg) 2400 12.0 (12,0) FWM3-24-230 141 lbs (69,1Kg) 2400... -
Page 13: Model Fwm3-41
Installation and Operation of Product Holding Cabinets MODEL FWM3-41 MODEL SHIPPING AC Voltage Watts Amps FREQUENCY WEIGHT (V ~) (Hz) FWM3-41-100 100 lbs (45Kg) 8.0 (8,0) FWM3-41-120 100 lbs (45Kg) 7.0 (7,0) FWM3-41-208 100 lbs (45Kg) 1200 6.0 (6,0) FWM3-41-230 100 lbs (45Kg) 1200 5.0 (5,0) -
Page 14: Model Fwm3-42
Installation and Operation of Product Holding Cabinets MODEL FWM3-42 MODEL SHIPPING AC Voltage Watts Amps FREQUENCY WEIGHT (V ~) (Hz) FWM3-42-100 145 lbs (65,8Kg) 1600 16.0 (16,0) FWM3-42-120 145 lbs (65,8Kg) 1600 13.0 (13,0) FWM3-42-208 145 lbs (65,8Kg) 2400 12.0 (12,0) FWM3-42-230 145 lbs (65,8Kg) 2400... -
Page 15: Model Fwm3-51
Installation and Operation of Product Holding Cabinets MODEL FWM3-51 MODEL SHIPPING AC Voltage Watts Amps FREQUENCY WEIGHT (V ~) (Hz) FWM3-51-100 125 lbs (56,8Kg) 1000 10.0 (10,0) FWM3-51-120 125 lbs (56,8Kg) 1000 8.0 (8,0) FWM3-51-208 125 lbs (56,8Kg) 1500 7.0 (7,0) FWM3-51-230 125 lbs (56,8Kg) 1500... -
Page 16: Installation Instructions
Installation and Operation of Product Holding Cabinets INSTALLATION INSTRUCTIONS UNPACKING UNIT • Install the unit on a level countertop surface. 1. Inspect the shipping carton and/or container, • The power outlet should be located so that plug is carefully noting any exterior damage on the delivery accessible when the unit is in place. -
Page 17: Stacking Units
: If the supply cord is damaged, it must be replaced by a special cord assembly available from Duke Manufacturing Co. or its service agent. : Refer to the specifications data plate when ordering or replacing a cord set. -
Page 18: Operation
Installation and Operation of Product Holding Cabinets OPERATION The following procedures must be performed on a : Bottom and sides of warmer daily basis. wells are very hot and cool slowly. CAUTION: Do not use caustic cleaners, acids, ammonia products or abrasive cleaners or abrasive OPENING CHECKLIST cloths. -
Page 19: Preserving & Restoring
Installation and Operation of Product Holding Cabinets KEYPAD PROGRAMMING salt on the surface. Many foods are acidic. Salt contains chloride. For routine cleaning, use warm water, mild soap or detergent and a sponge or soft cloth. For heavy-duty cleaning, use warm water, a degreaser and a plastic, stainless steel or Scotch-Brite pad. -
Page 20: Timer Operation
Installation and Operation of Product Holding Cabinets 2. Until warmer reaches preprogrammed operating 5. At t=0, alarm sounds, Status LED is FLASHING and “00:00” is FLASHING in the Display. Discard temperature, all displays will show actual temperature. product in pan. Press corresponding Arrow Button to silence alarm and reset timer. -
Page 21: Menu Mode
Installation and Operation of Product Holding Cabinets 6. Holding down the button continuously will speed 3. Use the Arrow Buttons to scroll to desired Meal Set the time up. and press the Enter Button to accept. Status LED stops flashing and desired Meal Set is displayed. Display Link, Hold Time &... -
Page 22: Troubleshooting
Installation and Operation of Product Holding Cabinets TROUBLESHOOTING 3. Sensor Fault – If it any time during normal operation There are no user serviceable parts on the Duke Product Holding Cabinet. If a malfunction occurs, “SENS” is displayed on the keypad: discontinue ensure unit is plugged in then check all switches and operation and contact qualified service technician. -
Page 23: Parts Lists And Illustrations
Installation and Operation of Product Holding Cabinets PARTS LISTS AND ILLUSTRATIONS DE T AIL M... - Page 24 2 or 4 LID,FOODWARMER SOLID 161029 (BROILED) LID,FOODWARMER VENTED 161030 (FRIED) 0653638 SCREW, 1/4-20 X 3/4 FACE PLATE w/GASKET, 157506 FWM3-13 FACE PLATE w/GASKET, 156354 FWM3-14 FACE PLATE w/GASKET, FRONT, 157859 FWM3-21 FACE PLATE w/GASKET, REAR, 157860 FWM3-21 FACE PLATE w/GASKET,...
- Page 25 Installation and Operation of Product Holding Cabinets PARTS LISTS AND ILLUSTRATIONS (CONTINUED) Locator FWM3 FWM3 FWM3 FWM3 FWM3 FWM3 FWM3 FWM3 FWM3 Description 17** 156603 CORD, NEMA 5-15P, 120V CORD, NEMA 5-20P, 120V, 156621 CANADIAN FWM3-24,-42 156624 CORD, NEMA 6-15P, 208/240V 156631 CORD, 230V CE 156640...
-
Page 26: Wiring Schematics
Installation and Operation of Product Holding Cabinets WIRING SCHEMATICS P2-12 P2-11 P2-13 DATA REAR P2-5 P2-4 P2-6 DATA FRONT GRN/YEL FWM 1-HIGH Internal Wiring Schematic... - Page 27 Installation and Operation of Product Holding Cabinets P2-12 P2-11 P2-13 DATA REAR P2-5 P2-4 P2-6 DATA FRONT GRN/YEL FWM 2-HIGH Internal Wiring Schematic...
- Page 28 Installation and Operation of Product Holding Cabinets P2-12 P2-12 P2-11 P2-11 P2-13 P2-13 DATA REAR DATA REAR P2-5 P2-5 P2-4 P2-4 P2-6 P2-6 DATA FRONT DATA FRONT GRN/YEL GRN/YEL FWM 4x1 Internal Wiring Schematic...
- Page 29 Installation and Operation of Product Holding Cabinets P2-12 P2-11 P2-13 DATA REAR P2-5 P2-4 P2-6 DATA FRONT GRN/YEL FWM 4x2 Internal Wiring Schematic...
- Page 30 Installation and Operation of Product Holding Cabinets P2-12 P2-11 P2-13 DATA REAR P2-5 P2-4 P2-6 DATA FRONT GRN/YEL FWM 5x1Internal Wiring Schematic...
- Page 31 Installation and Operation of Product Holding Cabinets 1O BLU 1O BLU 22 BLK 44 BLK 11 BLK 33 BLK ZONE 1 11 BLK heater 1 thermostat 11 BLU 8 RED ZONE 2 12 GRY 22 BLK heater 2 thermostat 22 BLU 11 BLU 22 BLU ZONE 3...
- Page 32 HOLE LOCATIONS For securing unit to table top, refer to the figure below which shows the foot print of the Duke 5X1 Food Warmer and location of the four 3/8 dia. mounting holes in base plate of unit. Position warmer on table and align holes with holes in bottom of warmer.
- Page 33 Installation and Operation of Product Holding Cabinets ATTACHING UNIT TO TABLE SEAL ALL AROUND WITH SILICONE TABLE ¼” BOLT & WASHER...
- Page 34 Installation and Operation of Product Holding Cabinets Duke Manufacturing Co. 2305 N. Broadway St. Louis, MO 63102 Phone: 314-231-1130 Toll Free: 1-800-735-3853 Fax: 314-231-5074 www.dukemfg.com...
Need help?
Do you have a question about the FWM3-13 and is the answer not in the manual?
Questions and answers