Advertisement
Table of Contents
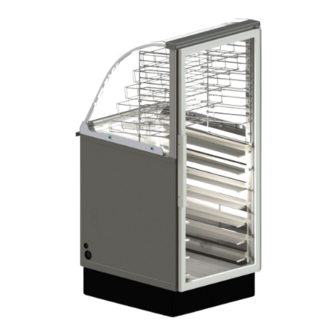
FLM200 Light Replacement
CAUTION:
This manual is Copyright © 2020 Duke Manufacturing Co. All rights reserved.
Reproduction without written permission is prohibited. Duke is a registered
Please read these instructions completely before attempting
to install, operate or service this equipment.
WARNING: Cancer and Reproductive Harm -
www.p65warnings.ca.gov
trademark of the Duke Manufacturing Co.
Instruction Sheet
REV A 04/03/2020
P/N 529811
Advertisement
Table of Contents

Related Manuals for Duke FLM200


Summary of Contents for Duke FLM200
- Page 1 WARNING: Cancer and Reproductive Harm - www.p65warnings.ca.gov This manual is Copyright © 2020 Duke Manufacturing Co. All rights reserved. Reproduction without written permission is prohibited. Duke is a registered trademark of the Duke Manufacturing Co.
- Page 2 • This equipment should be serviced by qualified personnel only. Contact the nearest Duke authorized service facility for adjustment or repair. • Turn the unit off, disconnect the power source before performing any service or maintenance on the unit.
- Page 3 Installation and Operation of: Product Name REMOVAL OF EXISTING LIGHT/GASKET D. Lower the front panel by loosening the support bracket on the bottom. Disconnect unit from power source. Remove the front decor panel from front of bread cabinet by: A. Remove any screws from operators side holding front panel in place.
- Page 4 Installation and Operation of: Product Name REMOVAL OF EXISTING LIGHT/GASKET - cont. Remove the inner cap inside bread display next Determine which side needs the lights replaced. to the hot food unit. Note: if opposite side of hot food well Note: This will expose the bolts going then repeat steps 5 and 6.
- Page 5 Installation and Operation of: Product Name INSTALLATION OF NEW LIGHT/GASKET To Determine which light assembly to use, for Remove the bottom 2” of backing paper from which side, the wire should be coming out of the adhesive at this time but do not remove the end of the gasket closest to the counter top.
- Page 6 Installation and Operation of: Product Name INSTALLATION OF NEW LIGHT/GASKET - cont. Repeat steps 1-7 for opposite side if needed. Re-install the top cap cover. Reinstall the two bolts under the front of the counter that were removed in step 10 of Removal of existing light/gasket.
- Page 7 Installation and Operation of: Product Name INSTALLATION OF NEW LIGHT/GASKET - cont. CAUTION Damage/Injury could result if two persons are not used for this Installation. Ensure all brackets on back of panel are adjusted as shown on the right. It is adjusted correctly when you can see the open center (where the bolt is) with the lower flange up above (see Red arrows).
- Page 8 Re-Install the top cap by pushing in and down. operators side. Reconnect unit to power source. Turn on unit and verify operation Phone: 314-231-1130 Duke Manufacturing Co. Toll Free: 1-800-735-3853 2305 N. Broadway www.dukemfg.com Fax: 314-231-5074 St. Louis, MO 63102...
Need help?
Do you have a question about the FLM200 and is the answer not in the manual?
Questions and answers