
Related Manuals for Definox VDCI-MC-FC


Summary of Contents for Definox VDCI-MC-FC
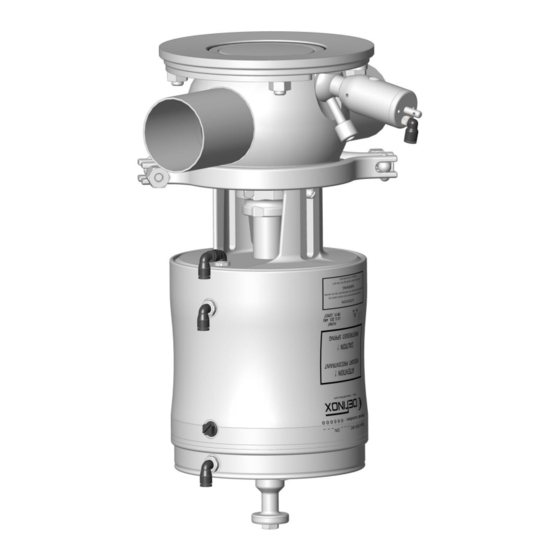
- Page 1 MAINTENANCE NOTICE VDCI-MC-FC PFA MIXPROOF VALVE www.definox.com NM-248 Revision 09 Page 1/33 January 2021...
-
Page 2: Table Of Contents
6.5.4 EPDM FDA seal kits for VDCI-MC-FC PFA valve bodies: 6.5.5 FKM FDA seal kits for VDCI-MC-FC PFA valve bodies 6.5.6 EPDM FDA seal kits for VDCI-MC-FC PFA valve leak and washing valves: 6.5.7 FKM FDA seal kits for VDCI-MC-FC PFA valve leakage and washing valves: 6.5.8 NBR seal kits for VDCI-MC-FC PFA take-off cylinder (ref. -
Page 3: Change Management
MAINTENANCE NOTICE 1 CHANGE MANAGEMENT For VDCI-MC-PFA DN63-80 actuators. Use of shaft 7142193 (2) with cam 7142205 (1) for all operators from 05/01 to 05/04. From 05/05, use of shaft 7142220 (1) with cam 7142222 (1). CHANGES INDEX DATE PAGE(S) INITIALS Modification rep :22 February 2012... -
Page 4: Safety
MAINTENANCE NOTICE 2 SAFETY IMPORTANT INFORMATION: Always read the maintenance notice before manipulating the valve Failure to observe these instructions can result in serious bodily injury or loss of life. DANGER ! This can also result in less serious injuries or damage to the equipment. CAUTION Electricity can result in serious bodily injury or loss of life. -
Page 5: Introduction
CAUTION The disassembly of a VDCI-MC-FC PFA mixproof valve breaks down as follows. First of all, if the valve is equipped with a signaling box, it may be necessary, for disassembly, to disconnect the signaling assembly from the actuator. -
Page 6: Separating The Pneumatic Actuator From The Valve Body
MAINTENANCE NOTICE SEPARATING THE PNEUMATIC ACTUATOR FROM THE VALVE BODY: Remove the body from the valve actuator • This operation enables access to the isolation seals (Changing the seals, see § 6.6 for lubrication) and the removal of the air cylinder. •... - Page 7 MAINTENANCE NOTICE • Supply air to the main air cylinder [A] to relieve the pressure on the clamp collar [38] from the actuator spring. • Disassemble the cam fastening screw [10] and the sensing cam [11]. • Disassemble the upper clamp collar [38]. •...
-
Page 8: Disassembly Of Vdci-Mc-Fc Components
MAINTENANCE NOTICE DISASSEMBLY OF VDCI-MC-FC COMPONENTS 3.3.1 Dismantling the valves and the seal support plate : OLD VERSION NEW VERSION • Unscrew the index screw [44]. • Unscrew the index screw [44]. • Unscrew the 2 fixing screws [45]. • Unscrew the 2 fixing screws [45]. - Page 9 MAINTENANCE NOTICE • Remove and replace the defective seals on the Seal Support Plate [48]. • Scraper seal [51], segment [56], upper form seal [53], body seal [54]. NM-248 Revision 09 Page 9/33 January 2021...
-
Page 10: Disassembly Of The Vdci-Mc Pfa Take-Off Cylinder (Ref. 9): (To Change The Seals If Necessary)
MAINTENANCE NOTICE DISASSEMBLY OF THE VDCI-MC PFA TAKE-OFF CYLINDER (ref. 9): (To change the seals if necessary) See take-off cylinder seal kit VDCI-MC PFA. (See § 6.5.8) • Remove the screws [1] securing the cover [4]. • Take the takeaway piston [7] out of the cover. •... -
Page 11: Disassembling The Main Pneumatic Actuator
MAINTENANCE NOTICE DISASSEMBLING THE MAIN PNEUMATIC ACTUATOR For the main actuator seal kits (See § 6.5.9). • Disassemble the air pipes [3] and [36] from the upper plug supply. • Position the actuator sub-assembly [37] on the press (see diagram below). •... -
Page 12: Disassembling The Lantern Sub-Assembly
MAINTENANCE NOTICE DISASSEMBLING THE LANTERN SUB-ASSEMBLY • Hold the clamp pin [27] with a drift punch [A] and the drift punch guide [84] held in a vice. • Unscrew the breakaway piston nut [26] using a plug valve wrench [82]. •... -
Page 13: Disassembling The Shaft/Piston Sub-Assembly
MAINTENANCE NOTICE DISASSEMBLING THE SHAFT/PISTON SUB-ASSEMBLY • Release the set screw [22] on the nut [21]. • Unscrew the main piston [23] screw [21] using a plug valve wrench [82] and the holding wrench [83]. • Release the main piston [23] screw [21] and remove the valve actuator shaft [12]. SHAFT/PISTON DISASSEMBLY TOOLS Diameter DN 38 to 80... -
Page 14: Disassembling The Leakage Valve And The Washing Valve
MAINTENANCE NOTICE DISASSEMBLING THE LEAKAGE VALVE AND THE WASHING VALVE 3.8.1 Disassembling the leakage valve • Unscrew the leakage valve assembly from the valve body [39]. • Unscrew the seal support [58] using an open-end wrench and remove the seal [59]. •... -
Page 15: Disassembling The Washing Valve
MAINTENANCE NOTICE 3.8.2 Disassembling the washing valve • Unscrew the washing valve assembly from the valve body [39]. • Remove the bottom of the washing valve actuator [61] with the p wrench lug valve [A]. Diameter DN 38 to 125 Plug valve wrench [A] 7110296 •... -
Page 16: Changing The Plug Seals On The Plugs
MAINTENANCE NOTICE 4 CHANGING THE PLUG SEALS ON THE PLUGS REMOVING THE SEALS ON THE LOWER PLUG: • Take out the lower plug [46] to gain access OLD VERSION to the seals [49] [55] and the ring [57]. IMPORTANT: When re-fitting the PFA NEW VERSION seal [49] be sure to place the bevelled CAUTION... -
Page 17: Dismantling The Pfa Seal On The Upper Plug
MAINTENANCE NOTICE DISMANTLING THE PFA SEAL ON THE UPPER PLUG: • Isolate the damaged PFA seal [50] using a cutter taking care not to mark the bearing surface of the plug [47] (protect the stainless-steel surface using the edge of a steel rule or a plastic off-cut). •... -
Page 18: Changing Seals And Reassembly
MAINTENANCE NOTICE 5 CHANGING SEALS AND REASSEMBLY INTRODUCTION : Before reassembling the parts, ensure that the assembly is lubricated with an appropriate lubricant (water-resistant and temperature-resistant food grade grease). Example for info : 4025 H1 QUINPLEX from Lubrication Engineers, see § 6.6) 5.1.1 REASSEMBLING THE VDCI-MC SHAFT/PISTON ASSEMBLY •... -
Page 19: Reassembling The Vdci-Mc Lantern Assembly
MAINTENANCE NOTICE 5.1.2 REASSEMBLING THE VDCI-MC LANTERN ASSEMBLY • Remove the torque seals [29] [32] [33] [35] (if a replacement is required, see parts reference at and grease the seals with grease (of the type 4025 H1 QUINPLEX by the end of this notice) Lubrication Engineers, see §... -
Page 20: Reassembling The Vdci-Mc Actuator Assembly
MAINTENANCE NOTICE 5.1.3 REASSEMBLING THE VDCI-MC ACTUATOR ASSEMBLY • Tighten the guides [78] and [80] on the shaft [12] (see table and diagram below). • Position the spring [19] on the body [15] , reassemble the shaft/piston assembly on the spring [19] , position in the spring assembly [20] and thread the lantern assembly on the guide [80] (see diagram below). -
Page 21: Reassembling The Valve Assembly On The Vdci-Mc Fc Pfa Body
MAINTENANCE NOTICE 5.1.4 REASSEMBLING THE VALVE ASSEMBLY ON THE VDCI-MC FC PFA BODY Tap each side of the clamp collar with a mallet before tightening Clamp collar tightening torque: 10 Nm Clamp collar tightening torque: 10 Nm Tap each side of the clamp collar with a mallet before tightening... -
Page 22: Spare Parts
MAINTENANCE NOTICE 6 SPARE PARTS PARTS FOR THE VDCI-MC PFA BREAKAWAY ACTUATOR SUB-ASSEMBLY (ref. 9) : (seal kits § 6.5.8) For assembly or disassembly of the [10] and [11] to refer to the maintenance notice N ° NM-187 for box ACS. NM-248 Revision 09 Page 22/33... -
Page 23: Parts For The Vdci-Mc Pfa Sp Actuator (Ref : 37) : (Seal Kits § 6.5.9)
MAINTENANCE NOTICE PARTS FOR THE VDCI-MC PFA SP ACTUATOR (ref : 37) : (seal kits § 6.5.9) • Use the reference 7142193 * instead of 7142220 * for the n ° 12 shafts mounted on the PFA DN63-80 actuators marked with n ° 100 to 400. NM-248 Revision 09 Page 23/33... -
Page 24: Parts For Detection Lantern Option
MAINTENANCE NOTICE PARTS FOR DETECTION LANTERN OPTION : • Assembly with ACS linear sensor box. NM-248 Revision 09 Page 24/33 January 2021... - Page 25 MAINTENANCE NOTICE • Lantern sensor adjustment. Before adjustment ➢ Screw the M8 sensor to its support (max. 5 to 6 turns), not forgetting the M8 nut and the adjustment and locking screws. ➢ Position the previously mounted assembly in the lower section of the lantern slot. (Fig. 1) ➢...
-
Page 26: Table Of Parts For Vdci-Mc Pfa Mixproof Valves
MAINTENANCE NOTICE TABLE OF PARTS FOR VDCI-MC PFA MIXPROOF VALVES OLD VERSION NEW VERSION DN38 DN38 DN51 DN51 DN63 DN76 DN104 (1’’1- Designation DN40 DN50 DN40 DN50 DN65 DN80 DN125 (1’’1-2) (2’’) (2’’) (3’’) (4’’) (2’’1-2) 1 TFB screw 7006906 7006907 Breakaway actuator wiper 7006100... - Page 27 MAINTENANCE NOTICE OLD VERSION NEW VERSION DN38 DN38 DN51 DN51 DN63 DN76 DN104 (1’’1- Designation DN40 DN50 DN40 DN50 DN65 DN80 DN125 (1’’1-2) (2’’) (2’’) (3’’) (4’’) (2’’1-2) Seal support plate seal 7008673 7008674 7008675 EPDM FDA Seal support plate seal 7380889 7380877 7380903...
-
Page 28: References Of Seal Kits For Vdci-Mc-Fc Pfa Valves
7148006 Upper PFA seal 7148741 7143071 7148743 7148005 6.5.2 EPDM FDA seal kits for VDCI-MC-FC PFA valve plugs: DN38 – 51 SMS DN63 – 76 SMS DN104 – 125 DIN Diameter DN40 – 50 DIN DN65 – 80 DIN DN4’’ US DN1’’1-2 –... -
Page 29: Epdm Fda Seal Kits For Vdci-Mc-Fc Pfa Valve Bodies
Body seal FKM FDA 7006124 7006240 7006306 6.5.6 EPDM FDA seal kits for VDCI-MC-FC PFA valve leak and washing valves: DN38 – 51 SMS DN63 – 76 SMS DN104 – 125 DIN DN40 – 50 DIN DN65 – 80 DIN Diameter DN4’’... -
Page 30: Nbr Seal Kits For Vdci-Mc-Fc Pfa Take-Off Cylinder (Ref. 9)
MAINTENANCE NOTICE 6.5.8 NBR seal kits for VDCI-MC-FC PFA take-off cylinder (ref. 9) : DN38 – 51 SMS DN63 – 76 SMS DN104 – 125 DIN DN40 – 50 DIN DN65 – 80 DIN Diameter DN4’’ US DN1’’1-2 – 2’’ US DN2’’1-2 –... -
Page 31: Reference Of Greases
MAINTENANCE NOTICE Reference of greases Ref. Designation grease cartridge 400 g Grease for actuator seals 7010662 (4025 H1 QUINPLEX) grease cartridge 500 g Grease for valve seals 7030668 (Kluber Paraliq GTE 703, NFS H1, FDA 21 CRF § 178.3570) NM-248 Revision 09 Page 31/33 January 2021... -
Page 32: References Of Tool Kits For Vdci-Mc Valves
MAINTENANCE NOTICE References of tool kits for VDCI-MC valves DN38 – 51 SMS DN63 – 76 SMS DN104 – 125 DIN DN40 – 50 DIN DN65 – 80 DIN Diameter DN4’’ DN1’’1-2 – 2’’ US DN2’’1-2 – 3’’ US N° Tool kits for VDCI-MC valves 7142233 7142234 7142235... - Page 33 New Berlin – WISCONSIN 53151 – USA Tel: (1) 262 797 5730 - Fax: (1) 262 797 5735 lbuckett@definox-usa.com CHINA DEFINOX Beijing Stainless Steel Equipment Ltd No 18 Anningzhuang East Road – HAIDIAN District BEIJING 100085 – CHINA Tel: (86) 10.6293.4909 - Fax: (86) 10.6293-4835 lk@definox.com.cn...
Need help?
Do you have a question about the VDCI-MC-FC and is the answer not in the manual?
Questions and answers