
Related Manuals for Definox VEOX SP 3 BODY


Summary of Contents for Definox VEOX SP 3 BODY
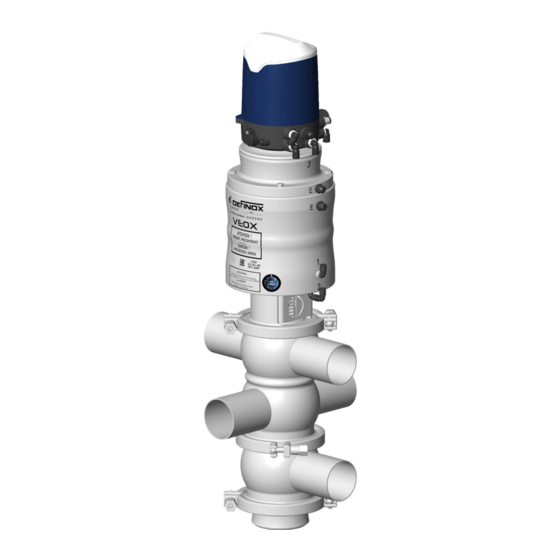
- Page 1 MAINTENANCE NOTICE MIXPROOF VALVE VEOX SP 3 BODY www.definox.com NM-277 index 02 Page 1/37 June 2020...
-
Page 2: Table Of Contents
6.3 VEOX SP 3 BODY VALVE SUB-ASSEMBLY SPARE PARTS: ELASTOMER / ELASTOMER / ELASTOMER (Seal kit, see § 6.9.3, § 6.9.4) 6.4 VEOX SP 3 BODY VALVE SUB-ASSEMBLY SPARE PARTS: PFA / ELASTOMER / ELASTOMER (Seal kit, see § 6.9.5, § 6.9.6, § 6.9.7, §... -
Page 3: Management Of Evolutions
MAINTENANCE NOTICE 1 MANAGEMENT OF EVOLUTIONS CHANGES INDEX DATE PAGES INITIALS New edition April 2020 G. BEGAUD Add of actuator shim for DN104 June 2020 23/31 G. BEGAUD NM-277 index 02 Page 3/37 June 2020... -
Page 4: Safety
MAINTENANCE NOTICE 2 SAFETY IMPORTANT INFORMATION Always read the maintenance notice before manipulating the valve Failure to observe these instructions can result in serious bodily injury or loss of life. DANGER! This can result in less serious injuries or damage to the equipment. CAUTION! Electricity can result in serious bodily injury or loss of life DANGER! -
Page 5: Introduction
(WARNING: pre-tensioned spring) CAUTION! N.B.: After any maintenance work on DEFINOX products, it is imperative to check the proper functioning of the equipment concerned: Sealing, pressure, etc. ATTENTION: NEVER BLOCK or REDUCE the flow of the LEAKAGE CHAMBER in NOTE! the lower part of the valve. -
Page 6: Valve Disassembling
MAINTENANCE NOTICE 4 VALVE DISASSEMBLING If the valve is fitted with a signalling unit, it may be necessary for disassembly, to first separate the signalling assembly from the actuator. DISASSEMBLING THE SIGNALING BLOCK Disassembling without disconnection IMPORTANT! Before starting any work on the box, it is important to ensure that the air supply is closed and that the circuit is purged. -
Page 7: Body And Shut-Off
• Disassemble the upper clamp collar [53]. • Cut the air to the air cylinder (the valve returns to the closed position). • Remove the isolation (air cylinder) assembly [A] from the bodies of VEOX SP 3 BODY [50] and [52]. -
Page 8: Disassembly Of Veox Breakaway Cylinder (For Changing Seals And Segments If Necessary)
MAINTENANCE NOTICE DISASSEMBLY OF VEOX BREAKAWAY CYLINDER (For changing seals and segments if necessary) • Disassemble the screws [6] fastening the breakaway actuator body [1]. • Unscrew the breakaway piston lower valve pin [3]. • Remove the breakaway piston rod [4]. •... -
Page 9: Disassembly Of The Lower Valves Of The Veox Sp 3 Body
MAINTENANCE NOTICE DISASSEMBLY OF THE LOWER VALVES OF THE VEOX SP 3 BODY • Screw the protection screw [86] in the cylinder rod [11] to protect the tapped hole. • Using the plug valve wrench [82] on the lower valve side [71] and the holding wrench [84] on the flats on the cylinder rod side [11], unscrew the lower valve assembly [B] from the pneumatic cylinder [40]. - Page 10 MAINTENANCE NOTICE • Using the plug valve wrench [82] on the cylinder rod lower side and the plates of the lower valve axis [68]. (In a vice with protective jaws or with an open-ended wrench). • Unscrew the intermediate valve [70] from the lower valve axle [68]. (See drawing below). •...
-
Page 11: Disassembly Of The Ppj And The Veox Sp Upper Valves
MAINTENANCE NOTICE DISASSEMBLY OF THE PPJ AND THE VEOX SP UPPER VALVES • Unscrew the 2 fixing screws [42] to be able to remove the lantern protection plate [41]. • Unscrew the indexing screw [60]. • Unscrew the two fastening screws [58]. •... -
Page 12: Disassembling The Principal Air Cylinder
MAINTENANCE NOTICE DISASSEMBLING THE PRINCIPAL AIR CYLINDER • Disconnect the air connections [23] and [24] for the upper breakaway valve supply. • Position the cylinder sub-assembly [40] on the press. (See drawing below) • Make sure the press stroke is right for sides [A] and [B]. •... -
Page 13: Disassembling The Lantern Sub-Assembly
MAINTENANCE NOTICE DISASSEMBLING THE LANTERN SUB-ASSEMBLY • Hold the clamp rod [18] with the clamp rod guide [85] held in a vice. • Loosen the breakaway piston nut [16] using the plug valve wrench [83]. • Release the nut [16] the breakaway piston [17] and the clamp rod [18] from the lantern assembly [19]. -
Page 14: Disassembling The Axle / Piston Sub-Assembly
MAINTENANCE NOTICE DISASSEMBLING THE AXLE / PISTON SUB-ASSEMBLY • Screw the protection screw [86] in the cylinder rod [11] to protect the tapped hole. • Loosen the pressure screw [14] of the nut [13]. • Unscrew the nut [13] of the main piston [15] using the plug valve wrench [83] and the holding wrench [84]. -
Page 15: Reassembling Of Veox Sp Valve
5 REASSEMBLING OF VEOX SP VALVE CHANGING DEFECTIVE COMPONENTS OR SEALS ON THE VALVES 5.1.1 CHANGING THE SEALS ON VEOX SP 3 BODY VALVES IMPORTANT! It is required to disassemble the lower valve to change the seals located on the upper valve. -
Page 16: Changing The Pfa Seal On The Pfa Upper Valve
MAINTENANCE NOTICE 5.1.2 CHANGING THE PFA SEAL ON THE PFA UPPER VALVE IMPORTANT! It is required to disassemble the lower valve to change the PFA seal located on the upper valve. CAUTION! • Cut the damaged PFA joint using a cutter, taking care not to mark the support surface of the valve. - Page 17 MAINTENANCE NOTICE • Before changing the defective seals between the lower valve and the intermediate valve (See reference for seals or pockets at the end of the notice). • Mount the seal [72] on the dry insert [73] and mount the slightly greased assembly between the marks [70] and [71], pay attention to its concentricity on the valve.
-
Page 18: Reassembling Veox Sp Axle/Piston
MAINTENANCE NOTICE 5.1.3 REASSEMBLING VEOX SP AXLE/PISTON • Remove the O-rings [29] and [31] (If changing is necessary, consult the parts reference at the end of the notice), grease these with grease. (Type 4025 H1 QUINPLEX from Lubrication Engineers, see § 6.9.9) •... -
Page 19: Reassembling Veox Sp Lantern Assembly
MAINTENANCE NOTICE 5.1.4 REASSEMBLING VEOX SP LANTERN ASSEMBLY • Remove the O-rings [21] [26] [27] [37] (If changing is necessary, consult the parts reference at the end of the notice), grease these with grease. (Type 4025 H1 QUINPLEX from Lubrication Engineers, see § 6.9.9) •... -
Page 20: Reassembling Veox Sp Actuator Assembly
MAINTENANCE NOTICE 5.1.5 REASSEMBLING VEOX SP ACTUATOR ASSEMBLY • Screw the guides [81] and [79] to the axel [11]. (See drawing below) • Position the spring [33] in the barrel [12] reassemble the axle/piston assembly on the spring [33] position the spring [30] in the assembly and thread the lantern assembly on the guide [81]. -
Page 21: Reassembly Of The Valve Assembly On The Body Of Veox Sp 3 Body
MAINTENANCE NOTICE 5.1.6 REASSEMBLY OF THE VALVE ASSEMBLY ON THE BODY OF VEOX SP 3 BODY Check that the old seals [55] and [51] have been removed. Grease the new seal [51] and the inside diameter of the new seal [55] with edible silicone grease (Type Kluber Paraliq GTE 703). -
Page 22: Veox Sp Spare Parts
MAINTENANCE NOTICE 6 VEOX SP SPARE PARTS VEOX SP BREAKAWAY SUB-ASSEMBLY SPARE PARTS (Seal kit, see § 6.9.1) NM-277 index 02 Page 22/37 June 2020... -
Page 23: Veox Sp Actuator Spare Parts (Seal Kit, See § 6.9.2)
MAINTENANCE NOTICE VEOX SP ACTUATOR SPARE PARTS (Seal kit, see § 6.9.2) NM-277 index 02 Page 23/37 June 2020... -
Page 24: Veox Sp 3 Body Valve Sub-Assembly Spare Parts: Elastomer / Elastomer / Elastomer (Seal Kit, See § 6.9.3, § 6.9.4)
MAINTENANCE NOTICE VEOX SP 3 BODY VALVE SUB-ASSEMBLY SPARE PARTS: ELASTOMER / ELASTOMER / ELASTOMER (Seal kit, see § 6.9.3, § 6.9.4) NM-277 index 02 Page 24/37 June 2020... -
Page 25: Veox Sp 3 Body Valve Sub-Assembly Spare Parts: Pfa / Elastomer / Elastomer (Seal Kit, See § 6.9.5, § 6.9.6, § 6.9.7, § 6.9.8)
MAINTENANCE NOTICE VEOX SP 3 BODY VALVE SUB-ASSEMBLY SPARE PARTS: PFA / ELASTOMER / ELASTOMER (Seal kit, see § 6.9.5, § 6.9.6, § 6.9.7, § 6.9.8) NM-277 index 02 Page 25/37 June 2020... -
Page 26: Veox Sp 3 Body Sub-Assembly Spare Parts (Seals, See § 6.8)
MAINTENANCE NOTICE VEOX SP 3 BODY SUB-ASSEMBLY SPARE PARTS (Seals, see § 6.8) NM-277 index 02 Page 26/37 June 2020... -
Page 27: Veox Sp Breakaway Valve Detection Option Spare Parts
MAINTENANCE NOTICE VEOX SP BREAKAWAY VALVE DETECTION OPTION SPARE PARTS • Installation with SORIO box. • First, cut the metal tab with wire cutters and deburr it to remove the sharp edges. Deburr Tab to be removed NM-277 index 02 Page 27/37 June 2020... -
Page 28: Adjusting The Detector In The Lantern
MAINTENANCE NOTICE ADJUSTING THE DETECTOR IN THE LANTERN 1 Position the detector support [75] at the bottom of the lantern and tighten the 2 fixing screws [76]. (this operation is essential for a good adjustment of the M12 detector). 2 Screw on the M12 detector [77] until contact is made with the face of the detection target [60]. -
Page 29: Veox Sp 3 Body Spare Parts Table
MAINTENANCE NOTICE VEOX SP 3 BODY SPARE PARTS TABLE DN25 DN25 DN32 DN38 DN40 DN51 DN50 DN63 DN65 DN76 DN104 DN125 DN150 Designation DN80 DIN (1’’) (1’’1-2) (2’’) (2’’1-2) (3’’) (4’’) Breakaway actuator 7190000 7190001 7190002 body VEOX Lower valve... - Page 30 PTFE Intermediate valve 1 7191639 7191638 7191640 7191641 7191642 7191643 7191644 7191645 7191326 7191646 7191647 7191648 7191649 VEOX SP 3 BODY Lower valve VEOX 7191617 7191618 7191619 7191620 7191621 7191622 7191623 7191327 7191624 7191625 7191626 7191627 SP 3 BODY...
-
Page 31: References Of Seal Kits For Veox Sp
MAINTENANCE NOTICE DN38 DN25 DN25 DN32 DN40 DN51 DN50 DN63 DN65 DN76 DN80 DN104 DN125 DN150 Designation (1’’1- (1’’) (2’’) (2’’1-2) (3’’) (4’’) 82 Plug valve wrench 7141988 7141979 7142224 83 Nut wrench 7141988 7141989 84 Valve holding wrench 7142226 Rod clamp guide 7193222 7142262... -
Page 32: Seal Kits For Epdm Body And Valve Elastomer / Elastomer / Elastomer Veox Sp 3 Body
Lower valve seat seal VEOX SP EPDM 7190515 7190185 7190186 7190187 7190945 6.9.4 Seal kits for FKM FP75 body and valve ELASTOMER / ELASTOMER / ELASTOMER VEOX SP 3 BODY DN25 SMS DN38 – 51 SMS DN63 – 76 SMS DN104 SMS DN125 DN150 Diameter DN25 –... -
Page 33: Seal Kits For Epdm Body And Valve Pfa / Elastomer / Elastomer Veox Sp 3 Body
Lower valve seat seal VEOX SP EPDM 7190185 7190186 7190187 7190945 6.9.6 Seal kits for FKM FP755 body and valve PFA / ELASTOMER / ELASTOMER VEOX SP 3 BODY DN38 – 51 SMS DN63 – 76 SMS DN104 SMS DN125 DN150 Diameter DN40 –... -
Page 34: Seal Kits For Epdm Body And Valve Pfa / Elastomer / Elastomer / Elastomer Veox Sp 3 Body (Without Pfa Seal)
MAINTENANCE NOTICE 6.9.7 Seal kits for EPDM body and valve PFA / ELASTOMER / ELASTOMER / ELASTOMER VEOX SP 3 BODY (without PFA seal) DN38 – 51 SMS DN63 – 76 SMS DN104 SMS DN125 DN150 Diameter DN40 – 50 DIN DN65 –... -
Page 35: Greases Reference
MAINTENANCE NOTICE 6.9.9 Greases reference Ref. Designation Grease cartridge 400 g Grease for actuator seals 7010662 (4025 H1 QUINPLEX) Grease cartridge 500 g Grease for valve seals 7030668 (Kluber Paraliq GTE 703, NFS H1, FDA 21 CRF § 178.3570) NM-277 index 02 Page 35/37 June 2020... -
Page 36: Reference For Valve Tool Kits Veox Sp
MAINTENANCE NOTICE 6.9.10 Reference for valve tool kits VEOX SP DN25 SMS DN38 – 51 SMS DN63 – 76 SMS DN104 SMS DN125/150 Diameter DN25 – 32 DIN DN40 – 50 DIN DN65 – 80 DIN DN100 DIN DN1’’ US DN1’’1-2 –... - Page 37 Tel : (1) 262 797 5730 - Fax: (1) 262 797 5735 lbuckett@definox-usa.com CHINA DEFINOX Beijing Stainless Steel Equipment Ltd No 18 Anningzhuang East Road – HAIDIAN District BEIJING 100085 – CHINA Tel : (86) 10.6293.4909 - Fax: (86) 10.6293-4835 lk@definox.com.cn...
Need help?
Do you have a question about the VEOX SP 3 BODY and is the answer not in the manual?
Questions and answers