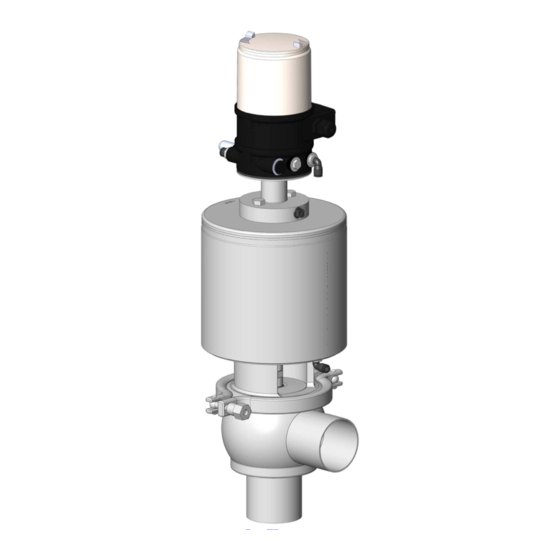
Definox DCX3 Maintenance Notice
Automatic regulating changeover valve
Hide thumbs
Also See for DCX3:
- Installation manual ,
- Maintenance notice (26 pages) ,
- Maintenance manual (19 pages)

Subscribe to Our Youtube Channel
Related Manuals for Definox DCX3


Summary of Contents for Definox DCX3
- Page 1 MAINTENANCE NOTICE DCX3 AUTOMATIC REGULATING CHANGEOVER VALVE www.definox.com NM-230 index 18 Page 1/55 September 2020...
-
Page 2: Table Of Contents
6.6 SETTING THE VALVE POSITIONER OPERATOR 6.7 SETTING THE VALVE REGULATOR OPERATION 6.8 SETTING THE VALVE AUTOMATIC OPERATION 7 DISASSEMBLING THE VALVE 7.1 DISASSEMBLING THE DCX3 REGULATING VALVE CLAMP COLLAR 7.2 DISASSEMBLING THE DCX3 REGULATING VALVE SHUT-OFF UNIT 8 CHANGING SEALS AND REASSEMBLY 8.1 INTRODUCTION... -
Page 3: Change Management
9.4 DCX3 DIAPHRAGM REGULATING VALVE, ELASTOMER AND SECTION /2 9.5 DCX3 ASEPTIC SEAT REGULATING VALVE 9.6 LIST OF PARTS FOR DN 25 to 51 DCX3/4 AUTOMATIC VALVES 9.7 LIST OF PARTS FOR DN 63 TO 104 DCX3/4 AUTOMATIC VALVES 9.8 LIST OF ACTUATORS FOR DCX3 AUTOMATIC CHANGEOVER VALVES 9.9 LIST OF REFERENCES OF SEAL KITS FOR DCX3/4 AUTOMATIC VALVES. -
Page 4: Safety
MAINTENANCE NOTICE 2 SAFETY IMPORTANT INFORMATION Always read the maintenance notice before manipulating the valve Failure to observe these instructions can result in serious bodily injury or loss of life. DANGER ! This can also result in less serious injuries or damage to the equipment. CAUTION Electricity can result in serious bodily injury or loss of life. -
Page 5: Introduction
For changing from an NC valve to an NO valve and vice versa, see ‘’Changing DANGER ! configuration’’. NOTE : After carrying out any maintenance work on DEFINOX products it is essential that you check the correct function of the equipment concerned : tightness, pressure, etc… NOTE... -
Page 6: Safety Devices
MAINTENANCE NOTICE 3.2.1 Safety devices For the maintenance of NC and NO actuators, we offer on request maintenance sets preventing unintended operation of the plug when the actuator is supplied with air. DCX3/4 NC (rod out) RISKS SOLUTIONS DANGER ! -
Page 7: Maintenance Of The Valve For Positioner Burkert 8630
MAINTENANCE NOTICE 4 MAINTENANCE OF THE VALVE FOR POSITIONER BURKERT 8630 Before starting the disassembly procedure, if the valve is fitted with a signalling box it may be necessary to detach the signalling unit from the actuator. DISASSEMBLING THE 8630 UNIT Dismantling without disconnection IMPORTANT: Before starting any work on the box, it is important to ensure that the air supply is closed and that the circuit is purged. -
Page 8: Reassembling The 8630 Unit
MAINTENANCE NOTICE REASSEMBLING THE 8630 UNIT • Refit the stem [50] and lock it in place using the turning flats. • Attach the base [48] using the screws [53]. • Position the housing [55] on the base [48] taking care not to damage the seal [52]. •... -
Page 9: Connecting The Air Supply To The 8630 Unit
MAINTENANCE NOTICE CONNECTING THE AIR SUPPLY TO THE 8630 UNIT NC assembly NO assembly NM-230 index 18 Page 9/55 September 2020... -
Page 10: Connecting The Power Supply Regulator Operation
MAINTENANCE NOTICE CONNECTING THE POWER SUPPLY REGULATOR OPERATION The signal from a temperature sensor or level, flow, which through with the control box of the valve that controls it (Regulator mode). • Remove the 4 screws from the electrical connection box using a flat screwdriver. •... -
Page 11: Connecting The Power Supply Positioner Operation
MAINTENANCE NOTICE CONNECTING THE POWER SUPPLY POSITIONER OPERATION The signal from a temperature sensor or level meter, etc... between the controller which controls the valve (positioner mode). • Remove the 4 screws from the electrical connection box using a flat screwdriver. •... -
Page 12: Connecting Power (Analog Card)
MAINTENANCE NOTICE CONNECTING POWER (analog card) • Remove the 4 screws from the electrical connection box using a flat screwdriver. • Connect the 4-20mA+ wire to ASR+ [3]. • Connect the 4-20mA- wire to ASR GND [4]. NM-230 index 18 Page 12/55 September 2020... -
Page 13: Setting The Valve Regulator Operation
MAINTENANCE NOTICE SETTING THE VALVE REGULATOR OPERATION • Press once on the button on the right of the box’s display to put it in auto mode (the yellow light flashes). • Hold down the button on the right of the display for five seconds to access the main menu. •... -
Page 14: Setting The Valve Positioner Operator
MAINTENANCE NOTICE SETTING THE VALVE POSITIONER OPERATOR • Same as the valve régulator positioner for functions ACTFUNC, INPUT, X.TUNE. • Then go to ADDFUNCT and uncheck P.CONTRL then placed before the star disappears. • Exit menu with ENDFUNCT. Parametrization of the PID controller NM-230 index 18 Page 14/55... -
Page 15: Setting The Valve (Analog Card)
MAINTENANCE NOTICE SETTING THE VALVE (analog card) • For the feedback signal OUTPUT must be in the main menu. • Select OUTPUT then go OUT ANL, choice (in our case) ANL POS ans select ANL 4’20A. • Exit menu with OUT END. NM-230 index 18 Page 15/55... -
Page 16: Maintenance Of The Valve For Positioner Burkert 8693
MAINTENANCE NOTICE 5 MAINTENANCE OF THE VALVE FOR POSITIONER BURKERT 8693 Before starting the disassembly procedure, if the valve is fitted with a signalling box it may be necessary to detach the signalling unit from the actuator. DISASSEMBLING THE 8693 UNIT Dismantling without disconnection IMPORTANT: Before starting any work on the box, it is important to ensure that the air supply is closed and that the circuit is purged. -
Page 17: Positioner And Adaptation Kits
7303166 Set positioner 8693 and adaptation kit: Description Reference Set positioner 8693 no feedback + adaptation kit DCX3/4 DN25/104 7303153 Set positioner 8693 feedback + adaptation kit DCX3/4 DN25/104 7303154 Set positioner 8693 no feedback + adaptation kit DPAX DN25/104... -
Page 18: Reassembling The 8693 Unit
MAINTENANCE NOTICE REASSEMBLING THE 8693 UNIT • Screw the linking rod by putting a drop of LOCTITE 222 threadlocker on the thread. • Refit the base using the 2 screws H (ref: 7006729). • Attach the control pin on the linking rod. •... -
Page 19: Connecting The Power Supply Regulator Operation (Without 4-20Ma Generator)
MAINTENANCE NOTICE CONNECTING THE POWER SUPPLY REGULATOR OPERATION (without 4-20mA generator) The signal from a temperature sensor or level, flow, which through with the control box of the valve that controls it. • Remove the 4 screws from the electrical connection box using a flat screwdriver and remove the connection cover. -
Page 20: Setting The Valve Automatic Operation
MAINTENANCE NOTICE SETTING THE VALVE AUTOMATIC OPERATION NM-230 index 18 Page 20/55 September 2020... -
Page 21: Automatic Adjustment Of The Positioner To The Operating Conditions (X.tune)
MAINTENANCE NOTICE 5.5.1 AUTOMATIC ADJUSTMENT OF THE POSITIONER TO THE OPERATING CONDITIONS (X.TUNE) NM-230 index 18 Page 21/55 September 2020... -
Page 22: Setting Up The Process Controller (Auxiliary Function
MAINTENANCE NOTICE 5.5.2 SETTING UP THE PROCESS CONTROLLER (auxiliary function P.CONTROL) NM-230 index 18 Page 22/55 September 2020... -
Page 23: Basic Setting Of The Process Controller
Action Description Switching from process level setting level Press for approx. 3 s Select P.CONTROL Press Select PID.PARAMETER Press • Setting DEFINOX : DBND 1% 5.00 3.00 3.00 Press • In the main menu (MAIN), the function P.CONTROL (Setting the... - Page 24 MAINTENANCE NOTICE Press Select CMD Press Pos % NM-230 index 18 Page 24/55 September 2020...
- Page 25 MAINTENANCE NOTICE NM-230 index 18 Page 25/55 September 2020...
-
Page 26: Maintenance Of The Valve For Positioner Gemü 1436
MAINTENANCE NOTICE 6 MAINTENANCE OF THE VALVE FOR POSITIONER GEMÜ 1436 Before starting the disassembly procedure, if the valve is fitted with a signalling box it may be necessary to detach the signalling unit from the actuator. DISASSEMBLING THE 1436 UNIT Dismantling without disconnection IMPORTANT: Before starting any work on the box, it is important to ensure that the air supply is closed and that the circuit is purged. -
Page 27: Reassembling The 1436 Unit
MAINTENANCE NOTICE REASSEMBLING THE 1436 UNIT • Screw the housing [60] on the base [61]. • Attach the base [61] using the screw [62]. It is imperative to first pass the GEMÜ housing on the base and then to mount the IMPORTANT: base on the actuator. -
Page 28: Connecting The Air Supply To The 1436 Unit
MAINTENANCE NOTICE CONNECTING THE AIR SUPPLY TO THE 1436 UNIT NC assembly NO assembly NM-230 index 18 Page 28/55 September 2020... -
Page 29: Connecting The Power Supply Regulator Operation
MAINTENANCE NOTICE CONNECTING THE POWER SUPPLY REGULATOR OPERATION The signal from a temperature sensor or level, flow, which through with the control box of the valve that controls it (Regulator mode). • Connect analogue input (actual value input) 0/4-20 mA to plug X3. NM-230 index 18 Page 29/55... -
Page 30: Initialization Automatic 1436 Unit
MAINTENANCE NOTICE INITIALIZATION AUTOMATIC 1436 UNIT NM-230 index 18 Page 30/55 September 2020... - Page 31 MAINTENANCE NOTICE NM-230 index 18 Page 31/55 September 2020...
-
Page 32: Setting The Valve Positioner Operator
MAINTENANCE NOTICE SETTING THE VALVE POSITIONER OPERATOR Set the type of external set-point (0 / 4-20mA) W-Input setting. SETTING THE VALVE REGULATOR OPERATION Set the type of external set-point (0 / 4-20mA) to the parameter W-Input. Set the type of external real value (0 / 4-20mA) to the parameter X-Input. If it functions as a process controller, set the parameter ProcCtrlMode to On. -
Page 33: Setting The Valve Automatic Operation
MAINTENANCE NOTICE SETTING THE VALVE AUTOMATIC OPERATION Operation as a positioner and process controller. Define the setting mode on auto. NM-230 index 18 Page 33/55 September 2020... -
Page 34: Disassembling The Valve
• Supply air to the NC actuator to relieve the pressure on the clamp collar from the spring. • Disassemble the clamp collar. • Switch off the actuator air supply. • Remove the actuator and plug assembly from the DCX3 body. Air supply Clamp collar DISASSEMBLING THE DCX3 REGULATING VALVE SHUT-OFF UNIT •... - Page 35 MAINTENANCE NOTICE CAUTION: This is a hazardous operation if performed without using the correct tools. We recommend using a hydraulic press or a tool of the type shown in the diagram opposite (this tool must be made to accommodate a spring expansion of 100 mm). DANGER ! With the actuator placed in vertically : •...
-
Page 36: Changing Seals And Reassembly
MAINTENANCE NOTICE 8 CHANGING SEALS AND REASSEMBLY INTRODUCTION Our valve components are listed and identified in this notice, together with all the information you need to order your spare parts. ASSEMBLING THE ACTUATOR CAUTION: For changing the actuator configuration from NC (Normally Closed) to NO (Normally Open), see the following chapter. - Page 37 MAINTENANCE NOTICE CHANGING ACTUATOR CONFIGURATION Transforming an actuator into a After opening the actuator, refit the stem/piston and spring assembly the other way around in the body. Guide pin NOTE: For your own safety, check that the snap-ring is properly positioned in its recess. If the snap-ring is damaged or deformed, it must be replaced.
- Page 38 MAINTENANCE NOTICE REASSEMBLING THE VALVE This procedure is performed in the reverse order to dismantling. You should follow the guidelines given below: • We recommend using a medium thread lock compound to lock the plug during reassembly on the actuator and retightening the plug of diaphragm valves after first usage with temperature.
- Page 39 MAINTENANCE NOTICE 9 PARTS DCX3 STANDARD VALVE ACTUATOR (elastomer, diaphragm) Seal kit family: NM-230 index 18 Page 39/55 September 2020...
- Page 40 MAINTENANCE NOTICE DCX3 ASEPTIC SEAT VALVE ACTUATOR Seal kit family: NM-230 index 18 Page 40/55 September 2020...
- Page 41 MAINTENANCE NOTICE DCX3 STANDARD REGULATING VALVE, ELASTOMER AND SECTION /2 B1, B2 Seal kit family (Standard): C1, C2 Seal kit family (Elastomer): (According to material grade) A/B/C/D/E NM-230 index 18 Page 41/55 September 2020...
- Page 42 MAINTENANCE NOTICE DCX3 DIAPHRAGM REGULATING VALVE, ELASTOMER AND SECTION /2 D1, D2 Seal kit family (Diaphragm): F1, F2 Seal kit family (Elastomer Diaph.): (According to material grade) F/G/H/I NM-230 index 18 Page 42/55 September 2020...
- Page 43 MAINTENANCE NOTICE DCX3 ASEPTIC SEAT REGULATING VALVE E1, E2 Seal kit family (Aseptic STD): G1, G2 Seal kit family (Asept. Elasto.): (According to material grade) A/B/C/D/E NM-230 index 18 Page 43/55 September 2020...
- Page 44 MAINTENANCE NOTICE LIST OF PARTS FOR DN 25 to 51 DCX3/4 AUTOMATIC VALVES DN25 DN1’’ DN25 DN32 DN38 DN1’’1/2 DN40 DN2’’ DN51 DN50 Guide Part name Depending on body configuration DCX3 valve body 7303023 7300183 7303023 7300184 7300182 DCX3 STD and aseptic regulating valve plug...
- Page 45 MAINTENANCE NOTICE LIST OF PARTS FOR DN 63 TO 104 DCX3/4 AUTOMATIC VALVES DN80 DN2’’1/2 DN63 DN65 DN3’’ DN76 DN80 DN4’’ DN104 Guide Part name ACT.10 Depending on body configuration DCX3 valve body 7300185 7810607 7300186 7302018 7302022 DCX3 STD and aseptic regulating...
- Page 46 7100301 7100302 7100303 diaphragm 7100487 7100488 7100489 7100490 DCX3 aseptic seat valve actuator LIST OF REFERENCES OF SEAL KITS FOR DCX3/4 AUTOMATIC VALVES. DN80 DN 100- DESCRIPTION DN 25-40 DN 50-51 DN 63-76 DN 80 .104 7070600 7070601 7070602 7070603...
- Page 47 MAINTENANCE NOTICE 9.9.1 DETAILS OF SEAL SETS FOR DCX3 REGULATING VALVES actuator seal sets for DCX3 standard valves DN80 ACT.104- DN25-38 SMS DN51 SMS DN63-76 SMS Diameter 104 SMS DN25-40 DIN DN50 DIN DN65 DIN DN80 DIN 100 DIN DN1’’-1’’1-2 US DN2’’...
- Page 48 MAINTENANCE NOTICE seal kits for EPDM FDA DCX3 standard valve DN25-38 SMS DN51 SMS DN63-76 SMS 104 SMS Diameter DN80 ACT. 100 DIN DN25-40 DIN DN50 DIN DN65 DIN DN80 DIN DN1’’-1’’1-2 US DN2’’ US DN3’’ US DN4’’ US Kit No.:...
- Page 49 MAINTENANCE NOTICE seal kits for elastomer plug EPDM FDA DCX3 valve DN25-38 SMS DN51 SMS DN63-76 SMS 104 SMS Diameter DN80 ACT. 100 DIN DN25-40 DIN DN50 DIN DN65 DIN DN80 DIN DN1’’-1’’1-2 US DN2’’ US DN3’’ US DN4’’ US Kit No.:...
- Page 50 MAINTENANCE NOTICE seal kits for Diaphragm/EPDM FDA DCX3 diaphragm valve DN25-38 SMS DN51 SMS DN63-76 SMS 104 SMS Diameter DN80 ACT. 100 DIN DN25-40 DIN DN50 DIN DN65 DIN DN80 DIN DN1’’-1’’1-2 US DN2’’ US DN3’’ US DN4’’ US Kit No.:...
- Page 51 MAINTENANCE NOTICE seal kits for EPDM FDA DCX3 aseptic seat valve DN25-38 SMS DN51 SMS DN63-76 SMS 104 SMS DN80 Diameter 100 DIN DN25-40 DIN DN50 DIN DN65 DIN DN80 DIN ACT. DN1’’-1’’1-2 US DN2’’ US DN3’’ US DN4’’ US Kit No.:...
- Page 52 Seal reference O-ring for seal support plate with leak 7006145 7006038 7006235 7006008 collector EPDM FDA 7006174 7380158 7006193 7006002 7006008 7006162 DCX3/4 plug O-ring EPDM FDA 7006691 7006692 7006693 7006694 Diaphragm PTFE 7007425 7007419 7007426 Spring washer 7003558 7009962...
- Page 53 MAINTENANCE NOTICE seal kits for with EPDM FDA DCX3 aseptic seat valves elastomer plugs DN25-38 SMS DN51 SMS DN63-76 SMS 104 SMS Diameter DN80 ACT. 100 DIN DN25-40 DIN DN50 DIN DN65 DIN DN80 DIN DN1’’-1’’1-2 US DN2’’ US DN3’’ US DN4’’...
- Page 54 7030668 (Kluber Paraliq GTE 703, NFS H1, FDA 21 CRF § 178.3570) www.definox.com FRANCE DEFINOX SAS 3 Rue des Papetiers - Z.A.C de Tabari 2 44190 CLISSON - France : +33 (0)2 28 03 98 50 : +33 (0)2 28 03 88 00 info@definox.com...
- Page 55 MAINTENANCE NOTICE CHINA DEFINOX Beijing Stainless Steel Equipment Ltd No 18 Anningzhuang East Road – HAIDIAN District BEIJING 100085 – CHINA Tel : (86) 10.6293.4909 - Fax : (86) 10.6293-4835 lk@definox.com.cn The product specifications of this document are indicative and may be modified according to technological developments.
Need help?
Do you have a question about the DCX3 and is the answer not in the manual?
Questions and answers