Table of Contents
Advertisement
Quick Links
OPERATOR'S MANUAL
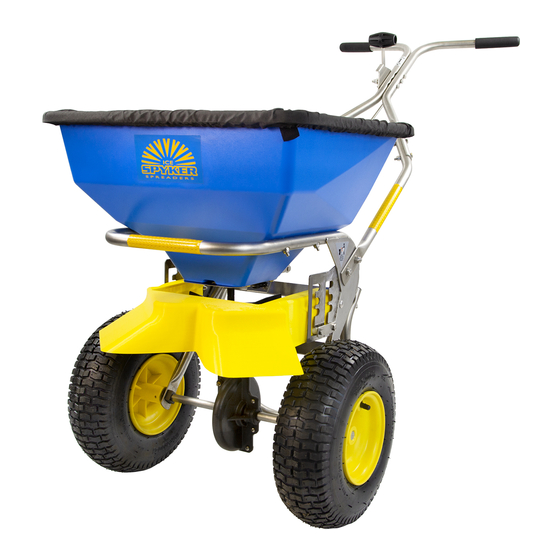
Model SPY50L-2S Push Spreader
Spyker Spreaders
Contact us at 800.972.6130
www.spyker.com
IMPORTANT
!
!
This manual contains information for the safety of persons and property.
Read it carefully before assembly and operation of the equipment!
©2021 Spyker Spreaders/A Brinly-Hardy Co.
Page 1
1019225-D
Advertisement
Table of Contents

Related Manuals for SPYKER SPY50L-2S


Summary of Contents for SPYKER SPY50L-2S
- Page 1 OPERATOR'S MANUAL Model SPY50L-2S Push Spreader Spyker Spreaders Contact us at 800.972.6130 www.spyker.com IMPORTANT This manual contains information for the safety of persons and property. Read it carefully before assembly and operation of the equipment! ©2021 Spyker Spreaders/A Brinly-Hardy Co.
-
Page 2: Table Of Contents
• Keep all nuts, bolts and screws tight to be sure the equipment is in safe working condition. • Always remove material from hopper before attaching spreader on a vehicle-mounted spreader caddy. ©2021 Spyker Spreaders/A Brinly-Hardy Co. Page 2 1019225-D... -
Page 3: Part List
1001274 Clevis Pin, 3/16 x 1-3/4 1019223 Stand, Med Frame, SS 1019596 Cotter Ring 1001607 Wheel, 13” 1017344 Control Lever Stop F-283 Bearing, Axle 1017725 Lock Washer Ext/Int Tooth 5/16 1019225 Manual ©2021 Spyker Spreaders/A Brinly-Hardy Co. Page 3 1019225-D... -
Page 4: Hardware Identifier
Bolt: Carriage, SS 1/4” - 20 x 1-3/4” (x2) ..1/4” - 20 x 3/4” (x2) ... 1007386 1019001 ©2021 Spyker Spreaders/A Brinly-Hardy Co. Page 4 1019225-D... -
Page 5: Part Explosions
Part Explosions DO NOT RETURN PRODUCT IF YOU ARE MISSING PARTS. PLEASE CALL: 1 (800) 972-6130 RATE GATE + AXLE / SPINNER ©2021 Spyker Spreaders/A Brinly-Hardy Co. Page 5 1019225-D... - Page 6 Part Explosions DO NOT RETURN PRODUCT IF YOU ARE MISSING PARTS. PLEASE CALL: 1 (800) 972-6130 FRAME & HANDLE ©2021 Spyker Spreaders/A Brinly-Hardy Co. Page 6 1019225-D...
- Page 7 Part Explosions DO NOT RETURN PRODUCT IF YOU ARE MISSING PARTS. PLEASE CALL: 1 (800) 972-6130 HOPPER ©2021 Spyker Spreaders/A Brinly-Hardy Co. Page 7 1019225-D...
- Page 8 External Tooth Lockwasher 1018993 Spacer, Plastic 1004975 Nut, 1/4-20 Hex Flange 1019231-LH Mounting Bracket, LH 1007386 Bolt, Carriage, SS: 1/4”-20 x 3/4” 1019231-RH Mounting Bracket, RH 1019001 Bolt, HexHd: 1/4”-20 x 1-3/4” ©2021 Spyker Spreaders/A Brinly-Hardy Co. Page 8 1019225-D...
-
Page 9: Assembly
Remove the Part List (page 3) / Hardware Identifier (page 4) and set aside for frequent reference during assembly. For reassurance, lay the nuts, bolts and washers down on page 4 to verify you’re using the correct parts during assembly. ©2021 Spyker Spreaders/A Brinly-Hardy Co. Page 9 1019225-D... - Page 10 (See Fig. 4 for alignment). Lower the tubing for the stand (59) on the bolts and secure in place with two Nylon Lock Nuts (3). Tighten completely with a 7/16” socket & wrench. Front Fig. 2 Fig. 4 ©2021 Spyker Spreaders/A Brinly-Hardy Co. Page 10 1019225-D...
- Page 11 Lower handle (52). Nut (53). Use a 1/2” Socket & Wrench. Repeat on the other side. Tighten with a 7/16” socket & wrench. Do NOT tighten (yet). Fig. 5 Fig. 7 ©2021 Spyker Spreaders/A Brinly-Hardy Co. Page 11 1019225-D...
- Page 12 Fig. 9a - The lip of the the Control Lever Stop (73) needs to be POINTED OUT & AWAY from the handle tubing. Fig. 9b Fig. 10a Fig. 10b (See Fig 9b). ©2021 Spyker Spreaders/A Brinly-Hardy Co. Page 12 1019225-D...
- Page 13 Fig. 11c Lift the linkage (51), aligning the top hole of the guide (47) with the Push the bolt (45) through the Control Lever. hole of the lower handle (52). See Fig. 13b ©2021 Spyker Spreaders/A Brinly-Hardy Co. Page 13 1019225-D...
- Page 14 If it is NOT closed, follow these steps: Fig. 13c a) Ensure the hopper is empty. b) Turn the Spyker dial to #9. Remove the spring tension on the gate control lever by moving the lever to the Open position.
- Page 15 Secure the Linkage Guide (47) in place by tightening* the bolt (46) that goes through the lower handle. (See step 12 on page 12 for clarification). *Bolt can remain slightly loose, allowing Linkage Guide to move. ©2021 Spyker Spreaders/A Brinly-Hardy Co. Page 15 1019225-D...
-
Page 16: Operation Instructions
Extra coverage can be given under SETTINGS ON PAGES 20-21). One-half rate dial trees and other heavy feeding areas without showing settings are highly recommended under damp “Edge Of Spread” lines. and humid conditions. ©2021 Spyker Spreaders/A Brinly-Hardy Co. Page 16 1019225-D... -
Page 17: Troubleshooting
Control Lever Stop (73). (3). See fig 13C. Lever control is making a Linkage (51) is rubbing against the Loosen guide plate (47) and grinding noise. Guide Plate (47). adjust up/down. ©2021 Spyker Spreaders/A Brinly-Hardy Co. Page 17 1019225-D... -
Page 18: Dial Settings
Full Rate Half Rate SIZE sq. ft. Once Over Twice Over LESCO SPYKER SETTINGS SETTINGS Fine Pellets Mixed Fine Pellets Small Pellets Medium Nitrogen Pellets Medium Pellets and Granuals Large Heavy Pellets ©2021 Spyker Spreaders/A Brinly-Hardy Co. Page 18 1019225-D... -
Page 19: Deflector Settings
2. Grasp the deflector (as illustrated here) on both sides and pull toward yourself while raising or lowering to the desired setting. NOTE: Moving the deflector UP increases the spread width. ©2021 Spyker Spreaders/A Brinly-Hardy Co. Page 19 1019225-D... -
Page 20: Warranty
WARRANTY 1 YEAR LIMITED WARRANTY This is warranted to the original purchaser only. Spyker will replace parts with defects in materials and workmanship, for a period of one year from the date of purchase. For Spyker Spreaders–a Brinly-Hardy Company, products employing metal gear systems,...
Need help?
Do you have a question about the SPY50L-2S and is the answer not in the manual?
Questions and answers