
Related Manuals for Mark Fitness XM-4422


Summary of Contents for Mark Fitness XM-4422
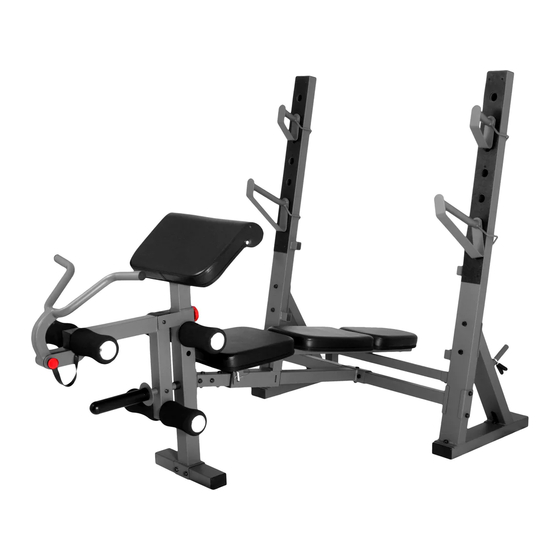
- Page 1 XM-4422 OLYMPIC BENCH with LEG & PREACHER Owner’s Manual Read all precautions and instructions in this manual before using this equipment. 8/09...
-
Page 2: Table Of Contents
Table of Contents Before You Begin Important Safety Information Assembly Parts List Exploded View 11-12 Warranty Information... -
Page 3: Before You Begin
7501 Trammel Drive Shreveport, LA 71108 QUESTIONS? CALL 1-800-719-4605 Monday-Friday 8:30 a.m.-5:00 p.m. XMARK FITNESS SERIES (Central Standard Time) MODEL: XM-4422 When calling please have the following product information available: Model Name : XM-4422 Date Mfg.: Serial # Model Name Decal Location... -
Page 4: Important Safety Information
Important Safety Information NOTE: Hand tighten bolts and nylon nuts until machine is fully assembled. Prior to assembly, remove components from the box and verify that all the listed parts were supplied. SAFETY INFORMATION WARNING! Before using this unit or starting any exercise program, consult your physician. This is especially important for persons over the age of 35 and/or persons with pre- existing health problems. -
Page 5: Assembly
Assembly NOTE: Hand tighten bolts and lock nuts until machine is fully assembled. A6 B2 A6 B2 STEP 1 Place the Left Upright (5) and the Right Upright (11) on the floor as illustrated. Make sure that the brackets on the side of each upright should be facing each other. Attach the Cross Bar (10) to the Uprights (5) (11), using rectangular Plates (8), M10 x 90 Bolts (A2) and M10 Lock Nuts (C1). - Page 6 Assembly NOTE: Hand tighten bolts and lock nuts until machine is fully assembled. STEP 2 Attach the Front Frame (21) to Main Frame (18) with two M10X20 Bolts (A4) and two M10 Lock Nuts (C1). Attach the Main Frame (18) to the Cross Bar (10) using two M10X75 Bolts (A3), one Oval Plate (17) and two M10 Lock Nuts (C1).
- Page 7 Assembly NOTE: Hand tighten bolts and lock nuts until machine is fully assembled. STEP 3 Attach the Upper Back Pad (26) and Lower Back Pad (44) to the Backrest Supports (14) using eight bolts M6X40 (A5) and eight washers M6 (B3). The Back Pads can be adjusted by pushing the Long Lock Pin (15) through the holes in the Main Frame (18).
- Page 8 Assembly NOTE: Hand tighten bolts and lock nuts until machine is fully assembled. STEP 5 Push two Spacers (46) into the Leg Lift Bar (37). Attach the Leg Lift Bar (37) to the Front Frame (21) with one M10X75 bolt (A3) and a M10 Lock Nut (C1). Push Foam Roller Tubes (34) into the holes of the Leg Lift Bar (37) and the Front Frame (21).
- Page 9 Attache the Curl Pad (27) to the Curl Post (28) with two M10X20 Bolts (A4). Insert the Arm Curl Post (28) into the Front Frame (21). Adjust and secure with one Short Knob Bolt (31). Congratulations!!! You have completed assembly of your XM-4422.
-
Page 10: Parts List
RIGHT UPRIGHT, XM- 4422 204028604503 ADJUSTMENT TUBE XM- 4422 307010001732 ADJUST PLUG 204056503503 BACKREST SUPPORT,XM- 4422 204028610002 LONG LOCK PIN XM-4422 204028602503 BACKREST FIXED BAR XM- 4422 204028613503 OVAL PLATE, XM- 4422 204028620503 MAIN FRAME XM- 4422 204028609002 SHORT LOCK PIN XM- 4422... -
Page 11: Exploded View
Exploded View A6 B2 A6 B2... - Page 12 Exploded View...
-
Page 13: Warranty Information
Warranty XMARK FITNESS LIMITED LIFETIME WARRANTY THIS PRODUCT IS INTENDED FOR RESIDENTIAL USE ONLY This Warranty applies only in the United States and Canada to products manufactured or distributed by XMARK Fitness under the XMARK Fitness brand name. This product is backed by a lifetime residential warranty, excluding only expendable parts such as paint, finish and vinyl.
Need help?
Do you have a question about the XM-4422 and is the answer not in the manual?
Questions and answers