Advertisement
Quick Links
Advertisement

Summary of Contents for Mark Fitness XM-7626
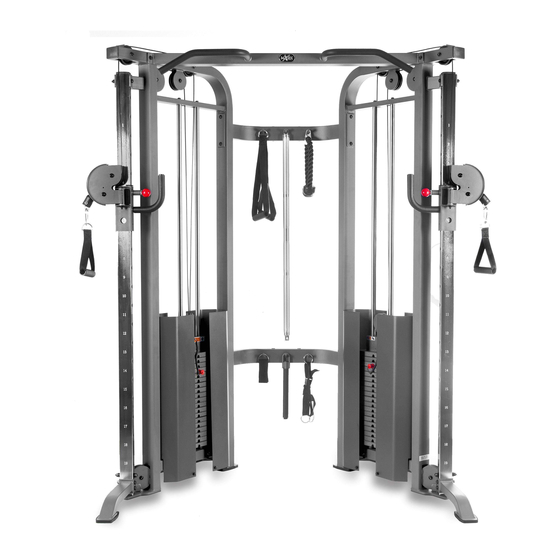
- Page 1 XM-7626 FUNCTIONAL TRAINER Owner’s Manual...
-
Page 2: Table Of Contents
Table Of Contents Important Safety Information Before You Start 5-12 Assembly Weight Stack Sticker Placement Parts List Exploded View Visit www.xmarkfitness.com for warranty information... -
Page 3: Important Safety Information
Important Safety Information NOTE: Hand tighten bolts and nylon nuts until machine is fully assembled. Prior to assembly, remove components from the box and verify that all the listed parts were supplied. SAFETY INFORMATION WARNING! Before using this unit or starting any exercise program, consult your physician. This is especially important for persons over the age of 35 and/or persons with pre- existing health problems. -
Page 4: Before You Start
QUESTIONS? CALL 1-800-719-4605 Monday-Friday 8:30 a.m.-5:00 p.m. XMARK FITNESS SERIES (Central Standard Time) MODEL: XM-7626 When calling please have the following product information available: Model Name : Date Mfg.: Serial # Model Name Decal Location... -
Page 5: Assembly
Assembly... - Page 6 Assembly NOTE: Hand tighten bolts and Nylon Lock nuts until machine is fully assembled. Step 1 Connect the Left frame(#1)and the Right frame (#2) with two Rear beam (#4) using: • four M10*80 Button Head Cap Screw (#55) • four M10*75 Button Head Cap Screw (#56) •...
- Page 7 Assembly NOTE: Hand tighten bolts and Nylon Lock nuts until machine is fully assembled. Step 2 Attach the Main top beam (#3) to the Left frame (#1) and the Right frame (#2) using: • four M10*105 Button Head Cap Screw (#52) •...
- Page 8 Assembly NOTE: Hand tighten bolts and Nylon Lock nuts until machine is fully assembled. Step 3 Attach: • two Guide Rod (#19) • two Φ62*Φ58*Φ25.2*25 Weight bumper (#37) • five Weight plate 15LB (#39) • nine Weight plate 10LB (#40) •...
- Page 9 Assembly NOTE: Hand tighten bolts and Nylon Lock nuts until machine is fully assembled. Step 4 Attach the Left slip frame (#5) to the Left slip tube (#13). Attach the Left slip tube (#13) and the Front support frame (#69) to the Left frame (#1) using: •...
- Page 10 Assembly NOTE: Hand tighten bolts and Nylon Lock nuts until machine is fully assembled. Step 5 Attach one Pulley Cable (#8) to the Left Frame (#1). Attach two 4.5" Pulley (#33) to the Left Frame (#1) using: • two M10*50 Button Head Cap Screw (#57) •...
- Page 11 Assembly NOTE: Wrench tighten bolts and Nylon Lock nuts. Step 6 Attach four Shroud bracket (#12) to the Left frame (#1) using: • two M10*100 Button Head Cap Screw (#53) • four Φ11*Φ20*2 Flat washer (#60) • two M10 Nylon lock nut (#64) Attach two Weight shroud (#11) to the Left frame (#1) using: •...
-
Page 12: Assembly
Assembly Tighten all hardware securely. Congratulations! You have completed the assembly of your new XM-7626. -
Page 13: Weight Stack Sticker Placement
Weight Stack Sticker Placement The weight stack image below illustrates how the weight stack decals should be applied to the weight stack. Please note these decals should not be put on until the entire unit has been assembled and all bolts and nuts have been tightened. 200 LB Stack... -
Page 14: Parts List
Tube Slip Left XM-7626 P00661 Tube Slip Right XM-7626 P00263 Stopper, Rubber XM-7626 P00264 Bracket, Cable Retainer XM-7626 P00265 Pad, Big Base Right XM-7626 P00266 Pad, Big Base Left XM-7627 P00267 Guide Rod, XM-7626 P00268 Strap, Leg Extension/Curl P00098 Handle, Long Strap XM-7626... -
Page 15: Exploded View
Exploded View... - Page 16 Customer Service: 1-800-719-4605...


Need help?
Do you have a question about the XM-7626 and is the answer not in the manual?
Questions and answers