Montigo DelRay DRL3613NI-2 Installation & Maintenance Manual
Indoor direct vent gas fireplace
Hide thumbs
Also See for DelRay DRL3613NI-2:
- Installation & maintenance manual (58 pages) ,
- Installation & maintenance manual (70 pages)
Table of Contents
Advertisement
Quick Links
WARNING:
FIRE OR EXPLOSION HAZARD
Failure to follow safety warnings exactly could result in serious injury,
death, or property damage.
— Do not store or use gasoline or other flammable vapors and
liquids in the vicinity of this or any other appliance.
— WHAT TO DO IF YOU SMELL GAS
• Do not try to light any appliance.
• Do not touch any electrical switch; do not use any
phone in your building.
• Leave the building immediately.
• Immediately call your gas supplier from a neighbour's
phone. Follow the gas supplier's instructions.
• If you cannot reach your gas supplier, call the fire
department.
— Installation and service must be performed by a qualified
installer, service agency or the gas fitter.
Danger
HOT GLASS will cAuse burns.
DO NOT TOUcH glAss until
NEvER Allow children
A barrier designed to reduce the risk of burns
from the hot viewing glass is provided with this
appliance and must be installed for the protection
of children and other at-risk individuals.
Installation & Maintenance Manual
®
C
US
cooled.
to touch glAss.
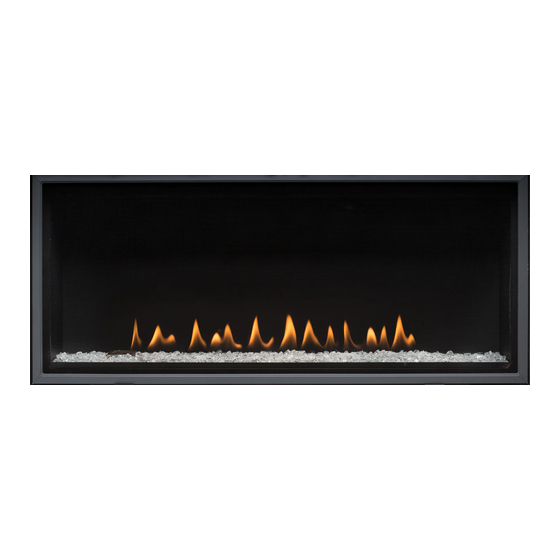
DelRay
INDOOR DIREcT vENT GAS FIREPLAcE
DRL3613NI 16,000 btu/hr Natural Gas or Propane Gas
DRL3613NI-2 16,000 btu/hr Natural Gas or Propane Gas
DRL4813NI 21,000 btu NG /19,000 btu Propane /hr
DRL4813NI-2 21,000 btu NG /19,000 btu Propane /hr
Installation and service must be performed by a qualified installer,
service agency or the gas fitter. Check local codes and read all
instructions prior to installation.
notice
Installer: leave this manual with the appliance. Please refer to the
Montigo website for the most current version of the fireplace manual
consumer: retain this manual for future reference. Please refer to the
Montigo website for the most current version of the fireplace manual
Warning
some materials used in the manufacturing process of this product can
expose you to benzene which is known in the state of california to
cause cancer and birth defects or other reproductive harm. For more
information go to www.P65warnings.ca.gov
xg0226 - 042220
Advertisement
Table of Contents

Related Manuals for Montigo DelRay DRL3613NI-2


Summary of Contents for Montigo DelRay DRL3613NI-2
- Page 1 Danger Installer: leave this manual with the appliance. Please refer to the Montigo website for the most current version of the fireplace manual consumer: retain this manual for future reference. Please refer to the HOT GLASS will cAuse burns.
-
Page 2: Safety Alert Key
Introduction DR4813LI-2 congratulations on your purchase of a Montigo Fireplace. With over 30 years of experience, Montigo is committed to providing BTU Listing you with a gas fireplace that is not only a beautiful addition to your space, but that is also designed and manufactured to the highest safety, reliability and engineering standards. -
Page 3: Table Of Contents
General This appliance may be installed in an aftermarket, permanently located, manufactured home (USA only) or mobile home, where not prohibited by local codes. This appliance is only for use with the type of gas indicated on the rating plate. A conversion kit is supplied with the appliance. contents Safety Alert Key .................. 2 Section 5: Installing the gas line............. 18 Introduction ..................2 Fuel Type ......................18 Efficiency ..................... -
Page 4: Section A: Before You Begin
• should it be impossible to meet the venting requirements laid out in Section 3: Venting, please contact your Montigo dealer regarding the use of a Montigo Power Vent. notice •... -
Page 5: Standard Installation Checklist
General Standard Installation Checklist This standard installation checklist is to be used by the installer in conjunction with, not instead of, the instructions contained within this installation manual. customer Date Installed: Install Address: Location of Fireplace: Installer: Dealer Phone: Model (circle one): DRL3613NI, DRL3613NI-2, DRL4813NI, DRL4813NI-2 DRL3613LI, DRL3613LI-2, DRL4813LI, DRL4813LI-2 Serial #: IF NO, WHY NOT? -
Page 6: Rating Plate Sample
General Rating Plate Sample Figure 1.1 Rating Plate for DelRay DRL3613NI-2 Figure 1.2 Rating Plate for DelRay DRL4813NI-2 xG0226 - 042220... -
Page 7: Section 1: Dimensions
Installation Section 1: Dimensions DelRay Dimensions 3/8” 5” 4” 7” 3/4” 5/16” 3/8” 1/2” 3/4” 11/16” 1/2” 5/8” 3/4” 1/8” 9/16” 1/4” Figure 2. DelRay Fireplace dimensions (Tolerance ± ⅛"). DRL*3613 DIMENSIONS DRL*4813 DIMENSIONS 413/8 383/8 361/2 451/4 535/16 505/16 481/2 571/4 xg0226 - 042220... -
Page 8: Section 2: Framing
Installation Section 2: Framing In Wall and corner Dimensions Alcove above the fireplace 1). Frame in the enclosure for the unit with framing materials. the Ceiling Level framed opening for the assembled fireplace shown below in table Non-combustible materials. Alcove over fireplace NOTE: When constructing the framed opening, please ensure there is access to install the gas line when the unit is installed 1"... -
Page 9: Clearances
Installation Section 3: venting clearances Montigo offers a variety of direct venting and termination options. The direct vent termination location Must be selected such that it is the highest point in the venting assembly. it should also be selected such When installing a shelf over the top of the fireplaces, the following that it provides the shortest vent run possible. -
Page 10: Section 3-3-1: Venting Layout
Installation Section 3-3-1: venting Layout OUTDOOR WALL OUTDOOR WALL FLEX PIPE MTO-4F MTO-4F 8 " 13" MIN. MIN. Maximum Vertical vent run: 34’ vertical length with a roof termination, 37 1/2'' Min. restrictor recommended. 40.652'' Min. DELRAY DELRAY Maximum Horizontal vent run: UNIT UNIT 34’... -
Page 11: Co-Linear Venting Into Existing Masonry Chimney
• A maximum of two certified couplers may be used per length of 3" liner • DelRay co-linear installation requires reducing from Montigo 4/7 the unit must be fully enclosed while maintaining clearances to to Duravent 4x6⅝ combustibles detailed elsewhere in this manual... -
Page 12: Section 3-2: Installing A Roof Mounted Direct Vent Termination For 4''/7'' (Mvtk-1)
Installation Section 3-2: Installing a Roof Mounted Direct vent Termination for 4''/7'' (MVTK-1) this section applies to installations where the direct vent termination will be roof mounted. MVTK1 Termination 2' min storm collar Roof flashing Section 3-2-1: venting Layout support ring selection of components and details of venting lay out should adhere 34' max support plate to the following guidelines:... -
Page 13: Section 3-3: Installing A Wall Mounted Termination 4''/7
NOTE: If subject to a highly corrosive environment A termination with a Mosr Frame is installed from the inside of the i.e. Seaside, Montigo recommends using Stainless Steel Termination. structure. these are commonly used in high-rise construction. -
Page 14: Section 3-3-2: Venting Components
E - Rigid Pipe Extension EXT18 (18" f/f Section) possible hot spots. • Montigo recommends the use of a flex section for the first section of F - Elbows MEL-90MM (m/m 90º Elbow) venting connected directly to the fireplace, offering greater flexibility MEL-90FF ( f/f 90º... -
Page 15: Section 3-3-2.2: 4" X 7" Venting Components
Installation Section 3-3-2.2: 4” x 7” venting components the following venting components are approved for use with Montigo products. Please contact your local Montigo dealer for further information. component Montigo Part Number Simpson Duravent Part Number Flexmaster Part Number Termination Mto4 (3" length) 46dVA-hc Mto4F (3" length) -
Page 16: Section 3-3-3: Heat Shields 4''/7
Installation Section 3-3-3: Heat Shields 4''/7'' Installing a Wall Mounted RHS7 heat shield Installing a Wall Mounted RHS100 Heat shield The RHS7 Heat shield CANNOT be used WITHIN 36" horizontal or 60" The RHS100 Heat shield MUST be used where the RHS7 Termination vertically of the fireplace. For applications within these dimensions the cAnnot be used. -
Page 17: Section 4: Wiring
DRL4813*I Installation of the wall switch Montigo supplies 15' of low voltage wire to be plugged into the control board. Connect to a standard single pole ON/OFF switch to the location of your choice. You may extend these wires up to 30' in length with a wire of equal quality. -
Page 18: Drl**13 (N/L) I-2 Wiring Diagram
Installation DRL**13 (N/L) I-2 Wiring Diagram BATTERy PACK 1.5V AA tYPe 1.5V AA type 1.5V AA tYPe 1.5V AA type SPARK green 1.5V AA tYPe 1.5V AA type MAin Power white 120vac 60 hz 1.5V AA tYPe 1.5V AA type BLACK 6 amps sensor black MAIN ON/OFF switch... -
Page 19: Section 5: Installing The Gas Line
N.P.T. plug to be fitted with a hose barb. unit or worse, a gas leak. • Montigo requires a service shut off valve be located in an accessible location to isolate the gas supply. • Only install gas shut-off valves approved for use by the state, province, or other governing body in which the fireplace is being installed. -
Page 20: Section 6: Finishing
Installation Section 6: Finishing Finishing Around the Fireplace Sidewall clearances Fireplace Facing side wall clearances are 4". combustible surrounds may be installed with 4" clearance to the side of the fireplace as shown. When sizing the finish material for your fireplace, it is important to remember the following: THE OPENING MUST NOT BE OBSTRUCTED IN AnY wAY - to do so restricts the air supply for the control compartments and heat exchanger it also prevents access for servicing controls. -
Page 21: Section 8: Removing & Installing The Screen / Door
Installation Section 8: Removing & Installing the Screen / Door Removing the Screen Removing the door Follow the steps below to remove, or install the fireplace screen and the door is removed in a few simple steps. Follow these steps below door. Before beginning any screen or glass removal, make sure that the to unlatch the door buckles and remove the door. -
Page 22: Propane Conversion
Installation Propane Conversion Tools required to convert the delray from 1. shut off gas supply. Natural Gas to Propane, install the GCA010 / GCA019 1). torx t20 screw driver bit conversion kit. the unit must 2. remove the 2 screws securing the pilot cover to the media 2). - Page 23 Installation 6. use screwdriver to carefully detach spring clip from the pilot 10. The pilot size can be adjusted using a flathead screwdriver to hood. (spring clip will be reused) adjust “pilADJ” screw shown Figure 13.g Adjust pilot size Figure 13.d Removing the spring clip 7.
-
Page 24: Section 9: Installing The Accessories
Installation Section 9: Installing the Accessories Installing the Fireglass or Optional Glass Media The unit is supplied with fireglass. Optional fireglass may be purchased from the dealer. remove the door as shown in the previous instruction. Once the glass door is removed place the firestones randomly across the pan and the burners as described in Figure 24 to 24.b Note: Only cover the burner with one layer of firestones or fireglass. -
Page 25: Delray 48" Optional Log Kit Installation
Installation DelRay 48" Optional Log Kit Installation the Fireplace has the option of installing a drift wood log set. once LGS77 the base media of fireglass, firestones, or speckled stones has been placed the log set can be installed. ensure logs are securely placed and will not tip or fall. - Page 26 Operation DANGER HOT GLASS WILL CAUSE BURNS. DO NOT TOUCH GLASS UNTIL COOLED. NEVER ALLOW CHILDREN TO TOUCH GLASS. A barrier designed to reduce the risk of burns from the hot viewing glass is provided with this appliance and must be installed for the protection of children and other at-risk individuals.
-
Page 27: Section 10: Cleaning And Maintenance
Operation Section 10: cleaning and Maintenance General Pilot Burner Adjustment. • Have the fireplace and installation inspected yearly. The inspection 1. Locate Pilot Adjustment Screw. (See figure 28) must include, but is not limited to, the following: 2. Adjust pilot screw to provide properly sized flame as shown. •... -
Page 28: Pod - Pilot On Demand
4. check and make sure the ground wire from the pilot is connected to the fireplace body. If your fireplace still does not operate correctly, consult your local Montigo dealer. All service and repairs should be performed by a qualified Technician. All spare parts, optional fans, and optional trim finishes are available from your local Montigo dealer. xg0226 - 042220... -
Page 29: Troubleshooting
Appendix Indoor fireplace in protected outdoor applications This fireplace may be installed into outdoor locations provided they are suitably protected from direct water impingement. However, all installation clearances in the appliance manual must be observed. Framing, Clearances to Combustibles, Mantel Heights, Facing Requirements, Venting Installation, etc. -
Page 30: Indoor Fireplace In Protected Outdoor Applications
Appendix Appendix A: venting Terminations Covered Covered Alcove Detail Alcove Detail Vinyl Siding 2’ 2’ 2’ 2’ 17.5’’ 29.5’’ 11.5’’ 17’’ Must use Vinyl Siding Termination Shield Location Canada* USA** clearance to the termination frame above grade, veranda, porch, deck, or balcony 12 inches 12 inches clearance to top of doors or operable windows... -
Page 31: Appendix A: Venting Terminations
(collectively referred to herein as "The Companies"), warrants the if the components of the appliance covered by this warranty Montigo gas appliance (referred to herein as 'the appliance') to are found to be defective within the time frame stated (see the... -
Page 32: Appendix B: Warranty
Montigo dealer (www.Montigo.com) or contact Montigo direct at techsupport@ montigo.com. ensure you have your sales receipt and the model and serial number of your appliance. DO NOT ATTEMPT TO DO ANY SERvIcE WORK YOURSELF If you cannot locate the installing dealer, or nearest dealer/ distributor, you must notify The Companies in writing. -
Page 33: Appendix B: Warranty Continued
Appendix Appendix c: Amendment (Gas Fireplace / Equipment sold in the State of Massachusetts) 5.08: Modifications to NFPA-54, Chapter 10 (1) revise nFPA-54 section 10.5.4.2 by adding a second exception as 4. insPection. the state or local gas inspector of the side wall follows: horizontally vented gas fueled equipment shall not approve the installation unless, upon inspection, the inspector observes... -
Page 34: Appendix C: Amendment
Installation & Maintenance Manual DelRay single sided gas Fireplace xg0226 - 042220...
Need help?
Do you have a question about the DelRay DRL3613NI-2 and is the answer not in the manual?
Questions and answers