Table of Contents
Advertisement
Available languages
Available languages
Quick Links
Questions, problems, missing parts?
Before returning to your retailer, our exceptional customer service is available.
English & Spanish speaking.
Call Toll-Free (866) 985-7877
Email
cservice@welltraveled.net
Live Chat
www.balkenehome.com
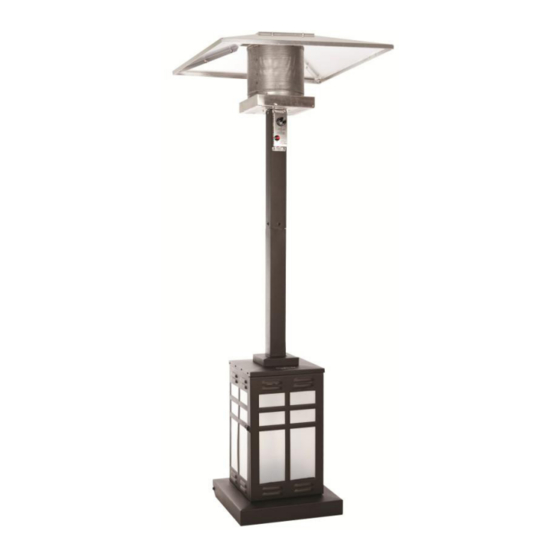
Outdoor Patio Heater
ITM./ART. 924792 Model # LIP-10A-TGG/60951
ASSEMBLY AND/OR CARE & USE
INSTRUCTIONS IMPORTANT, RETAIN FOR
FUTURE REFERENCE: READ CAREFULLY.
DANGER
FOR YOUR SAFETY: If you smell gas:
1. Shut off gas to the appliance.
2. Extinguish any open flame.
3. If odor continues, keep away from the
appliance and immediately call your gas
supplier or fire department.
DANGER
DANGER indicates an imminently
hazardous situation which, if not avoided,
will result in death or serious injury.
DANGER
Failure to comply with the precautions and
instructions provided with this heater can result
in death, serious bodily injury and property
loss or damage from hazards of fire, explosion,
burn, asphyxiation, and/or carbon monoxide
poisoning. Only persons who can understand
and follow the instructions should use or service
this heater.
WARNING
This product can expose you to chemicals
including Carbon Monoxide, Lead, Chromium
(hexavalent compounds, Di(2-ethylhexyl) phthalate
(DEHP) and Diisonoyl phthalate (DINP), which is
known to the State of California to cause cancer and
birth defects or other reproductive harm. For more
information go to www.P65Warnings.ca.gov.
9 a.m. – 9 p.m., EST
9 a.m. – 9 p.m., EST, Mon - Fri
WARNING
Do not store or use gasoline or other
flammable vapors and liquids in the vicinity
of this or any other appliance. An LP cylinder
not connected for use shall not be stored in
the vicinity of this or any other appliance.
WARNING
Improper installation, adjustment,
alteration, service or maintenance can
cause property damage, injury or death.
Read the installation, operation and
maintenance instructions thoroughly before
installing or servicing this equipment.
WARNING
FOR OUTDOOR USE ONLY!
ATTENTION
If your patio heater model is equipped with a base
weight/sand box, it is strongly recommended that you
fill it with sand or fine gravel and attach it securely to
the bottom of the heater. In windy conditions, store
the heater in a protected area or otherwise secure it.
Unsecutred heaters can be blown over in moderate to
high wind. Damage due to weather or acts of God is
not covered under warranty.
ATTACH YOUR
RECEIPT HERE
Keep a copy of your proof of purchase or
order confirmation which will be needed if you
need to contact us about warranty coverage.
Serial No.
Purchase Date
08052021
Advertisement
Table of Contents

Related Manuals for Fire Sense LIP-10A-TGG/60951


Summary of Contents for Fire Sense LIP-10A-TGG/60951
- Page 1 Outdoor Patio Heater ITM./ART. 924792 Model # LIP-10A-TGG/60951 ASSEMBLY AND/OR CARE & USE INSTRUCTIONS IMPORTANT, RETAIN FOR FUTURE REFERENCE: READ CAREFULLY. WARNING DANGER Do not store or use gasoline or other FOR YOUR SAFETY: If you smell gas: flammable vapors and liquids in the vicinity 1.
- Page 2 English Page 3 Français Page 19 Español Page 36 Contact us for assistance: (866) 985-7877 | www.balkenehome.com...
-
Page 3: Table Of Contents
BEFORE YOU BEGIN TABLE OF CONTENTS Before You Begin Page 3 Safety Information Page 4-5 Package Contents Page 5 Hardware Contents Page 5 Assembly Page 6-10 Operating Instructions Page 11-14 Care and Maintenance Page 15 Troubleshooting Page 16 Replacement Parts List Page 17 Warranty Information Page 18... -
Page 4: Safety Information
SAFETY INFORMATION DANGER DANGER WARNING DANGER indicated an imminently • This product is fueled by propane gas. CARBON MONOXIDE HAZARD hazardous situation which, if not avoided, • This heater is a combustion appliance. Propane gas is invisible, odorless, and will cause death or serious injury. All combustion appliances produce carbon flammable. -
Page 5: Package Contents
PACKAGE CONTENTS PART DESCRIPTION QUANTITY Reflector Panel and Center Cap 5pcs packed in 2 inner cartons Head and Upper Post Assembly Gas Hose 1 attached to Head Assembly Regulator Lower Post Post Support Plate 1 packed under Tank Housing Assembly Tank Housing Assembly* Tank Housing Support Bar 1 contains 2-M4x10 countersunk screws... -
Page 6: Assembly
ASSEMBLY PREPARATION Before beginning assembly of this appliance, make sure all parts are present. Compare all parts with package contents list and hardware contents as listed on page 4 of this manual. If any part is missing or damaged, do not attempt to assemble this product. - Page 7 ASSEMBLY Attach the Lower Post to the Post Support Plate using 4 M8x16 Bolts and 4 M8 Washers. (Note: Turn the post and support plate upside down to secure the bolts.) Align the Post Support Plate with the holes in the Lower Post, and insert 1 M8x16 Bolt through 1 M8 Washer and through the aligned holes.
- Page 8 ASSEMBLY Carefully route the Gas Hose that comes attached to Head and Upper Post Assembly completely through the Lower Post/Post Support Plate Assembly . (Hint: Control knob on Head Assembly should be located over the Tank Housing Door.) Attach Head Assembly and Upper Post Assembly the Lower Post by aligning the 4 small holes located on the Upper Post with the 4 small holes located on the Lower...
- Page 9 ASSEMBLY While supporting heater, tilt the Head and Upper Post Assembly and screw in the 3 M8x66 Stud Bolts into the holes on top of the Head Assembly. Slide the assembled Reflector over the 3 Stud Bolts that now extend from the Head Assembly.
- Page 10 ASSEMBLY Connect the hose and regulator to the LP cylinder. The LP cylinder is sold separately. Use a standard 9.08 kg / 20 lb propane cylinder only. Screw Regulator onto Gas Hose . Do not cross thread. Hand tighten securely. Attach Regulator to valve on LP cylinder and hand tighten securely.
-
Page 11: Operating Instructions
OPERATING INSTRUCTIONS A minimum supply pressure of .5 psi is required for the purpose of input adjustment of propane gas. Storage of an appliance indoors is permissible only • Do not store a spare LP-gas if the cylinder is disconnected and removed from the appliance. A cylinder cylinder under or near this must be stored outdoors in a well-ventilated area out of the reach of children. - Page 12 OPERATING INSTRUCTIONS LEAK TEST BEFORE TURNING GAS SUPPLY ON: WARNING 1. Make 2-3 oz. of leak test solution 1. Your heater was designed and • Perform all leak tests outdoors. (one part liquid dish washing approved for OUTDOOR use • Extinguish all open flames. only.
- Page 13 OPERATING INSTRUCTIONS LIGHTING WARNING NOTE: For initial start or after any cylinder change, hold the control knob in for 2 FOR YOUR SAFETY minutes to purge air from all gas lines Be careful when attempting to manually ignite this heater. Holding in the control before proceeding.
- Page 14 OPERATING INSTRUCTIONS OPERATION CHECKLIST: WARNING For a safe and pleasant heating experience, perform this check before each use: FOR YOUR SAFETY Heater will be hot after use. Handle with extreme care. BEFORE OPERATING: I am familiar with entire owner’s manual and understand all precautions noted.
-
Page 15: Care And Maintenance
CARE AND MAINTENANCE To enjoy years of outstanding performance from your heater, make sure you WARNING perform the following maintenance activities on a regular basis: FOR YOUR SAFETY • Do NOT touch or move heater for at least KEEP EXTERIOR SURFACES CLEAN. 45 minutes after use. -
Page 16: Troubleshooting
TROUBLESHOOTING PROBLEM POSSIBLE CAUSE CORRECTIVE ACTION Gas valve may be off Turn gas valve ON Fuel tank may be empty Refill LPG tank Orifice blocked Clean or replace orifice Purge air from lines. Open gas lines and depress control Air in supply system knob for 2-3 minutes. -
Page 17: Replacement Parts List
PACKAGE CONTENTS PACKAGE CONTENTS PART DESCRIPTION QUANTITY Reflector Panel and Center Cap 5pcs packed in 2 inner cartons Head and Upper Post Assembly Gas Hose 1 attached to Head Assembly Regulator Lower Post Post Support Plate 1 packed under Tank Housing Assembly Tank Housing Assembly* Tank Housing Support Bar 1 contains 2-M4x10 countersunk screws... -
Page 18: Warranty Information
Costco Wholesale Corporation P.O. Box 34535 MADE IN CHINA Seattle, WA 98124-1535 FABRIQUÉ EN CHINE HECHO EN CHINA 1-800-774-2678 www.costco.com Fire Sense ® , Mojave Sun ® , and Well Traveled Living ® are registered trademarks of Well Traveled Imports, Inc ®... - Page 19 Chauffe-terrasse extérieur ITM./ART. 924792 Nº de modèle # LIP-10A-TGG/60951 INSTRUCTIONS DE MONTAGE OU D'ENTRETIEN ET D'UTILISATION IMPORTANT, CONSERVER POUR RÉFÉRENCE FUTURE : LIRE ATTENTIVEMENT. AVERTISSEMENT DANGER Ne stockez pas et n'utilisez pas d'essence ou POUR VOTRE SÉCURITÉ : Si vous sentez une d'autres vapeurs et liquides inflammables à...
- Page 20 AVANT DE COMENCER TABLE DES MATIÈRES Avant de commencer Page 20 Informations sur la sécurité Page 21 Contenu du paquet Page 22 Outils inclus Page 22 Assemblage Page 23-27 Instructions d’utilisation Page 28-31 Soin et entretien Page 32 Dépannage Page 33 Liste des pièces de rechange Page 34 Informations sur la garantie...
- Page 21 INFORMATIONS SUR LA SÉCURITÉ AVERTISSEMENT DANGER DANGER - Ce produit est alimenté par du gaz propane. DANGER indique une situation dangereuse RISQUE DE MONOXYDE DE CARBONE Le gaz propane est invisible, inodore et imminente qui, si elle n'est pas évitée, inflammable.
- Page 22 CONTENU DU PAQUET PIÈCE DESCRIPTION QUANTITÉ Panneau réflecteur et capuchon central 5 pièces emballées dans 2 cartons intérieurs Ensemble tête et poteau supérieur Tuyau de gaz 1 attaché à l'assemblage de la tête Régulateur Poteau inférieur Plaque de support du poteau 1 emballé...
- Page 23 ASSEMBLAGE PRÉPARATION Avant de commencer l'assemblage de cet appareil, assurez-vous que toutes les pièces sont présentes. Comparez toutes les pièces avec la liste du contenu de l'emballage et les outils, comme indiqué à la page 4 de ce manuel. Si une pièce est manquante ou endommagée, n'essayez pas d'assembler cet appareil.
- Page 24 ASSEMBLAGE Fixez le montant inférieur à la la plaque de support du montant à l'aide de 4 boulons M8x16 et de 4 rondelles M8. (Remarque : Tournez le poteau et la plaque de support à l'envers pour fixer les boulons.) Alignez la plaque de support du poteau avec les trous du poteau inférieur, et insérez un boulon M8x16 dans une rondelle M8 et dans les trous alignés.
- Page 25 ASSEMBLAGE Faites soigneusement passer le tuyau à gaz qui est fixé à l'ensemble tête et poteau supérieur à travers l'ensemble poteau inférieur/plaque de support de poteau (Conseil : le bouton de commande de la tête doit être situé au- dessus de la porte du réservoir. Fixez l'ensemble tête et l'ensemble poteau supérieur au poteau inférieur en alignant les 4 petits trous situés...
- Page 26 ASSEMBLAGE Tout en soutenant l'appareil, inclinez l'ensemble tête et poteau supérieur et vissez les 3 boulons M8x66 dans les trous situés sur le dessus de l'ensemble tête. Faites glisser le réflecteur assemblé sur les 3 boulons qui dépassent maintenant de la tête. Utilisez les 3 3 écrous papillon M8 et les 3 rondelles M8 pour fixer le réflecteur assemblé...
- Page 27 ASSEMBLAGE Raccordez le tuyau et le détendeur à la bouteille de GPL. La bouteille de GPL est vendue séparément. Utilisez uniquement une bouteille de propane standard de 9,08 kg / 20 . Ne croisez pas lb. Vissez le régulateur sur le tuyau de gaz le filetage.
- Page 28 INSTRUCTIONS D'UTILISATION Une pression d'alimentation minimale de 0,5 psi est requise pour le réglage de • Ne stockez pas de bouteille de l'entrée du gaz propane. Le stockage d'un appareil à l'intérieur n'est autorisé que si la gaz de pétrole liquéfié de bouteille est déconnectée et retirée de l'appareil.
- Page 29 INSTRUCTIONS D'UTILISATION AVANT D'OUVRIR L'ALIMENTATION TEST D'ÉTANCHÉITÉ EN GAZ : AVERTISSEMENT 1. Préparez 2 à 3 onces de solution 1. Votre radiateur a été conçu et pour le test d'étanchéité (une part de approuvé pour une utilisation à • Effectuez tous les tests d'étanchéité à l'extérieur. détergent à...
- Page 30 INSTRUCTIONS D'UTILISATION ÉCLAIRAGE REMARQUE : Lors du premier démarrage ou après tout changement de bouteille, AVERTISSEMENT maintenez le bouton de commande enfoncé pendant 2 minutes pour purger l'air de toutes POUR VOTRE SÉCURITÉ Soyez prudent lorsque vous essayez d'allumer les conduites de gaz avant de poursuivre. manuellement ce radiateur.
- Page 31 INSTRUCTIONS D'UTILISATION OLISTE DE CONTRÔLE DES OPÉRATIONS : AVERTISSEMENT Pour une expérience de chauffage sûre et agréable, effectuez ce contrôle avant chaque utilisation : POUR VOTRE SÉCURITÉ Le radiateur sera chaud après utilisation. AVANT D'UTILISER : Manipuler avec une extrême précaution. •...
- Page 32 SOIN ET ENTRETIEN Pour profiter d'années de performances exceptionnelles de votre radiateur, AVERTISSEMENT veillez à effectuer régulièrement les opérations d'entretien suivantes : POUR VOTRE SÉCURITÉ • Ne touchez pas et ne déplacez pas le radiateur pendant au moins 45 minutes GARDEZ LES SURFACES EXTÉRIEURES PROPRES.
- Page 33 DÉPANNAGE PROBLÈME CAUSE POSSIBLE ACTION CORRECTIVE Le robinet de gaz est peut-être éteint. Ouvrir la vanne de gaz Le réservoir de carburant est peut-être Remplir le réservoir de GPL vide Orifice bloqué Nettoyer ou remplacer l'orifice Purger l'air des conduites. Ouvrir les conduites de gaz Air dans le système d'alimentation et appuyer sur le bouton de commande pendant 2 à...
- Page 34 CONTENU DU PAQUET PIÈCE DESCRIPTION QUANTITÉ Panneau réflecteur et capuchon central 5 pièces emballées dans 2 cartons intérieurs Ensemble tête et poteau supérieur Tuyau de gaz 1 attaché à l'assemblage de la tête Régulateur Poteau inférieur Plaque de support du poteau 1 emballé...
- Page 35 Fire Sense®, Mojave Sun®, et Well Traveled Living® sont des marques déposées de Well Traveled Imports, Inc®. Toutes les présentations des instructions de montage sont la propriété de Well Traveled Imports, Inc.® et sont protégées par les droits d'auteur et les marques de commerce...
- Page 36 Calentador de patio exterior ITM./ART. 924792 Nº de modelo: LIP-10A-TGG/60951 INSTRUCCIONES DE MONTAJE O CUIDADO Y USO IMPORTANTES, CONSÉRVALAS PARA FUTURAS CONSULTAS: LEER CON ATENCIÓN. AVISO PELIGRO No almacenes ni utilices gasolina u otros POR TU SEGURIDAD: Si hay olor a gas: vapores y líquidos inflamables cerca de este u...
- Page 37 ANTES DE EMPEZAR CONTENIDOS Información de seguridad Página 38 Contenido del paquete Página 39 Contenido material Página 39 Ensamblaje Página 40-44 Instrucciones de funcioncamiento Página 45-48 Cuidado y mantenimiento Página 49 Solución de problemas Página 50 Lista de piezas de reemplazo Página 51 Información de garantía Página 52...
- Page 38 INFORMACIÓN DE SEGURIDAD PELIGRO PELIGRO AVISO PELIGRO indica una situación de peligro - Este producto se alimenta de gas propano. El gas PELIGRO DE MONÓXIDO DE CARBONO inminente que, si no se evita, causará la propano es invisible, sin olor e inflamable. - Este calentador es un aparato de combustión.
- Page 39 CONTENIDO DEL PAQUETE PIEZA DESCRIPCIÓN CANTIDAD 5 unidades Panel reflector y tapa central embaladas en 2 cajas de cartón interiores Conjunto de cabezal y poste superior Manguera de gas unido al conjunto del cabezal Regulador Poste inferior embalado bajo el conjunto de la carcasa de Placa de soporte del poste depósito Conjunto de la carcasa de depósito*...
- Page 40 ENSAMBLAJE PREPARACIÓN Antes de empezar a montar este aparato, asegúrate de que están todas las piezas. Compara todas las piezas con la lista de contenidos del paquete y con el contenido de la tornillería que aparece en la página 4 de este manual. Si falta alguna pieza o está...
- Page 41 ENSAMBLAJE Sujeta el poste inferior a la placa de soporte del poste con 4 pernos M8x16 y 4 arandelas M8. (NOTA: Da la vuelta vuelta al poste y a la placa de soporte para asegurar los pernos). Alinea la placa de soporte del poste con los agujeros del poste inferior e inserta 1 perno M8x16 a través de 1 arandela M8 y de los agujeros alineados.
- Page 42 ENSAMBLAJE Pasa con cuidado la Manguera de gas que viene unida al conjunto de cabeza y poste superior por completo a través del conjunto de placa de soporte del poste inferior (Sugerencia: El mando de control del conjunto del cabezal debe estar situado sobre la puerta de la carcasa de depósito.) Fija el conjunto del cabezal y el conjunto del poste superior al poste inferior...
- Page 43 ENSAMBLAJE Mientras sostienes el calefactor, inclina el conjunto de cabezal y poste superior y atornilla los 3 tornillos prisioneros M8x66 en los agujeros de la parte superior del conjunto de cabezal. Desliza el r montado sobre los 3 pernos prisioneros que ahora salen del conjunto del cabezal.
- Page 44 ENSAMBLAJE Conecta la manguera y el regulador a la bombona de gas. La bombona de gas se vende por separado. Utiliza sólo una bombona de propano estándar de 9.08 kg/20 lb. Enrosca el . No cruces la rosca. Apriétalo a regulador en el tubo de gas mano con firmeza.
- Page 45 INSTRUCCIONES DE USO Se necesita una presión de suministro mínima de 0.5 psi para ajustar la entrada • No guardes una bombona de de gas propano. El almacenamiento de un aparato en el interior sólo está gas LP de repuesto debajo o permitido si la bombona está...
- Page 46 INSTRUCCIONES DE USO PRUEBA DE ESTANQUEIDAD ANTES DE ABRIR EL SUMINISTRO DE GAS: AVISO 1. Prepara 2 o 3 onzas de solución para 1. Tu calentador se ha diseñado y • Realiza todas las pruebas de fugas al aire la prueba de estanqueidad (una parte libre.
- Page 47 INSTRUCCIONES DE USO ENCENDIDO PRECAUCIÓN NOTA: Para el arranque inicial o después de cualquier cambio de cilindro, mantén PARA TU SEGURIDAD el mando de control apretado durante 2 Ten cuidado cuando intentes encender manualmente este calentador. Si mantienes minutos para purgar el aire de todos los pulsado el mando de control durante más de conductos de gas antes de proceder.
- Page 48 INSTRUCCIONES DE USO LISTA DE CONTROL DE OPERACIONES: Para una experiencia de calentamiento segura y agradable, realiza esta comprobación antes de cada uso: AVISO PARA TU SEGURIDAD ANTES DE PONER EN MARCHA: El calentador estará caliente después de • Estoy familiarizado con todo el manual del propietario y entiendo todas su uso.
- Page 49 CUIDADO Y MANTENIMIENTO Para disfrutar de años de excelente rendimiento de tu calentador, asegúrate de AVISO realizar las siguientes actividades de mantenimiento de forma regular: PARA TU SEGURIDAD • NO toques ni muevas el calentador MANTÉN LIMPIAS LAS SUPERFICIES EXTERIORES. durante al menos 45 minutos después de usarlo.
- Page 50 SOLUCIÓN DE PROBLEMAS PROBLEMA POSIBLE CAUSA ACCIÓN CORRECTIVA La válvula de gas puede estar Pon en marcha la válvula de gas desconectada El depósito de combustible puede estar Rellena el depósito de GLP vacío Orificio bloqueado Limpia o sustituye el orificio Purga el aire de los conductos.
- Page 51 CONTENIDO DEL PAQUETE PIEZA DESCRIPCIÓN CANTIDAD 5 unidades Panel reflector y tapa central embaladas en 2 cajas de cartón interiores Conjunto de cabezal y poste superior Manguera de gas unido al conjunto del cabezal Regulador Poste inferior embalado bajo el conjunto de la carcasa de Placa de soporte del poste depósito Conjunto de la carcasa de depósito*...
- Page 52 GARANTÍA LIMITADA DE UN AÑO · NO HAY GARANTÍAS EXPRESAS, SALVO LAS INDICADAS ANTERIORMENTE Clientes en los Estados Unidos contiguos · EL COMPRADOR ASUME TODOS LOS RIESGOS Todos los componentes están garantizados durante un período de un año a partir de la EN EL MONTAJE Y FUNCIONAMIENTO DE ESTA fecha de compra por parte del propietario original contra defectos de materiales y UNIDAD...
Need help?
Do you have a question about the LIP-10A-TGG/60951 and is the answer not in the manual?
Questions and answers