Advertisement
DANGER!
The Elite arm contains high
pressure gas springs. The fol-
lowing cautions MUST be ob-
served to avoid serious injury.
1) Do not attempt to adjust your Elite arm un-
til everything you intend to mount to the arm is
mounted.
2) Arm must be completely horizontal (extended)
before adjusting the arm's tension. Failure to do
so will damage the arm and void the warranty.
3) Never loosen or remove any
of the shoulder bolts. Doing so
will cause the arm to immedi-
ately come apart with tremen-
dous force, and could cause
serious injury.
4) If equipment requiring AC power is mounted
to this unit, have a certified electrician inspect the
installation.
5) Failure to install this unit according to these
instructions will void all ICW warranties. If in-
stalled incorrectly, ICW is not liable for any dam-
age or injury caused by the unit.
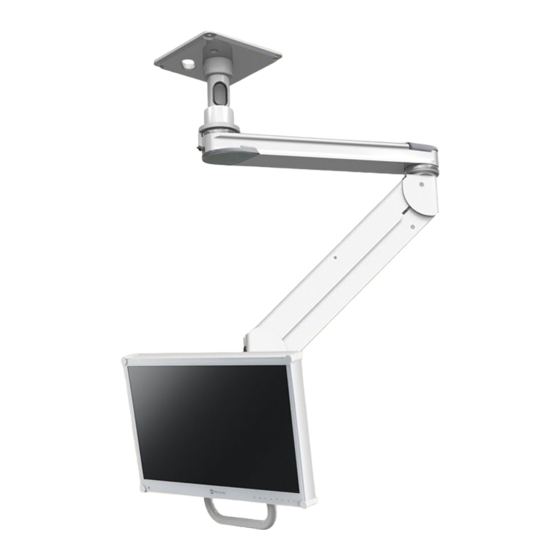
Titan Elite Installation
1
secure the ceiling mount to a solid stud in the ceiling using
the 4 provided screws and being sure the mount is level.
Loosen the set screw in the ceiling mount and thread the
extension pipe fully into the ceiling mount and retighten
the set screw.
2
3
4
Shoulder bolt
Remove the ceiling mount from the box, and find
the 4 #14 wood screws in the hardware bag. Firmly
Ceiling mount
Extension pipe
Remove the long arm cover by unscrewing the
(2) 6-32 flathead screws using a Phillips head
screw driver.
Remove the end covers by unscrewing the
(2) 10-24 flathead screws using the 1/8" hex key.
Disassemble the upper arm using the provided
socket wrench and 5mm hex key. Keep track of
all parts.
Do not disassemble these bearing packs.
Slip the end
caps out of
the arm.
3/8" Nylock,
split washer
and race
Advertisement
Table of Contents

Subscribe to Our Youtube Channel
Related Manuals for ICW Titan Elite


Summary of Contents for ICW Titan Elite
- Page 1 5) Failure to install this unit according to these instructions will void all ICW warranties. If in- stalled incorrectly, ICW is not liable for any dam- age or injury caused by the unit. Do not disassemble these bearing packs.
- Page 2 Once your monitor is mounted, extend and adjust the tension on the lower arm using the T-handle adjustment wrench provided. Thank you for your purchase of an ICW Titan Elite arm. Any questions? Please call 1-800-558-4435. Titan Elite PL Ceiling 5/26/10 JM...
- Page 3 PARALINK TO ELITE MOUNTING INSTRUCTIONS A. Once the arm assembly is fixed to the ceiling mount and adjusted to the neutral setting, move the arm to it’s vertical position. Long arm covers and end covers should be removed. A. Place Paralink up to base of arm and insert stud.
Need help?
Do you have a question about the Titan Elite and is the answer not in the manual?
Questions and answers