Advertisement
Replacing Access Panel ECPIR
Item Number
Item Name
102 3200 030
ECPIR-P
102 3200 033
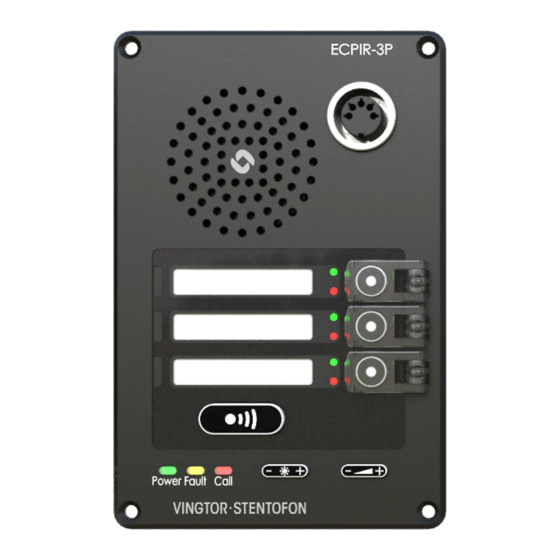
ECPIR-3P
1
Demounting the Old Access Panel
To demount the access panel:
1. Disconnect the access panel from the power supply, microphone, I/O interface and network
cables.
2. Remove the four screws that attach the access panel to the mounting box or console.
3. Lift the access panel out of the mounting box or console.
2
Mounting the New Access Panel
To mount the access panel:
1. Insert the access panel into the mounting box or console.
2. Fasten the access panel to the mounting box or console with the four screws.
3. Reconnect the access panel to the power supply, microphone, I/O interface and network cables.
Description
Exigo Access Panel, PTT Button
Exigo Access Panel, PTT + 3 Buttons
Advertisement
Table of Contents

Subscribe to Our Youtube Channel
Related Manuals for Vingtor Stentofon ECPIR Series


Summary of Contents for Vingtor Stentofon ECPIR Series
- Page 1 Replacing Access Panel ECPIR Item Number Item Name Description 102 3200 030 ECPIR-P Exigo Access Panel, PTT Button 102 3200 033 ECPIR-3P Exigo Access Panel, PTT + 3 Buttons Demounting the Old Access Panel To demount the access panel: 1. Disconnect the access panel from the power supply, microphone, I/O interface and network cables.
- Page 2 Setting Up the New Access Panel To set up the access panel: 1. Power up the access panel by connecting it to a PoE network. 2. Wait for the yellow Fault LED to start flashing, indicating that the access panel has been booted up successfully.
Need help?
Do you have a question about the ECPIR Series and is the answer not in the manual?
Questions and answers