Advertisement
Quick Links
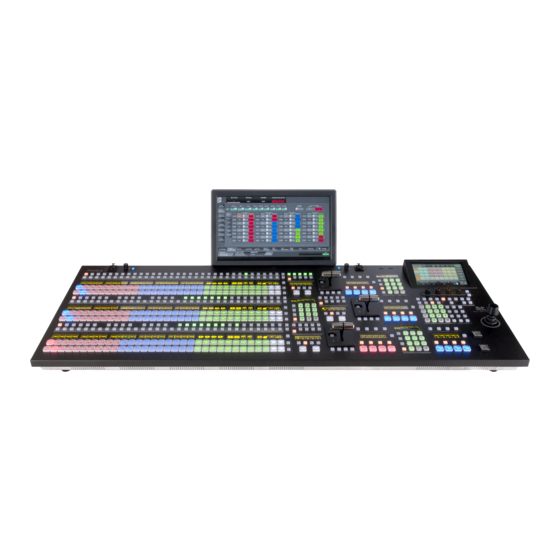
HVS-6000/6000M
2120ROU/2240OU/3320OU
1. Connection
Reference
(1) Connect SDI video signal inputs.
(2) Input a reference signal. Terminate
the other connector with 75-ohm,
if it is not looped-through.
(3) Connect combined SDI video
signal outputs.
Video Server/VDR
(4) Use a supplied LAN cable to connect
LAN1 (MAIN) ports on the HVS-6000/6000M (MU)
and the control panel (OU).
(5) Use a supplied LAN cable to connect
LAN2 (SUB) ports on the HVS-6000/6000M (MU)
and the control panel (OU)..
GUI menu
(Midas Touch)
MONIT OR OUT
VGA
HDMI
(6) Supply power to the MU and the OU respectively using the supplied AC power cables.
(7) Turn on power switch(es) on the OU rear panel.
(8) Turn on power switch(es) on the MU front panel.
3. Select System Signal Format
(1) A menu is displayed on the control panel at power ON.
(2) Tap the SETUP tab in the menu.
(3) Tap SYSTEM, then FORMAT to display the [SETUP > SYSTEM > FORMAT] menu.
(4) Turn F1 to select the signal format, then press F1.
(5) Turn F2 to select the aspect ratio.
(6) Tap REBOOT to display the [SETUP > SYSTEM > REBOOT] menu.
(7) Turn F1 to select EXEC under REBOOT, then press F1 to reboot the system.
After a restart, the new format is applied.
Precautions
- Operate the unit only at the specified supply voltage.
- Ensure the unit is properly grounded at all times.
- Ensure the power cord and connectors are firmly
connected.
- Do not install/uninstall cards with power applied to the
unit.
- Unit should not be operated or stored with the cover,
panels, and/or casing removed.
Quick Setup Guide
SDI (M/E1 PGM)
SDI (M/E1 PVW)
AUXOUT 17~24
AUXOUT 1~8
M/E 1
INPUT 1~8
INPUT 17~24
INPUT 33~40
INPUT 49~56
EXT INPUT 65~72
M/E 3
GENLOCK
AC100-240V 50/60Hz IN
1
AC100-240V 50/60Hz IN
2
FAN 9
FAN 1
FAN 2
FAN 3
FAN 4
1
75-ohm termination
2
3
RS-422
4
5
6
SDI (M/E2 PGM)
ALARM
SDI (M/E2 PVW)
RATING Label
FAN 5
FAN 6
FAN 7
FAN 8
AUXOUT 25~32
AUXOUT 9~16
M/E 2
INPUT 9~16
INPUT 25~32
INPUT 41~48
INPUT 57~64
EXT INPUT 73~80
OPTION
CPU
AC100-240V 50/60Hz IN
FAN 10
3
AC100-240V 50/60Hz IN
4
HVS-6000 rear panel
HVS-2240OU
POWER 1
POWER 2
SER. NO.
AC100-240 V 50/60Hz IN
USB
LAN2
LAN1
POWER
(SUB)
(MAIN)
CONTROL
GPI IN/T ALLY OUT
ON
MODE SW
O FF
AC power
source
- Unit should not be operated or stored in a humid, dusty,
etc. environment. Doing so could result in fire or electrical
shock.
- Do not allow fluids, metal fragments, or any other foreign
objects to enter the unit. If foreign matter does enter the
unit, turn the power off and disconnect the power cord
immediately. Remove the material or contact your
authorized service representative.
- If you notice any strange smells or noises coming from the
unit, turn the power off immediately, disconnect the power
cord, then contact your authorized service representative.
MU Bundled Items
AC power cable
CD-ROM (User manual)
Quick Setup Guide (This guide)
4. Video Output
Select an M/E1PGM Video
AC power
Press a bus button on the M/E1PGM row.
source
The corresponding video will appear on M/E1 OUT1.
Select an M/E2PGM Video
Press a bus button on the M/E2PGM row.
The corresponding video will appear on M/E2 OUT1.
Select an AUX Video
(a) To output INPUT1 from AUX1, press AUX1, then 1
(b) To output the M/E1 program video from AUX12:
Press AUX12, then M/E1PGM as shown below. (HVS-2240OU)
While holding down AUX+10, press AUX2 twice quickly to display the menu, press M/E1. (HVS-2120ROU)
Press AUX12 twice quickly to display the menu, then turn F2 to select M/E1OUT1. (HVS-3320OU)
1
2
3
4
5
6
7
8
9
10
+10
AUX
KEY1
KE Y2
KE Y3
KE Y4
1
2
M/E1
M/ E2
M/E3
1
2
UT ILI TY
1
2
3
4
5
6
7
8
9
10
11
KE Y/A UX
HVS-2120ROU
RATING LABLE
KEY1
KE Y2
HVS-3320OU
1
2
5. Background Transitions
(1) Select the next video on the PST bus.
(2) Press CUT to perform Cut transitions (with BKGD lit).
Press MIX then AUTO to perform Mix transitions.
Press WIPE then AUTO to perform Pattern transitions.
Faders can be used instead of AUTO .
*
To select another transition pattern, press WIPE twice quickly to display the menu and turn F3 to select a pattern.
*
After transitions, the background video will be replaced with a new one. As soon as the images are switched, the PGM and PST bus signals on the
control panel are also switched with each other.
6. Key Transitions
The following procedure example shows how to display a logo using KEY1.
Assume that the fill and key signals are respectively input IN11 and IN12.
(1) Select M/E1,2 DSK at top-left, then M/E2 KEY1 to display the [M/E1,2 DSK > M/E2 > KEY1 > SRC/INS]
menu.
(2) Turn F1 to change TYPE to BUS
(3) Turn F3 to select IN11. Turn F4 to select IN12.
(4) Press KEY1 ON AIR to cut in KEY1 into the PGM image. (The KEY1 ON AIR button lights up while KEY1 is displayed.)
(5) Press KEY1 AUTO to fade out KEY1 from the PGM image.
*
KEY1-4 transitions can also be performed in the BKGD transition block.
OU Bundled
2120
2240
3320
LAN cable
2
2
2
-
AC power cable
1
1
-
-
AC adapter
1
-
Bus button partition plate
10
21
-
-
User button cover plate
10
Operations on HVS-2120ROU /
3320OU are almost the same as
HVS-2240
those on HVS-2240OU.
OU
M/E1 PGM
1
2
3
4
5
6
7
8
9
10
11
12
13
14
M/E2 PGM
1
2
3
4
5
6
7
8
9
10
11
12
13
14
as shown below.
CK
13
14
15
+20
C UT
M IX
W IPE
AUX TRANSI TION
KEY1
KEY2
KEY3
KEY4
1
2
3
3
4
5
6
USE R BUT TON
1
2
3
4
5
6
7
8
12
HOLD
SEL BUS
HVS-2240OU
KE Y3
KE Y4
UTL1
UTL2
1
2
3
4
5
6
7
8
9
10
11
AUX
3
4
5
6
7
8
9
10
11
12
1 3
14
15
16
17
KEY /AUX
KEY1
KEY2
KEY3
KEY4
1
2
3
4
1
2
3
4
M/E1 OUT1-4
15
16
17
18
19
20
21
22
23
24
M/E2 OUT1-4
15
16
17
18
19
20
21
22
23
24
HVS-6000
16
17
18
C UT
M IX
WI PE
PGM
OUT1
OUT2
OU T3
AUX TRANSITION
M/E1
4
5
6
7
8
9
10
11
12
PGM
OUT1
OUT2
OU T3
AUX
M/E2
9
10
11
12
13
14
15
16
17
18
19
20
21
22
23
KEY/AUX
LINE SELECT BUS
M/E1
M/ E2
MELite1
MEL ite2
MEL ite3
MEL ite4
MELite5
12
13
14
15
1 6
17
18
PGM
OU T1
OUT2
OUT3
PGM
OU T1
OUT2
M/E1
M/E2
18
19
20
21
2 2
23
24
25
26
27
28
29
30
3 1
Fader
FLX1
FLX2
FL X3
FLX1
BUS
REC
ATTACH
DETACH
1
2
3
4
5
6
7
8
SEL BUS
9
10
11
12
13
MACRO
USER BUTTON
USER BUTTON
5
6
7
8
9
10
11
12
13
14
15
16
17
18
19
20
21
22
23
24
HOLD
KEY1
KEY2
KEY3
KEY4
KEY/FLX
BKGD
FAD ER L IMIT
NEXT TR ANSITION
BUS DISP
MIX
WIPE
EFF1
EFF2
5
6
7
8
9
10
11
12
13
14
15
16
17
18
19
20
21
22
23
24
BUS FUNC
AUTO
CUT
TRANS
REV
NOR/REV
DIRECT
PREV
PATTERN
PST row
CUT
AUTO
14
15
16
17
18
USER BUTTON
KE Y1
KE Y2
KEY3
KE Y4
28
29
30
USER BUTTON
BK GD
FADER LIMIT
NEXT TRANSITION
ON AIR
MIX
WI PE
EF F1
EF F2
DVE
DVE
DVE
AUTO
CUT
KEY1
KEY2
KEY3
TR ANS
REV
NOR /REV
DIR ECT
PREV
PAT TERN
M V1
M V2
24
MELite6
OUT3
32
31
DVE
KEY4
Advertisement

Related Manuals for FOR-A HVS-6000


Summary of Contents for FOR-A HVS-6000
- Page 1 (4) Use a supplied LAN cable to connect (b) To output the M/E1 program video from AUX12: LAN1 (MAIN) ports on the HVS-6000/6000M (MU) AC100-240V 50/60Hz IN FAN 10 Press AUX12, then M/E1PGM as shown below. (HVS-2240OU) and the control panel (OU).
- Page 2 (2) Connect combined SDI video signal outputs. AC100-240V 50/60Hz IN source (PGM / PVW) on the HVS-6000/6000M(MU). (3) Tap REBOOT. Tap YES in the confirmation dialog to reboot the system. After a restart, the new format is applied. (3) Use a supplied LAN cable to connect...
Need help?
Do you have a question about the HVS-6000 and is the answer not in the manual?
Questions and answers