Table of Contents
Advertisement
Quick Links
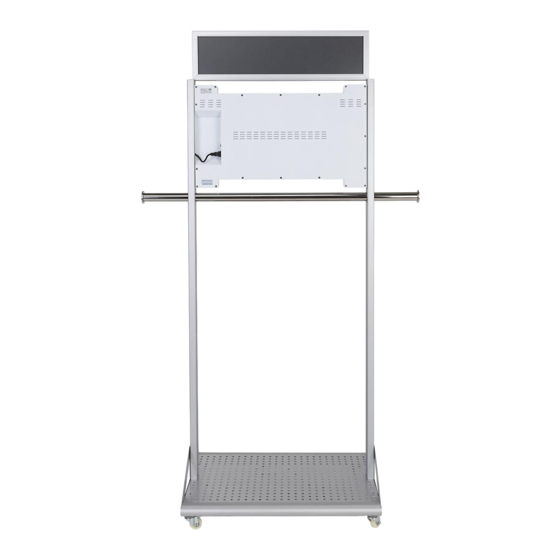
Model: SMMGRDS
Description: Mobile Garment Rack with 21.5 inch Digital Screen
Scan QR code to visit
the product page:
Note: Before using the product, please read the instructions carefully!
Do not attempt to disassemble this product. If the product does not work properly, please call our
Customer Service Department at 1-844-221-3393.
USER MANUAL
FCC ID: 2ASCB-SMMGRDS
This device complies with Part 15 of the FCC Rules. Operation is
subject to the following two conditions:
(1) this device may not cause harmful interference, and
(2) this device must accept any interference received, including
interference that may cause undesired operation.
Any changes/modifications to this equipment not approved by the
party responsible for compliance could void the user's authority to
operate the equipment.
1
Rev. 20.10
Advertisement
Table of Contents

Related Manuals for Displays2go SMMGRDS


Summary of Contents for Displays2go SMMGRDS
- Page 1 Model: SMMGRDS Description: Mobile Garment Rack with 21.5 inch Digital Screen Scan QR code to visit FCC ID: 2ASCB-SMMGRDS This device complies with Part 15 of the FCC Rules. Operation is the product page: subject to the following two conditions:...
-
Page 2: Table Of Contents
Contents Features ..............................3 Safety Warnings and Precautions ....................... 3 Assembly and Connection .......................... 6 Parts List ................................6 Assembly ................................. 7 Remote Control ............................11 Description of Basic Operation ......................... 12 Power on/Standby ............................12 Interface and Home Screen........................... 12 Description of Wallpaper Switch ........................ -
Page 3: Features
Thank you for purchasing the high-performance multi-functional LED backlight Digital Signage from Displays2go. We have considered the factors to ensure personal safety in product design and have tested rigorously at the factory. However, improper installation and use may result in electric shock and fire. - Page 4 Please ask qualified technician for repair. Note: Contact Displays2go if you have questions about the operation, debugging and connection of the unit; if the unit doesn’t work normally, please cut off the power immediately and consult the dealer. The unit is class-A product, which may cause radio interference in living environment.
- Page 5 CAUTION ⚫ Do not let children climb onto the Digital Signage. ⚫ Keep the small parts away from children to prevent them from swallowing. ⚫ If the Digital Signage won’t be used for a long time, please turn it off and pull out the power plug. ⚫...
-
Page 6: Assembly And Connection
Assembly and Connection Parts List PART PICTURE QTY. Side bracket Base plate Connecting tube Wheel with lock Wheel Poster frame LCD panel Top support bar Stainless steel bar Fixing plate Stainless steel end cap Aluminum. straight pole Remote control M6x20 Hex Drive Flat Head Screw M4x16 Phillips Rounded Head Screw M4x8 Phillips Low-profile Head Screw... -
Page 7: Assembly
Assembly CAUTION: Disconnect the power plug before assembling or disassembling the unit! Assemble the connecting tubes with the side brackets using 16pcs M6x20 Hex Screws. Turn over the base as shown, screw 4 wheels into the bottom holes. Assemble the base plate using M4x8 phillips low-profile head screws. - Page 8 Slide the L bracket into the grooves of the straight pole. Fix brackets using 12pcs M4x 16 Phillips Rounded Head Screw. Assemble the other side the same way. Carefully lay the LCD panel on a soft and non-abrasive surface. Attach the Aluminum Poles to the LCD frame on both sides and align holes on the L- shaped brackets with holes on the LCD frame.
- Page 9 Insert the bar through the holes on the straight poles, and then screw the end caps on both sides. Move the bar and align the precut slot with the fixing plate on the pole. Fix the hanging bar securely. Remove the lens and back sheet of the poster frame. Fix the poster frame onto the top support bracket using 4pcs M4x16 Phillips Flat Head Screws.
- Page 10 Align the holes on the poles and the side brackets as shown on the left. Secure the aluminum poles by tightening 8pcs M6x20 Hex Drive Flat Head Screws. Carefully move the assembled garment rack to its upright position. Insert the poster as shown in the box below.
-
Page 11: Remote Control
Remote Control Installing batteries for the remote control: Remove the battery cover and insert two AAA batteries (1.5V). Ensure that the battery polarity matches the “+”/“-” marks in the battery compartment of the remote control. Precautions for using the remote control: •... -
Page 12: Description Of Basic Operation
Description of Basic Operation Power on/Standby Insert the power plug into the outlet. If the Digital Signage has the switch button “I”, turn it on. In power on state, press the “ ” button on the remote control, and the Digital Signage enters standby state. Interface and Home Screen After power on, the machine will launch home screen, as shown below: Icon... -
Page 13: Description Of Wallpaper Switch
Description of Wallpaper Switch We suggest using a mouse to change the wallpaper. Connect a mouse with the digital panel through USB port, then follow the steps below: click “Setting” At the setting menu, click “Display” At the Display setting menu, click “Wallpaper”, then choose a folder. Then select an image you would like to set up as background. -
Page 14: Local Settings
Local Settings 1. Click the App Drawer icon “ ” in the Home page to enter the “APPS” menu interface (Fig. 1); 2. Click the “Settings” icon (Fig. 1) and enter “Settings” menu (Fig. 2); 3. Click “Wi-Fi” and choose options then set up the WIFI connection (Fig. 3). Description of Settings Interface (shown on the right) Icon Function... -
Page 15: Status Of Menu Bar
Status of Menu Bar 1. Click the setting (Fig. 1); 2. At the setting menu click the display menu (Fig. 2); 3. At the display setting menu unselect the display navigation check box (Fig. 3); DiViEx APP Introduction System requirements: Step 1: Before using the APP, make sure your device meets or exceeds the following system requirements: RK3288 Operating system... - Page 16 Image JPG/JPEG/BMP/PNG Video AVI, MPEG4, WMV, MKV, FLV, MP4, MOV Music Step 3: Plug the USB drive into the device and click the DiViEx APP. Step 4: When the screen shows “Copy finished” after “Usb Disk:”, the media files are ready to be displayed.
-
Page 17: Settings
Settings: Set the time each picture is to be shown on the screen by dragging the bar to the desired time. Select how you would like the images to display. Select the desired transition effect between pictures: ⚫ Auto Boot DiViEX APP will automatic open when the digital signage is turned on. - Page 18 ⚫ Image deletion Click " " to delete unwanted pictures...
-
Page 19: Music
Music: List all music files in the Playlist library ⚫ Add music to “Playing List Music” (Background music) from “Playlist Library”. Click “right arrow”, music title will show in the “Playlist Music” on the right. ⚫ To remove the added music file from the playlist, click the “left arrow” in the playlist. Factory Reset: 1. -
Page 20: Choose System Language
Choose System Language: 1. Get into Settings, then click “Language & input” (Fig. 1) 2. Click “Languages”, then click “Add a language” (Fig. 2) 3. You can add the required system language (Fig. 3) 4. Drag the system language you just added up to the front (Fig. 4)-Please use a mouse to operate. -
Page 21: Technical Specifications
Technical Specifications ITEM SPECIFICATION LCD size 21.5” Panel Model T215HVN01 Light source LED backlight Resolution 1920(H)× 1080(V) Brightness (typ.)/(min) 250 nits (typ.) Contrast (typ.) 3000:1 (typ.) Panel Response (ms) 18ms (typ.) Pixel pitch 248.25(µm) x 248.25(µm) Refresh rate 50/60Hz Viewing angle 89°... - Page 22 Supported Audio files RTC (real-time clock) Functions Schedule power on/off USB compatible System update App installation Support download and installation Ethernet (RJ45) HDMI I/O interfaces Headset USB2.0 Language English CARTON SPECIFICATIONS Gross weight 13.1kgs Base Package dimensions ≈875x590x100mm Frame Material Steel Wheels Color...
-
Page 23: Troubleshooting The Digital Signage
Troubleshooting the Digital Signage Issue Probable Cause Solutions ⚫ ➢ No picture or sound Unit not plugged into wall outlet □ Check that the unit is plugged into wall ➢ Power cord not properly outlet. connected to the terminal on the □... - Page 24 Having problems Did you purchase the □ If you purchased DisplayIt!Xpress software with installing DisplayIt!Xpress software from from Displays2go or from Best Wave directly, software or getting Displays2go? please contact Best Wave at ➢ content to play Did the customer purchase or support@bestwave.
-
Page 25: Cleaning And Maintenance
➢ App is defective Copy > Home > NAND > MediaFolder > ➢ Android board is defective. Images> Editor > Paste Open SlideShow app and select desired transitions, slide time and looping > Play MX Player steps > Follow same steps as SlideShow App >... - Page 26 Electrical and Electronic Products Recycling and Disposal Regulations or send it to qualified local manufacture for recycling. This Manual is for reference only and is subject to change without prior notice. Visit Displays2go.com for the latest product information and User Manual updates.
Need help?
Do you have a question about the SMMGRDS and is the answer not in the manual?
Questions and answers