Table of Contents
Advertisement
Quick Links
Advertisement
Table of Contents

Subscribe to Our Youtube Channel
Related Manuals for Kontron PCI-AOB8/12


Summary of Contents for Kontron PCI-AOB8/12
- Page 1 PCI-AOB8/12 (16/12) User’s Guide Manual PN: 00650-151-2A May 2002 www.kontron.com...
- Page 2 This user’s guide may contain or reference information and products protected by copyrights or patents and does not convey any license under the patent rights of Kontron, nor the rights of others.
-
Page 3: Table Of Contents
System Installation ......... 2-7 PCI-AOB8/12 (16/12) User’s Guide... - Page 4 Introduction ..........8-3 PCI-AOB8/12 (16/12) User’s Guide...
- Page 5 Table 9-2. Pin Assignments, 40-Pin Header ....9-5 Table 9-3. Pin Assignments, DF37F..... . 9-6 PCI-AOB8/12 (16/12) User’s Guide...
- Page 6 This page intentionally left blank. PCI-AOB8/12 (16/12) User’s Guide...
- Page 7 ä ä ä ä Figure 1-1. PCI-AOB8/12 (16/12) Block Diagram....1-10 Figure 3-1. PCI-AOB8/12 (16/12) Option Selection Map ... . . 3-5...
- Page 8 This page intentionally left blank. viii PCI-AOB8/12 (16/12) User’s Guide...
-
Page 9: Safety Instructions
Safety Instructions ä ä ä ä Contents Before You Begin ..........xi When Working Inside a Computer . - Page 10 This page intentionally left blank. PCI-AOB8/12 (16/12) User’s Guide...
-
Page 11: Before You Begin
Before You Begin ä ä ä ä Before handling the PCI-AOB8/12 (16/12), read the instructions and safety guidelines on the following pages to prevent damage to the product and to ensure your own personal safety. Refer to the “Advisories” section in the Preface for advisory conventions used in this user’s guide, including the distinction between Warnings, Cautions, Important Notes, and Notes. -
Page 12: When Working Inside A Computer
Also, before connecting a cable, make sure both connectors are correctly oriented and aligned. CAUTION Do not attempt to service the system yourself except as explained in this user’s guide. Follow installation and troubleshooting instructions closely. PCI-AOB8/12 (16/12) User’s Guide... -
Page 13: Preventing Electrostatic Discharge
Perform service at an ESD workstation and follow proper ESD procedure to reduce the risk of damage to components. Kontron strongly encourages you to follow proper ESD procedure, which can include wrist or heel straps and smocks, when servicing equipment. - Page 14 This page intentionally left blank. PCI-AOB8/12 (16/12) User’s Guide...
-
Page 15: Preface
Preface ä ä ä ä Contents How to Use This Guide ........xvii Customer Comments. - Page 16 This page intentionally left blank. PCI-AOB8/12 (16/12) User’s Guide...
-
Page 17: How To Use This Guide
Technical Support. The following is a summary of the chapter contents: J Chapter 1, Introduction, describes the PCI-AOB8/12 (16/12) A/D converter features and provides PCI-AOB8/12 (16/12) specifications. J Chapter 2, Installation, provides software and system installation instructions. It also describes the directory structure created when the software is installated. -
Page 18: Customer Comments
“Contact Us” on our web site (www.kontron.com) under “Technical Support.” Detail any errors you find. We will correct the errors or problems as soon as possible and post the revised user’s guide in our online Support Library. -
Page 19: Advisory Conventions
Disclaimer: We have tried to identify all situations that may pose a warning or caution condition in this user’s guide. However, Kontron does not claim to have covered all situations that might require the use of a Caution or Warning. -
Page 20: Unpacking
2) Remove all items from the box. If any items listed on the purchase order are missing, notify Kontron customer service immediately. 3) Inspect the product for damage. If there is damage, notify Kontron customer service immediately. Refer to “Guarantee and Warranty Policy” for the return procedure. -
Page 21: Regulatory Compliance Statements
Although Kontron offers accessories, the customer must ensure that these products are installed with proper shielding to maintain CE compliance. Kontron does not offer engineering services for designing cabling systems. In addition, Kontron will not retest or recertify systems or components that have been reconfigured by customers. - Page 22 This page intentionally left blank. PCI-AOB8/12 (16/12) User’s Guide xxii...
-
Page 23: Guarantee And Warranty Policy
Effective April 1, 1998, all products carry a 2-year limited warranty. Within 2 years of purchase, Kontron will repair or replace, at our option, any defective product. Kontron will service the warranty for all standard catalog products for the first two years from the date of shipment. -
Page 24: Return Procedure
Kontron or its authorized agent; or if the failure is caused by accident, acts of God, or other causes beyond the control of Kontron or the manufacturer. Neglect, misuse, and abuse shall include any installation, operation, or maintenance of the product other than in accordance with the user’s guide. -
Page 25: Limitation Of Liability
Limitation of Liability ä ä ä ä In no event shall Kontron be liable for any defect in hardware, software, loss, or inadequacy of data of any kind, or for any direct, indirect, incidental, or consequential damages in connection with or arising out of the performance or use of any product furnished hereunder. Kontron’s liability shall in no event exceed the purchase price of the product purchased hereunder. -
Page 26: Introduction
Chapter 1 Introduction ä ä ä ä Contents Features ..........1-3 Description . -
Page 27: Features
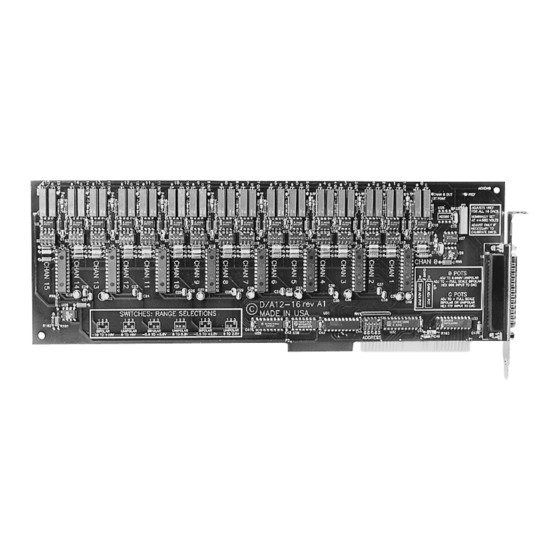
Description ä ä ä ä The PCI-AOB8/12 (16/12) are full-size cards that can be installed in any long PCI slot of PC-AT class computers. They contain either eight or sixteen double-buffered digital-to-analog converters (DACs) that provide independent analog output channels of 12-bit resolution. Each analog output channel can be configured for ranges of: 0V to +2.5V... - Page 28 The DAC outputs are undefined at power-up. Therefore, in order to prevent excessive outputs to external circuits, the PCI-AOB8/12 (16/12) contains automatic circuits that set D/A outputs to less than 15 percent of span at system power-on. Upon power-up, the card is not in the Simultaneous Update mode.
-
Page 29: Specifications
ä ä ä ä 4 to 20mA (with excitation voltage 8-36VDC) Voltage ranges (5mA max) ä ä ä ä 0V to +2.5V 0V to +5V 0V to +10V 2.5V to +2.5V 5V to +5V 10V to +10V Specifications PCI-AOB8/12 (16/12) User’s Guide... -
Page 30: Ad7237 D/A Converter, Double Buffered / Simultaneous Update
ä ä ä ä ± ½ LSB integral non-linearity over rated temperature range Gain Stability ä ä ä ä 15 ppm/ °C Output Drive Capability ä ä ä ä 5mA max. Short-Circuit Current ä ä ä ä 25mA max. PCI-AOB8/12 (16/12) User’s Guide... -
Page 31: Digital I/O
Logic Low: -0.5 to +0.8VDC, Input Load: -200µA Counter/Timer ä ä ä ä Type ä ä ä ä 82C54 programmable interval counters Output Drive ä ä ä ä 2.2mA at 0.45VDC (5 LSTTL loads) Input Gate ä ä ä ä TTL/CMOS compatible Specifications PCI-AOB8/12 (16/12) User’s Guide... -
Page 32: Environmental
ä ä ä ä 0° to 60° C Storage Temperature Range ä ä ä ä -20° to 85° C Humidity ä ä ä ä 5% to 95% non-condensing External DAC Reference (input) ä ä ä ä +4.5V to +5.5V PCI-AOB8/12 (16/12) User’s Guide... - Page 33 ä ä ä ä 12.2" long (310 mm) Power Required ä ä ä ä +12VDC at 310mA max. (16 channels) 12VDC at 150mA max. +5VDC at 662mA typical with all digital outputs at high impedance Specifications PCI-AOB8/12 (16/12) User’s Guide...
- Page 34 GROUP PORT C HI PORT C LO FREQUENCY INPUT 8254 CONTROL LOGIC INPUT GATE CTR0 1MHz OSC INPUT GATE CTR1 INPUT FREQUENCY OUTPUT GATE CTR2 PULSE WIDTH INPUT (GATE) Figure 1-1. PCI-AOB8/12 (16/12) Block Diagram PCI-AOB8/12 (16/12) User’s Guide 1-10...
-
Page 35: Installation
Chapter 2 Installation ä ä ä ä Contents Software Installation ........2-3 CD Installation . -
Page 36: Software Installation
2) The CD should automatically run the install program after 30 seconds. 3) If the install program does not run, click START | RUN and type d:install. Then click OK or press Enter. 4) Follow the on-screen prompts to install the software for this card. Software Installation PCI-AOB8/12 (16/12) User’s Guide... -
Page 37: Directories Created On The Hard Disk
WinRISC.exe – A Windows dumb-terminal type communication program designed for RS-422/ 485 operation. Used primarily with remote data acquisition pods and our RS-422/485 serial communication product line. Can be used to say hello to an installed modem. PCI-AOB8/12 (16/12) User’s Guide... - Page 38 SOURCE ä ä ä ä A utility program is provided with source code you can use to determine allocated resources at run-time from your own programs in DOS. Software Installation PCI-AOB8/12 (16/12) User’s Guide...
- Page 39 Poly.exe ä ä ä ä A generic utility to convert a table of data into an nth order polynomial. Useful for calculating linearization polynomial coefficients for thermocouples and other non-linear sensors. PCI-AOB8/12 (16/12) User’s Guide...
-
Page 40: System Installation
SETUP.EXE software program. 4) Locate an available PCI slot and remove the blank metal slot cover. 5) Gently insert the PCI-AOB8/12 (16/12) into the slot. Make sure that the board is seated properly and that there is a positive chassis ground. - Page 41 PNP-compliant operating system) should set the CMOS option to OS. Systems running under DOS, WindowsNT 3.51, Windows 3.1, or any other non-PNP-compliant operating system should set the PNP CMOS option to BIOS or motherboard. Save the option and continue booting the system. PCI-AOB8/12 (16/12) User’s Guide...
- Page 42 Chapter 3 Option Selection ä ä ä ä Contents Introduction..........3-3 Output Ranges .
- Page 43 Voltage Range JP1-16 0 to +2.5V Set in Position V 0 to +5V 0 to +10V -2.5V to +2.5V -5V to +5V -10V to +10V Current Range JP1-16 4 mA to 20 mA Position I Introduction PCI-AOB8/12 (16/12) User’s Guide...
- Page 44 (mode 2 or mode 4), initialize your ISR, enable updates (read base+5), and enable interrupts (read base+3). This counter-generated update pulse is available at the 40-pin header connector (OUT2) to synchronize external devices. Refer to Chapter 5, “Programming” of this manual for more detail. PCI-AOB8/12 (16/12) User’s Guide...
- Page 45 Figure 3-1. PCI-AOB8/12 (16/12) Option Selection Map Analog Output Update PCI-AOB8/12 (16/12) User’s Guide...
- Page 46 Chapter 4 Address Selection ä ä ä ä...
- Page 47 To determine the base address that has been assigned, run the PCIFind.EXE utility program provided. This utility will display a list of all of the Kontron cards detected on the PCI bus, the addresses assigned to each function on each of the cards, and the respective IRQs.
- Page 48 Chapter 5 Programming ä ä ä ä Contents Introduction..........5-3 Table 5-1.
- Page 49 Introduction ä ä ä ä The PCI-AOB8/12 (16/12) DACs, timers, and digital I/O use 40 consecutive I/O addresses. Programming the PCI-AOB8/12 (16/12) is very straightforward as there are only three operating modes, three range-selection switches per channel, and one unique addition. The basic...
- Page 50 * Although it is possible to write the low and high bytes separately as shown above, it is much easier to write both bytes with a single OUT DX, AX instruction. In that case, only even addresses are written. PCI-AOB8/12 (16/12) User’s Guide...
- Page 51 Base + 18 DAC 12 Low Byte Base + 19 DAC 12 High Byte Base + 1A DAC 13 Low Byte Base + 1B DAC 13 High Byte Base + 1C DAC 14 Low Byte Introduction PCI-AOB8/12 (16/12) User’s Guide...
- Page 52 Base + 25 Counter/Timer 1 Counter/Timer 1 Base + 26 Counter/Timer 2 Counter/Timer 2 Base + 27 Counter/Timer Control Counter/Timer control register Register Table 5-2. I/O Address Map for the Digital I/O and Counter/Timers Low Byte High Byte PCI-AOB8/12 (16/12) User’s Guide...
- Page 53 For Bipolar ranges: For Bipolar ranges, data are in offset binary form. XXXX 0000 0000 0000 = -Full Scale XXXX 1000 0000 0000 = Zero XXXX 1111 1111 1111 = +Full Scale MSB or B11 <----| |----> B0 or LSB Introduction PCI-AOB8/12 (16/12) User’s Guide...
- Page 54 J There are two 8-bit ports (A and B) and two 4-bit ports (C Hi and C Lo) J Any port can be configured as an input or an output J Outputs are latched J Inputs are not latched PCI-AOB8/12 (16/12) User’s Guide...
- Page 55 The 8255 control register will latch a new configuration byte when it's written to with bit D7 high. If, for example, hex 80 is sent to Base Address+23, the group 0 PPI will be configured in mode 0 with ports A, B, and C as outputs. Programming the Digital I/O Circuit PCI-AOB8/12 (16/12) User’s Guide...
- Page 56 Important: All data bits except D7 must be the same for the two control bytes. Those buffers will now remain enabled until another control byte with data bit D7 high is sent to Base Address+23. PCI-AOB8/12 (16/12) User’s Guide 5-10...
- Page 57 Chapter 6 8245 Counter/Timer ä ä ä ä Contents Introduction..........6-3 Operational Modes .
- Page 58 If a trigger occurs before the counter decrements to zero, a new count is loaded. This forms a retriggerable one-shot. In mode 1, a low output pulse is provided with a period equal to the counter count-down time. Introduction PCI-AOB8/12 (16/12) User’s Guide...
- Page 59 In this mode, the counter will start counting after the rising edge of the trigger input and will go low for one clock period when the terminal count is reached. The counter is retriggerable. The output will not go low until the full count after the rising edge of the trigger. PCI-AOB8/12 (16/12) User’s Guide...
- Page 60 SC0-SC1: These bits select the counter that the control byte is destined for. Function Program Counter #0 Program Counter #1 Program Counter #2 Read/Write Cmd.* * See section on Reading and Loading the Counters. Programming the 8254 PCI-AOB8/12 (16/12) User’s Guide...
- Page 61 Read/Write MS Byte Read/Write LS Byte, then MS Byte M0-M2: These bits set the operational mode of the selected counter. Mode BCD: Set the selected counter to count in binary (BCD = 0) or BCD (BCD = 1). PCI-AOB8/12 (16/12) User’s Guide...
- Page 62 When 0, returns the status byte of counters selected by C0-C2. C0, C1, C2: When high, select a particular counter for readback. C0 selects Counter 0, C1 selects Counter 1, and C2 selects Counter 2. Reading and Loading the Counters PCI-AOB8/12 (16/12) User’s Guide...
- Page 63 After any latching operation on a counter, the contents of its hold register must be read before any subsequent latches of that counter will have any effect. If a status latch command is issued before the hold register is read, the first read will read the status, not the latched value. PCI-AOB8/12 (16/12) User’s Guide...
- Page 64 Sincestart = 4;return the number of events since the start Sincelast = 8;return the number of events since last check Stop = 16; stop counting events Reset = 32; reset number of events to 0 unsigned event_counter(unsigned BaseAddress, int feature); 8254 Driver PCI-AOB8/12 (16/12) User’s Guide...
- Page 65 The signal should be applied to the CLOCK IN pin of the card. Software latency will be affected by the operating system and will set a limit on the precision of the measurement. unsigned pulse_width(unsigned BaseAddress); PCI-AOB8/12 (16/12) User’s Guide 6-10...
- Page 66 Chapter 7 Software ä ä ä ä...
- Page 67 Overview ä ä ä ä The PCI-AOB8/12 (16/12) cards are straightforward to program. The following example is in C, but sample code is also provided on the CD in Pascal and four Windows languages: C++Builder, Delphi, VisualBASIC, and Visual C++.
- Page 68 Chapter 8 Calibration ä ä ä ä...
- Page 69 Introduction ä ä ä ä Periodic calibration of the PCI-AOB8/12 (16/12) cards is recommended if they are used in extreme environmental conditions. The card uses very stable components but high-low temperature cycles might result in slight analog output errors. This card is calibrated by software using the following formula: Y= (4096 -a - b)/4096) * X + b To calibrate the card, run the calibration program and follow the screen prompts.
- Page 70 Base + A0h -10 V to 10 V DAC 0 DAC 0 Base + BEh DAC 15 DAC 15 Base + C0h 4 to 20mA DAC 0 DAC 0 Base + DEh DAC 15 DAC 15 PCI-AOB8/12 (16/12) User’s Guide...
- Page 71 Base + FAh Channel 10 -10 V - +10 V Base + FBh Channel 11 Base + FCh Channel 12 4-20mA Base + FDh Channel 13 Base + FEh Channel 14 Base + FFh Channel 15 Introduction PCI-AOB8/12 (16/12) User’s Guide...
- Page 72 Chapter 9 Connector Pin ä ä ä ä Assignments Contents Introduction..........9-3 Table 9-1.
- Page 73 Analog DAC 14 Output D/A 15 Out Analog DAC 15 Output XREF IN External Ref In Analog GND Analog Ground Return GND Return Analog Ground Return GND Return Analog Ground Return GND Return Analog Ground Introduction PCI-AOB8/12 (16/12) User’s Guide...
- Page 74 Return GND Return Analog Ground Return GND Return Analog Ground Return GND Return Analog Ground Return GND Return Analog Ground Return GND Return Analog Ground +5 Vout Fused +5 VDC from PC Power GND Power Ground PCI-AOB8/12 (16/12) User’s Guide...
- Page 75 Digital I/O Port B - Bit 5 Return Ground Digital I/O Port B - Bit 6 Return Ground Digital I/O Port B - Bit 7 Return Ground Return Ground Return Ground Return Ground Return Ground Introduction PCI-AOB8/12 (16/12) User’s Guide...
- Page 76 Digital I/O Port B - Bit 4 Clock Out Digital I/O Port B - Bit 5 Return Ground Digital I/O Port B - Bit 6 Return Ground Digital I/O Port B - Bit 7 Return Ground Return Ground PCI-AOB8/12 (16/12) User’s Guide...
- Page 77 \ ..../ \_________________________________________/ 20 21 22 23 24 25 26 27 28 29 30 31 32 33 34 35 36 37 Introduction PCI-AOB8/12 (16/12) User’s Guide...
- Page 78 EN 60950:1992 Safety of Information Technology Equipment The technical documentation required to demonstrate this product meets the requirements of the EMC Directive and the Low Voltage Directive has been compiled by Kontron and is available for inspection by the relevant enforcement authorities.
Need help?
Do you have a question about the PCI-AOB8/12 and is the answer not in the manual?
Questions and answers