Table of Contents
Advertisement
Quick Links
Advertisement
Table of Contents

Subscribe to Our Youtube Channel
Related Manuals for RGBlink UMS4 plus


Summary of Contents for RGBlink UMS4 plus
- Page 1 UMS4 plus User Manual Article No:RGB-RD-UM-UMS4 plus E0001 Version:V1.1...
-
Page 2: Table Of Contents
Chapter 2 Install Your Product ............................12 2.1 Connecting Signals ............................. 12 2.2 Plug in Power ............................... 12 2.3 Turn on Your UMS4 plus ............................ 12 Chapter 3 Use Your Product ............................. 13 3.1Graphics Card Mosaic Setting ........................... 13 3.2 Software Installation ............................14 3.3 Add Device ................................ - Page 3 5.1 Contact us ................................35 Chapter 6 Appendix ................................36 6.1 Terms & Definitions ............................36 6.2 Revision History ..............................42 UMS4 plus User Manual...
-
Page 4: Declarations
RGBlink. If the purchaser or a third party carries out modifications or repairs on goods delivered by RGBlink, or if the goods are handled incorrectly, in particular if the systems are commissioned operated incorrectly or if, after the transfer of risks, the goods are subject to influences not agreed upon in the contract, all guarantee claims of the purchaser will be rendered invalid. -
Page 5: Operators Safety Summary
To protect users from electric shock, ensure that the chassis connects to earth via the ground wire provided in the AC power Cord. The AC Socket-outlet should be installed near the equipment and be easily accessible. UMS4 plus User Manual... - Page 6 Site Preparation The environment in which you install your product should be clean, properly lit, free from static, and have adequate power, ventilation, and space for all components. UMS4 plus User Manual...
-
Page 7: Chapter 1 Your Product
Chapter 1 Your Product 1.1 In the Box Certification Power Cord Note: Power cable are supplied according to the destination market. UMS4 plus User Manual... -
Page 8: Product Overview
Two slots are provided for installation of a select platform approved capture cards including 12G-SDI and HDMI 2.0. Use RGBlink MPS plus to configure and output multiple video sources as layers, windows or PIP, allowing outputted media to be tailored the needs of downstream processors and displays directly from the source.UMS solutions are ideal companions for video wall processors and similar devices, and perfect... -
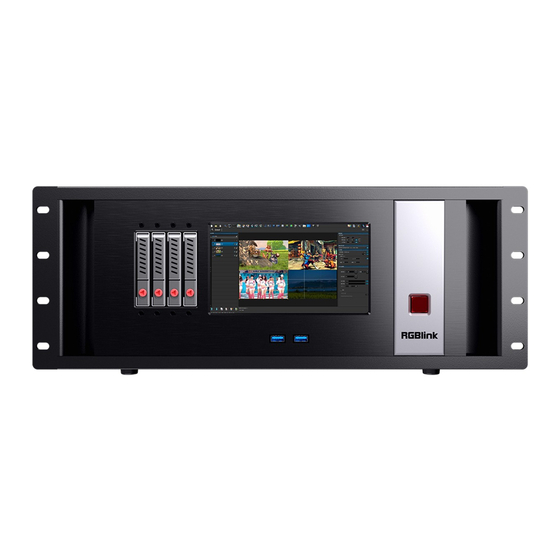
Page 9: Front Panel
1.2.1 Front Panel Item Description Harddisk Slots Replaceable Connect to keyboard and mouse LCD screen Show device status and menu Power Button Press to turn on , long press for 3 seconds to turn off UMS4 plus User Manual... -
Page 10: Rear Panel
4096×2160@60 6×DP 1.2,2×Type C,output resolutions up to 4096×2160@60 Output slots (6 *DP 1.2 is recommended to use) Audio 2×Audio in,3×Audio out,connect to earphones and speakers 2×RJ45,connect to control computer Communication 5×USB-A | 1×Type-C,connect to hard disk UMS4 plus User Manual... -
Page 11: Dimension
1.2.3 Dimension Following is the dimension of UMS4 plus for your reference: 484mm×598mm×180mm UMS4 plus User Manual... -
Page 12: Chapter 2 Install Your Product
2.2 Plug in Power Connect power cable to device and plug into wall socket. Turn on power at wall socket. 2.3 Turn on Your UMS4 plus Press the power switch and the device will enter boot interface. The device will remain the status you have set last time. -
Page 13: Chapter 3 Use Your Product
1. Right-click your computer desktop to open"NVIDIA Control Panel". 2. Click “Work Station” -- “Mosaic Setting” -- “Add new” 3. Layout Number of monitor:1-4 Layout(Row × Column):select layout according to your needs. Direction:Horizontal/Vertical Click “Next” to continue. UMS4 plus User Manual... -
Page 14: Software Installation
MPS Server requires both the Client and the Server to be installed. Both can be installed on the same device. In most cases, the client and server need to be installed respectively,so you need to install the client on the controller and the server on the playback server. UMS4 plus User Manual... - Page 15 Fill in the file name and save the file on your computer. Settings on the software will be saved in the file and you can directly load the file next time. Now you will enter MPS plus boot interface. UMS4 plus User Manual...
-
Page 16: Add Device
Device name : custom IP : IP address Resolution : Automatically detect resolution or custom resolution Width/Height : fill in width and height of display After setting,click“Accept” Add one device every time,and the number of device is unlimited. UMS4 plus User Manual... -
Page 17: Add Media
The text can be edited and displayed as the media to the big screen. 3.4.1 Add Media There are 2 ways to add media 1. Click 【Media】 on the menu bar-- 【Add local media】 2. Click the icon in the menu of media list --【Add local file】 UMS4 plus User Manual... - Page 18 Click the icon to delete the media. Left-click the video, audio or picture in the media list in the right column and drag and drop them into the time axis as shown in the picture. UMS4 plus User Manual...
-
Page 19: Layer Setting
Control Button :play :stop play :next flag :previous flag :hide layer :lock layer bind layer :mute layer Aux time axis Add aux time axis to create multiple tasks outside the main time axis. UMS4 plus User Manual... -
Page 20: Add Command
:jump CMD 添加控制命令 1. Click menu bar 【 TimeAxis】 -- 【 Add play CMD】 / 【 Add pause CMD】/【Add jump CMD】; 2. Add 【 play CMD 】 by shortcut Ctrl+W,add 【 pause CMD】by Ctrl+E,add【jump CMD】by Ctrl+R. UMS4 plus User Manual... - Page 21 Pause/Stop:Stop just on aux time axis Click【Accept】after setting done. Jump CMD Name:customize name Excutiion:select the main time axis or aux time axis Time:enable start time setting Jump to:set time position and CMD name After jump:play/pause/delay Click【Accept】after setting done. UMS4 plus User Manual...
-
Page 22: Story
If the start time of multiple media is the same, it will be played at the same time, and the end time will be determined according to the length of media. This playback setting applies to one device or multiple devices playing multiple media at the same time UMS4 plus User Manual... - Page 23 :play :pause when the play is over :loop play :pause :return to first frame When playing,the countdown will be shown. Double click the program can rename it. UMS4 plus User Manual...
-
Page 24: Media Effect
The media is displayed as a rectangular plan in the stage window. Edit the values of position parameters X and Y to change the position of the media. Drag the media with the left mouse button can also change the position. UMS4 plus User Manual... - Page 25 You can cut off the unnecessary part by sliding the crop bar. Volume You can set the volume for audio and video.If complex effect is needed, you can achieve it by adjust the volume in different position of the timeline UMS4 plus User Manual...
-
Page 26: Output Settings
In the menu,you can adjust the geometry to every device.You can adjust via point/row/column/all according to your needs. The geometric adjustment function can be applied to multi-channel projection picture correction,3D projection picture correction, special-shaped projection picture correction, 3D Mapping projection correction. UMS4 plus User Manual... -
Page 27: Stage Preview
Medias within the blue rectangle are normally output to the display device, so when adding media, it is important to note that the parts of the media that need to be displayed must be added to the blue rectangle. UMS4 plus User Manual... -
Page 28: Program Preview
:click to lock all operations of the layer.It will return editing status when clicking again. :click to hid the preview image. :click to mute the media.It will return normally when clicking again. UMS4 plus User Manual... -
Page 29: Save And Export
The main function of Export is to export the entire project file to a folder, and then copy the entire folder to other servers (including all the media materials used), can be directly used without editing. Steps:Click【File】--【Export】 UMS4 plus User Manual... -
Page 30: General Setting
,which is in the unplayed state. 4. Auto play on connected to server:the server will display the project file. 3.8.2 TimeAxis Media default: 30s Time Axis FPS: System default 25FPS,you can select 30/50/60/75/100/120FPS Arrangement:Seriel/Parallel Max Media count:default 2000 UMS4 plus User Manual... -
Page 31: Save
Use frame sync mechanism: click the option and set delay time frame and click “accept”to make effect Show logo: When the server is boot up, it will display MPS If there is no other media import. UMS4 plus User Manual... -
Page 32: Control
: view mode : option : device mode : media mode : template mode : position effect : scale effect : rotation effect : opacity effect : media clip : volume effect Shortcut key Add new:ctrl+N Open:ctrl+O Save:ctrl+S UMS4 plus User Manual... - Page 33 Add local file:ctrl+M Stage Device: D Media: M Tempale: T Virtual screen:V Time Axis Add aux time axis:ctrl+T Add layer:ctrl+I Remove layer:ctrl+shift+I Add program:alt+S Remove program:alt+N Add play CMD:ctrl+W Add pause CMD:ctrl+E Add jump CMD:ctrl+R Stop:Backspace Play/pause:Space UMS4 plus User Manual...
-
Page 34: Product
Chapter 4 Ordering Codes 4.1 Product 820-0002-05-0 UMS4 pro 820-0002-06-0 UMS4 plus 820-0002-07-0 UMS4 max 4.2 Accessory 829-0001-01-0 12G SDI capture card 829-0002-01-0 HDMI 2.0 capture card 829-0011-01-0 3G SDI capture card 829-0012-01-0 HDMI 1.3 capture card 829-0023-01-0 AMD sychron-card... -
Page 35: Chapter 5 Support
Chapter 5 Support 5.1 Contact us UMS4 plus User Manual... -
Page 36: Chapter 6 Appendix
Technology for transmitting large-volume 8K signals over a single cable. a signal interface called the ultra high definition signal/data interface (U-SDI) for transmitting 4K and 8K signals using a single optical cable. The interface was standardized as the SMPTE ST 2036-4. UMS4 plus User Manual... - Page 37 ●Single-mode Fiber: Fiber that support a single mode are called single-mode fibers. Single-mode fibers UMS4 plus User Manual...
- Page 38 ● USB 3.2: Super Speed USB with 3 varieties of 3.2 Gen 1(original name USB 3.0), 3.2Gen 2(original name USB 3.1), 3.2 Gen 2x2 (original name USB 3.2) with speed up to 5Gbps,10Gbps,20Gbps respectively. USB version and connectors figure: Type Type B Mini Mini Micro- Micro Type C USB 2.0 USB 3.0 UMS4 plus User Manual...
- Page 39 ● NDI: Network Device interface (NDI) is a software standard developed by NewTek to enable video-compatible products to communicate, deliver, and receive broadcast quality video in a high quality, low latency manner that is frame-accurate and suitable for switching in a live production environment over UMS4 plus User Manual...
- Page 40 ●OSC: The principle of Open Sound Control (OSC) protocol is for networking sound synthesizers, computers, and multimedia devices for musical performance or show control. As with XML and JSON, the OSC protocol allows sharing data. OSC is transported via UDP packets between devices connected on an Ethernet. UMS4 plus User Manual...
- Page 41 ●Seamless Switching: A feature found on many video switchers. This feature causes the switcher to wait until the vertical interval to switch. This avoids a glitch (temporary scrambling) which often is seen when UMS4 plus User Manual...
-
Page 42: Revision History
Update rear panel Sylvia All information herein is Xiamen RGBlink Science & Technology Co Ltd. excepting noted. is a registered trademark of Xiamen RGBlink Science & Technology Co Ltd. While all efforts are made for accuracy at time of printing, we reserve the right to alter otherwise make change without notice.
Need help?
Do you have a question about the UMS4 plus and is the answer not in the manual?
Questions and answers