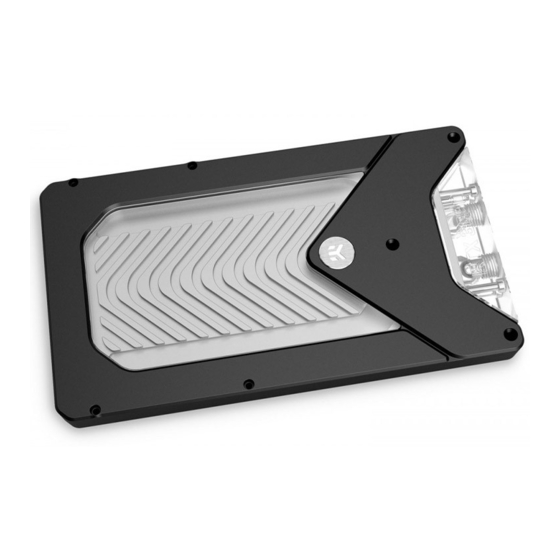
EK-Quantum Vector FE RTX 3090 Quick Start Manual
D-rgb active backplate
Hide thumbs
Also See for Vector FE RTX 3090:
- User manual (16 pages) ,
- Manual (10 pages) ,
- User manual (15 pages)
Table of Contents
Advertisement
Quick Links
Advertisement
Table of Contents

Summary of Contents for EK-Quantum Vector FE RTX 3090
- Page 1 EK-Quantum Vector FE RTX 3090 D-RGB Active Backplate USER GUIDE...
- Page 2 This product is intended for installation by expert users only. Please Before you start using this product, please follow these basic consult with a qualified technician. Improper installation may result guidelines: in damage to your equipment. EK assumes no liability whatsoever, expressed or implied, for the use of this product or its installation.
-
Page 3: Table Of Contents
TABLE OF CONTENTS BOX CONTENTS ACTIVE BACKPLATE DIMENSIONS REQUIRED TOOLS TECHNICAL SPECIFICATIONS AND PRODUCT PARTS PREPARING THE 3090 FE WATER BLOCK CUTTING AND PLACING THERMAL PADS ATTACHING THE BACKPLATE CONNECTING THE D-RGB LED STRIP SUPPORT AND SERVICE SOCIAL MEDIA - 3 -... -
Page 4: Box Contents
EAN: 104218 EAN: 104219 M3x25 DIN7991 Screw – Black (1 pc), M3x25 DIN7991 Screw – Nickel (1 pc), EK-Quantum Vector FE RTX 3090 D-RGB Active Backplate EAN: 9061 EAN: 104197 M3x20 DIN7991 Screw – Black (2 pcs), M3x20 DIN7991 Screw - Nickel (2 pcs), Terminal Screw M4x27 –... -
Page 5: Active Backplate Dimensions
ACTIVE BACKPLATE DIMENSIONS 19.5 mm 212.5 mm 40 mm 12.5 mm REQUIRED TOOLS Phillips Head Screwdriver Scissors - 5 -... -
Page 6: Technical Specifications And Product Parts
TECHNICAL SPECIFICATIONS AND PRODUCT PARTS Technical Specification: - Dimensions (L x H x W): 212.5 x 121.5 x 40 mm - D-RGB (Addressable RGB) Cable Length: 500 mm - D-RGB LED Count: 24 - D-RGB Connector: Standard 3-Pin (+5V, Data, Blocked, Ground) Position EAN Description Quantity... -
Page 7: Preparing The 3090 Fe Water Block
PREPARING THE 3090 FE WATER BLOCK STEP 1 Unscrew the three (3) M3x12 DIN7991 screws and remove the backplate M3 x 12 cover, as shown in the image.. DIN7991 SCREW For this Step, you will need: Allen Key 2 mm BACKPLATE COVER STEP 1... -
Page 8: Cutting And Placing Thermal Pads
STEP 3 EK-Quantum Vector FE 3090 Active Backplate comes with its own terminal, meaning the original terminal on the EK-Quantum Vector FE 3090 water block must be removed. In case the EK-Quantum Vector FE 3090 water block is already filled with coolant, empty the contents of the water block before continuing with this step. -
Page 9: Attaching The Backplate
STEP 2 Thermal Pad F 1.0mm Once cut to size thermal pads should be applied to the PCB as shown in the image. STEP 2 ATTACHING THE BACKPLATE STEP 1 For easier installation of the Active Backplate, the preinstalled terminal and metal plate must be removed. Unscrew the two (2) Terminal screws (as shown in the image) and remove the terminal. - Page 10 STEP 2 M2.5 x 20 Place the active backplate on the PCB and make sure all holes are aligned. Position the screws in each of the seven (7) mounting holes (as shown in the image) and tighten them evenly with Allen M3 x 25 DIN7991 Key 2 mm.
-
Page 11: Connecting The D-Rgb Led Strip
STEP 4 Set the Active backplate terminal in place with the preinstalled AB TERMINAL metal plate and secure it with four (4) M4x27 DIN7984 Screws. Tighten them evenly with the provided 2.5 mm Allen Key. For this Step, you will need: AB Terminal with pre- Terminal Screw Allen Key 2.5 mm... -
Page 12: Support And Service
SUPPORT AND SERVICE In case you need assistance or wish to order spare parts or a new mounting mechanism, please contact: https://www.ekwb.com/customer-support/ For spare parts orders, refer to the page with “TECHNICAL SPECIFICATIONS AND PRODUCT PARTS” where you can find the EAN number of each part you might need.


Need help?
Do you have a question about the Vector FE RTX 3090 and is the answer not in the manual?
Questions and answers