Table of Contents
Advertisement
Quick Links
Installation and Operating Instructions
Natural Gas
OFP-36LECO-N OFP-36LECO-P
OFP-48LECO-N OFP-48LECO-P
OFP-60LECO-N OFP-60LECO-P
OFP-72LECO-N OFP-72LECO-P
INSTALLER: Leave this manual with the appliance.
CONSUMER: Retain this manual for future reference.
IF YOU CANNOT READ OR UNDERSTAND THESE INSTALLATION INSTRUCTIONS
DO NOT ATTEMPT TO INSTALL OR OPERATE THIS APPLIANCE
This fireplace requires a minimum 18-square inches (per side) of cross ventilation.
Failure to provide proper ventilation can void the warranty.
Warning: For Outdoor Use Only
Installation and service must be performed by a
qualified installing service agency, or the gas
supplier
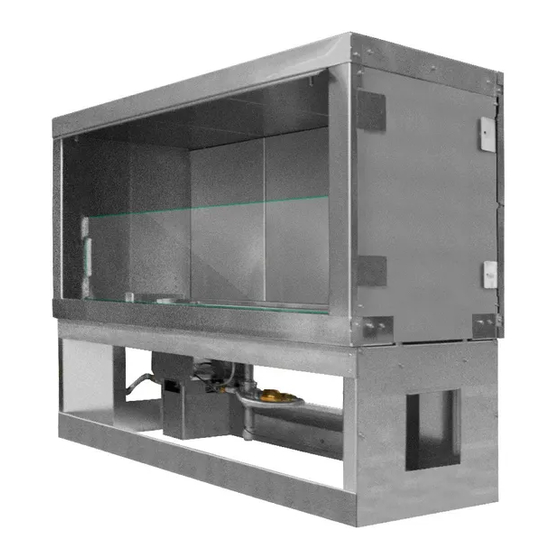
Kalea Bay
Outdoor Gas Fireplace
MODELS
Propane Gas
INSTALLATION PRECAUTION:
PN#90021
DO NOT DISCARD. THIS MANUAL
HAS IMPORTANT OPERATING AND
MAINTENANCE INSTRUCTIONS.
LEAVE WITH THE HOMEOWNER.
MODEL:
SERIAL #:
Description
36" Open Front Fireplace
48" Open Front Fireplace
60" Open Front Fireplace
72" Open Front Fireplace
#20-024
REV. E
Advertisement
Table of Contents

Related Manuals for Firegear OFP-36LECO-P


Summary of Contents for Firegear OFP-36LECO-P
- Page 1 Kalea Bay Outdoor Gas Fireplace #20-024 Installation and Operating Instructions MODELS Natural Gas Propane Gas Description OFP-36LECO-N OFP-36LECO-P 36” Open Front Fireplace OFP-48LECO-N OFP-48LECO-P 48” Open Front Fireplace OFP-60LECO-N OFP-60LECO-P 60” Open Front Fireplace OFP-72LECO-N OFP-72LECO-P 72” Open Front Fireplace INSTALLER: Leave this manual with the appliance.
- Page 2 CARBON MONOXIDE HAZARD This appliance can produce carbon monoxide which has no odor. DANGER Using it in an enclosed area can kill you. Never use this appliance in an enclosed space such as a camper, tent, car or home. DANGER WARNING FIRE OR EXPLOSION HAZARD...
- Page 3 SAFETY CERTIFICATION: These outdoor fireplaces are tested and approved to ANSI Z21.97-2017/CSA 2.41. 1. This appliance is manufactured from the factory standards by Underwriters Laboratories using listing specifically as Natural gas or Propane (LP). You must MH#60069. It should be installed by a qualified installer in specify which gas to be used.
-
Page 4: Table Of Contents
Fuels used in gas fired appliances, and the products of combustion such as fuels, contain chemicals known to cause cancer, birth defects and/or other reproductive harm. This warning is issued pursuant to the California Health & Safety Code Sec. 25249.1 IT IS IMPORTANT TO READ THROUGH THE ENTIRE INSTALLATION MANUAL BEFORE BEGINNING INSTALLATION OF THIS FIREPLACE!! TABLE OF CONTENTS... -
Page 5: Installation Precautions
Media is NOT provided and must be purchased separately. When installing media use minimum of ½” to ¾” diameter Firegear Outdoors glass to fill the burner trough. After the burner trough is covered you are permitted to fill the remaining area in the burner pan. DO NOT COVER THE IGNITION HOOD WITH ANY ROCK OR MEDIA. See Figs. - Page 6 INSTALLATION PRECAUTIONS CAUTION: BEFORE BEGINNING INSTALLATION CAREFULLY REMOVE THE GLASS WINDSHIELD, PARTS BOX AND ANY PACKING MATERIALS FROM FIREPLACE AND SET ASIDE FOR LATER USE. FRAMING: After framing is complete, place the fireplace into position and secure it with the side nailing flanges. Next install cement board, securing it to the metal studs and fireplace.
- Page 7 INSTALLATION PRECAUTIONS The vents (VENT-KIT-6x12SS ) used for cross ventilation should be installed at each end of the fireplace. Vents should be placed 3-4” from the bottom of the fireplace and centered side to side as shown in Fig. 3B. Vent 3-4”...
- Page 8 42,000 (19.00 kW) (12.30 kW) LP Models: LP Btu’s LP Btu’s LP Low Factory High Rate Orifice Screw OFP-36LECO-P #52 30,000 19,5000 (8.79kW) (5.72kW) OFP-48LECO-P #48 42.500 29.000 (12.46kW) (8.50kW) Disclaimer: Btu listings are based on 7.0”WC for OFP-60LECO-P #44...
-
Page 9: Gas Pipe Sizing
REFERENCE GAS PIPE SIZING GAS PIPE SIZING NATURAL GAS : PIPE SIZING CHART Length of Pipe in Feet 1/2” 3/4” 1” 1 - 1/4” 1 - 1/2” 2” 2 - 2 1/2” 3” 4” • Natural Gas (NG) flow is given in 1237 2259 3640... - Page 10 SINGLE-SIDED FIREPLACE DIMENSIONS, FRAMING AND CLEARANCES SECTION This fireplace comes with two boxes prepackaged inside and outside the fireplace. Do not discard any boxes unless noted to do so. Read the list below for the contents. PART NUMBER DESCRIPTION QTY. 77140 Parts box (includes all parts in box) VENT-6X12SS...
- Page 11 SINGLE-SIDED FIREPLACE DIMENSIONS & CLEARANCES Model: N= NG Overall Inside Overall Opening Overall Valve Clearance Clearance P= LP Length Opening Height Height Depth Height Depth Combustible Combustible Side Wall Ceiling OFP-36LECO-N/P 40” 36” 33½” 16” 16¼” 11½” 10¼” 6” 46 ½” OFP-48LECO-N/P 52”...
- Page 12 SINGLE-SIDED FRAMING DIMENSIONS WITH METAL STUDS Model: N=NG LP=P Width Height Depth NOTE: This outdoor fireplace is not a “load bearing” fireplace. All finishing materials must be supported OFP-36LECO-N/P 40 ½” 33 ¾” 15¾” by the surrounding structure and not rely on the OFP-48LECO-N/P 52 ½”...
-
Page 13: See-Through Fireplace Application
SEE-THROUGH FIREPLACE DIMENSIONS, FRAMING AND CLEARANCES SECTION It is important to understand that when installing this outdoor appliance the installation must follow ANSI standards as described below. AN OUTDOOR SPACE IS DEFINED AS FOLLOWS PER ANSI Z21.97: Outdoor spaces - An appliance is considered to be outdoors if installed with shelter no more inclusive than: •... - Page 14 SEE-THROUGH FIREPLACE DIMENSIONS & CLEARANCES ONLY This fireplace ships from the factory as a single sided fireplace, but by removing the back panels you can convert it into a see-through fireplace. Your specific application, single sided verses see-through, will determine your installation. Ensure you follow the proper clearances during installation.
- Page 15 SEE-THROUGH FRAMING DIMENSIONS WITH METAL STUDS Model: N=NG P=LP Width Height Depth NOTE: This outdoor fireplace is not a “load bearing” OFP-36LECO-N 40 ½” 33 ¾” 15” fireplace. All finishing materials must be supported by the surrounding structure and not rely on the OFP-48LECO-N 52 ½”...
- Page 16 WIRING TO CONTROL BOX Kalea Bay Outdoor Fireplace REV. E Page 16...
-
Page 17: Control Box Installation
CONTROL BOX INSTALLATION Step 1: After the fireplace has been framed into position begin determining the control box location. Locate the module wire harness (#77160) and battery pack harness (#VCS-ECOBBUEXT32) protruding outside of the valve box. Refer to page 16 Fig. 13. Step 2: Connect the module wire harness #77160 to #77161 wire harness (10’... -
Page 18: Control Box Wiring
CONTROL BOX INSTALLATION Step 7: Feed the wire harrness (# 77161) up to the control box and attach the Molex connectors from the module wire harness to the control box wire harness. At the same time, connect the 2-PIN connector (#VCS-ECOBBUEXT32) from module wire harness to the 2-PIN connector inside the control box. -
Page 19: Module & Battery Pack Wiring
MODULE & BATTERY PACK WIRING Kalea Bay Outdoor Fireplace REV. E Page 19... - Page 20 WIRING DIAGRAM INSIDE VALVE BOX BATT Kalea Bay Outdoor Fireplace REV. E Page 20...
-
Page 21: Final Preparation
FINAL PREPARATION After the fireplace is framed into position and the gas line is Step 2: After each LED glass clip is installed, use a flat run in place, ensure the burner pan is installed. It is blade screw and carefully bend the bottom tab out and recommended to burn test the fireplace before the upward to lock it into position. - Page 22 FINAL PREPARATION Step 5: Install the burner pan back into the fireplace. See Step 3: Remove the windshield support from the carton Fig. 24. (The front of the support has a shield facing the front. See Figs. 19-21 for details. Note: If you are installing into a see-through fireplace you will install a windshield support will be used on both sides of the fireplace.
- Page 23 FINAL PREPARATION FINAL PREPARATION Step 7: NOTE: The pilot hood will have a plastic film that must be removed before installing. Remove the plastic film from the pilot hood and place it on top of the pilot box as shown in Figs. 26 & 27.. Fig.
- Page 24 FINAL PREPARATION ½” - ¾” No media in the shaded area of the fire box Crushed Glass Fig. 31 Covering the entire fireplace floor is NOT permitted in the shaded area. Burner Trough Fig. 29 Installing media. Proper Media Height Step 9: INSTALLING HOOD(S) The fireplace requires a hood to be installed into the upper opening of the firebox.
-
Page 25: Windshield Installation
FINAL PREPARATION Glass Holders GLASS WINDSHIELD Fig. 33 Windshield glass holder location. Step 10 GLASS PANEL/WINDSHIELD INSTALLATION Step 1 • Carefully unpack the glass panels. • Using gloves carefully lift one glass panel, into the fireplace opening, over top of the glass clips, and slide it down into the metal retainer clip, supporting the glass at the top and bottom as you handle it. -
Page 26: Flame Height
FINAL PREPARATION FLAME HEIGHT Proper flame height (Fig. 35) should be at the top edge of glass windshield (peaking above at times) while on HI Pilot setting. Note: Glass windshield is 7-inches tall. The LO setting will be at least half of the height of HI or maybe (Hidden Underneath) lower. -
Page 27: Operation
OPERATION CAUTION: Children and adults should be alerted to the hazards on high surface temperatures and should stay away to avoid burns or clothing ignition. Young children should be carefully supervised when they are in the area of the appliance. WARNING: Do not use this appliance if any part has been under water. -
Page 28: Replacement Parts
REPLACEMENT PARTS 1/2 PSI SPAIN BATT Drawings Not to Scale Not all parts are shown but all are listed on replacement parts page. Kalea Bay Outdoor Fireplace REV. E Page 28... -
Page 29: Replacement Parts List
REPLACEMENT PARTS LIST Description Item Part Number Complete Stainless Steel Burner Pan Assembly 36”-(73235) 48”-(74235) 60”-(75235) 72”-(76235) Bottom Support Fin - 2 per unit 36”-(73130) 48”-(74130) 60”-(75130) 72”-(76130) C-Size Batteries (requires (4); supplied with fireplace) BATTC 1/2” Flex Gas Line (46-inch Length) T-200-9898-46 Air Shutter Orifice NG (for 36”... - Page 30 NATURAL GAS TO LP GAS CONVERSION This kit will properly convert the outdoor fireplace to LP gas. Kit contents are: (1) OAS-LP# (Brass orifice) and (1) ECO- LSS# (Brass low rate set screw), (1) LP Conversion label (placed next to blank space on rating label, (1) Installation instruction Model Main Burner...
- Page 31 NATURAL GAS TO LP GAS CONVERSION Fig. 6 Show pilot assembly under the pilot hood. Plastic Stem Regulator Fig. 5 Regulator stem shown in LP setting Step 8: Lift/pull the pilot head straight up and out of the pilot assembly. If pilot head does not move, then pull the wire clip, under the head, with a small screwdriver or CAUTION: Ensure the aluminum cap is installed with the needle-nose pliers, then lift the head off.
- Page 32 NATURAL GAS TO LP GAS CONVERSION Step 9: Insert a 4mm hex head (allen wrench) into the octagon hole of the brass orifice inside the pilot assembly and turn clockwise until it stops (approximately 2 full revolutions). See Fig. 8. Top View of Pilot Assembly Low Rate...
-
Page 33: Fireplace Maintenance
FIREPLACE MAINTENANCE 1. The fireplace should be inspected and cleaned before first use at the beginning of each season by a qualified field service person. 2. Any component that is found faulty must be replaced with an approved component. 3. Any tampering with or modifying the fireplace is dangerous and voids all warranties. 4. -
Page 34: Troubleshooting
GENERAL TROUBLESHOOTING Symptom Remedy Fireplace 1. Bleed gas line. ADDITIONAL TROUBLE SHOOTING Won’t Light 2. Ensure all gas lines are turned ON. 3. Ensure there is not too much media overtop the burner, it can inhibit the gas flow. Too little or no media can also contribute to non-lighting. 4. - Page 35 Brand Name: Firegear Outdoors 17322 Gothard St Huntington Beach, CA 92647 Web Site: www.firegearoutdoors.com Manual changes often occur, ensure to check the Firegear Outdoor website for any recent updates and warranty information. Kalea Bay Outdoor Fireplace REV. E Page 35...
-
Page 36: Optional Accessories
OPTIONAL ACCESSORIES The following accessories are available from your local Firegear dealer/distributor. Each accessory comes with a separate installation manual. Read each instruction thoroughly before installing. Wireless Wall Switch Wireless Wall Switch Wireless Wall Switch Timer 30 MIN 60 MIN... -
Page 37: Warranty
FIREGEAR LIMITED WARRANTY - 2020 Firegear Outdoors hereby warrants to the end user that products will be free from material and workmanship defects that prevent safe and correct operation of the product. The warranty commences from date of sale to the end user for the following period: CONSUMER RESIDENTIAL APPLICATIONS –... - Page 38 COMMERCIAL APPLICATIONS – MANUFACTURED AFTER 12/02/2019 BURNER SYSTEMS, BURNERS, COMPONENTS AND ACCESSORIES • TWO (2) YEAR WARRANTY ON CONSTRUCTION AND MANUFACTURER DEFECTS • TWO (2) YEAR WARRANTY - STAINLESS STEEL BURNERS AND PANS • TWO (2) YEAR WARRANTY - BRASS BURNERS •...
- Page 39 For Commercial Applications, the liability of Firegear Outdoors is limited to the express terms of this warranty. We expressly disclaim any and all implied warranties, including any warranties of fitness for a particular purpose or merchantability.
- Page 40 We do not authorize any person or company to assume for it any other obligation or liability in connection with the sale, installation, use, removal, return, or replacement of its equipment, and or such representation are binding. Manufactured by AMD Direct, Inc. Brand: Firegear Outdoors 17322 Gothard Street, Huntington Beach, CA 92647 www.firegearoutdoors.com Phone: 800-966-8126 Email: order@firegearoutdoors.com...
- Page 41 Notes: Kalea Bay Outdoor Fireplace REV. E Page 41...
- Page 42 Having problems getting the fire pit to operate? Don’t leave the job site! We want to help! Call 800.966.8126 for Technical Support between the hours of 8:00AM to 5:00PM PST. BEFORE YOU CALL WE WILL NEED THIS INFORMATION Model Number: ___________________________ Serial Number: ___________________________ How long is the gas line run? Nat Gas ____ LP Gas ____ What size is gas line? _____...
Need help?
Do you have a question about the OFP-36LECO-P and is the answer not in the manual?
Questions and answers