
Related Manuals for Telair ENERGY 4010B


Summary of Contents for Telair ENERGY 4010B
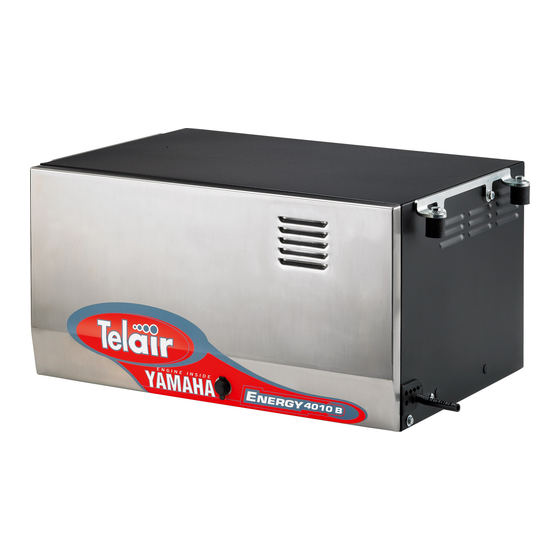
- Page 1 GENERATORS ENERGY 4010B USER'S OPERATING INSTRUCTION AND INSTALLATION MANUAL INDEX v. 001 – February 2011 Vers. 022 Energy 4010 B...
-
Page 2: Table Of Contents
INDEX 1 FOREWORD ............................. 5 1.1 Purpose and scope of this manual ..................... 5 1.2 Symbols and Definitions ......................5 1.3 General Information ........................5 2 GENERATING SET IDENTIFICATION DATA ................... 6 2.1 Components (Fig. 1) ........................6 2.2 Identification plate (Fig. 2) ......................6 2.3 Overall dimensions ........................ - Page 3 7.4 Maintenance operations to be carried out by qualified personnel..........22 7.4.1 Engine oil replacement ...................... 22 7.4.2 Air filter maintenance ......................22 7.4.3 Spark plug maintenance ....................22 7.4.4 Voltage adjustment ......................22 8 ROUTINE MAINTENANCE SCHEDULE ..................23 9 PROLONGED INACTIVITY ......................
- Page 4 Via E. Majorana , 49 48022 Lugo (RA) ITALY "CE" COMPLIANCE STATEMENT Under Machine Directive 89/392/ EEC, attachment II A We hereby represent that the generating set - the data concerning which are specified below - has been designed and built to correspond to the essential safety and health requirements laid down by the European Directive on Machine Safety.
-
Page 5: Foreword
1 FOREWORD 1.2 Symbols and Definitions Refer carefully this "Graphic safety symbols” have been employed in manual before performing any operation on this booklet to identify different levels of danger the power generator set. or important information. 1.1 Purpose and scope of this manual This means that you must This manual has been drawn up by the pay attention to avoid serious consequences... -
Page 6: Generating Set Identification Data
Power factor GENERATING SET IDENTIFICATION Frequency DATA Maximum electric power Maximum current 2.1 Components (Fig. 1) Rated voltage 230V AC Current delivered at 12V/DC Sound-proofing casing Weight Supporting brackets Bar code Access door Access door closure Technical features sticker Anti-vibration support Anchoring bracket Electronic control panel Gas pipe and cable outlet block... -
Page 7: Technical Specifications
2.4 Technical specifications ENERGY ENGINE 4010 B Type Single cylinder, 4 stroke petrol, overhead valves, air cooling Yamaha MZ 250 Engine Displacement 70 x 57 Bore x Stroke 2,0 l/h Max Fuel Consumption Lead-free petrol Fuel supply Electronic Ignition system BPR4ES Spark plug Oil sump capacity... -
Page 8: Handling
The ENERGY 4010B generating sets are provided with anchoring brackets with extra 3.3 Handling vibration dampers (Fig. 4, Ref. 1) and a fuel filter generating sets, complete with their to be fitted along the generator feeding pipe. The packaging, can be handled using common lifting brackets allow for hanging and floor assembly. -
Page 9: Floor Fastening
The brackets of the generator must be moved in order to fasten the Energy 4010B on the bearing surface. On both sides, remove the hole plugs (fig. 8 ref. -
Page 10: Wiring Connection Instructions
The generator can now be located on the previously drilled surface (fig.7) using the suitable vibration-damping cylinders (fig. 10 ref. 1) and spacers (fig. 10 rif.2) 4.4 Battery connection To start up the generating set, connection to the battery of the vehicle must be provided using a sheathed power cable up to current standards, with the cross-section shown in Table 1. -
Page 11: Electric Load Connection
Always fit a 100 A fuse Use the special cable outlet (Fig.11 Ref.1) to onto the positive cable connecting the prevent water seeping into the generating set. generating set to the positive pole of the Although the generating set is equipped with a battery. -
Page 12: Auxiliary Electric Cable Connection
4.6 Auxiliary electric cable connection All 3 auxiliary cables to connect are equipped with a polarized connector. One cable is necessary for generator operation, while the other 2 are optional cables. • Cable from the generating set to the control panel (mandatory). -
Page 13: Optional) Tank Installation Instructions
As is shown in the figure, fuel coming from a tank K fitting is taken in by suction by the pump G via the generating set; in any case, the installation a hose H and then fed to the joint C via the hose height difference should never exceed 20 cm (Fig. -
Page 14: Fuel Reserve
4.11 Battery charger ENERGY 4010B generating sets are equipped with a battery charger which can deliver current of approximately 10 Amp at 12 V. It can be used to recharge the generating set start-up battery. -
Page 15: Connecting An Additional Silencer
The generating set will not autonomously recharge the battery used for starting-up unless this is connected to a battery charger. 4.12 Connecting an additional silencer To further reduce the generating set operating noise, an (optional) additional silencer can be installed externally. The additional silencer kit code 03991 consists •... -
Page 16: Connecting An External Network Relay
TELAIR Silencers that have not absorbing materials. been specially sized may damage the motor. Fuel is fed to the internal combustion engine via a pump fitted to the generating set as part of the standard supply. -
Page 17: Using The Generating Set
generating sets have been built Make sure that any hot parts of the compliance with the safety standards listed in the generating sets are not in contact with any EEC statement of compliance. flammable material. Never fill up the fuel tank while the engine is running. -
Page 18: Turning The Generating Sets Off
provided with an electrical system built to standards and according to the quantity of power delivered. 6.3 Useful tips To make the best use of the generating sets, remember that even minor overloads - if they last long enough - will operate the thermal cut-out switches (Fig.31 Ref.3). -
Page 19: Automatic Version (Optional)
checking the engine oil, the control panel must 4 Minimum oil level indicator be reset in the following way: 5 Start-up failed indicator 6 Generator running indicator (flashing) 7 Maintenance request indicator Alarm: the red ‘service’ light is flashing. 8 Fuel reserve indicator Cause: 50 hours have elapsed since the latest engine oil change and oil level should be checked. -
Page 20: Maintenance Instructions
When the battery is charged, and anyway after at 1 The generating set must not be in operation, least 15 minutes’ running, the battery charged and all its parts must be cold hours indicator (Fig.32 Ref.11) will light up and 2 Let the generating set cool off. -
Page 21: Maintenance Not Requiring Specialised Personnel
7.4 Maintenance operations to be carried out by qualified personnel To carry out certain servicing operations, it is possible extract engine-alternator assembly from the front. (See paragraph 4.3.). This will make it easier to obtain access to all the inside parts of the generating set for unscheduled maintenance or repair operations. -
Page 22: Spark Plug Maintenance
unscrewed both screws that fix it to the air filter using the special wrench (see instructions in box. the engine user and maintenance manual). When assembling a new spark plug, tighten by 1/2 turn after the spark plug has compressed the sealing washer. If you put back the old plug after having removed it, tighten it by 1/4 turn after it has compressed the sealing washer. -
Page 23: Routine Maintenance Schedule
8 ROUTINE MAINTENANCE SCHEDULE First Every Every Every ROUTINE MAINTENANCE SCHEDULE Every Month 3 Months 6 Months 12 Mths To be performed after the period of time or the number of running hours listed here, whichever the earlier 20 hours 50 hours 100 hrs 300 hrs... -
Page 24: Prolonged Inactivity
9 PROLONGED INACTIVITY When the generator remains idle for at least three weeks, old unleaded petrol sediments could build up inside the carburettor. These sediments can seriously damage the engine and it is therefore COMPULSORY that the carburettor be completely emptied prior to a long period of non-use: do this by turning off the fuel tap and running the generator set until it stops. -
Page 25: General Warranty Terms
GENERAL WARRANTY TERMS TELAIR guarantees its products against any construction material and/or manufacturing faults and defects. The right to warranty cover for new engines is valid for a period of 24 months from the time of handing over to the end user, or for a maximum of 1000 operating hours, whichever limit is reached first. -
Page 26: Wiring Diagram Energy 4010 B
WIRING DIAGRAM ENERGY 4010 B Vers. 001 Energy 4010 B... - Page 27 Vers. 001 Energy 4010 B...
-
Page 28: Drawing For Spare Parts List Energy 4010 B
DRAWING FOR SPARE PARTS LIST ENERGY 4010 B Vers. 001 Energy 4010 B... - Page 29 Vers. 001 Energy 4010 B...
- Page 30 Vers. 001 Energy 4010 B...
- Page 31 Vers. 001 Energy 4010 B...
- Page 32 Descrizione Dèsignation Denomination Pos. Code Q.tà Description Bezeichnung Descripcion Sportello Tôle de fermeture de porte Afdekplaat deurtje 04698 N. 1 Door closing plate Türblech Chapa cierre puerta Image adhésive de porte du Adesivo Sportello Zelfklevend beeld van gevaldeur boîtier 04762 N. 1 Adhesive image of case door Anhaftendes Bild der Falltür Imagen adhesiva de la puerta...
- Page 33 Descrizione Dèsignation Denomination Pos. Code Q.tà Description Bezeichnung Descripcion Isolante Basamento Isolation Base Isolatie voor onderstel 04212 N. 1 Base insulation Isolierung für Grundrahmen Aislante Base Basamento cassa Base de la caisse Onderstel kast 04554 N. 1 Case base Kasten-Grundrahmen Base caja Condensatore 18 µF Condensateur 18 µF...
- Page 34 Descrizione Dèsignation Denomination Pos. Code Q.tà Description Bezeichnung Descripcion Staffa fissaggio motore Bride de fixation du moteur Bevestigingsbeugel motor 02184 N. 1 Engine fastening bracket Motor-Befestigungsbugel Abrazadera sujeciòn motor Serratura Serrure Slot 01224 N. 1 Lock Schloss Cerradura Tassello Portacavi Carburante Serre-câbles Carburant Kabeldoorvoer Brandstof...
- Page 35 Descrizione Dèsignation Denomination Pos. Code Q.tà Description Bezeichnung Descripcion Rondella 8 UNI 8842A Rondelle 8 UNI 8842A Onderlegring 8 UNI 8842A 02586 N. 8 Washer 8 UNI 8842A Scheibe 8 UNI 8842A Arandela 8 UNI 8842A Rondella 6 UNI 6592 Rondelle 6 UNI 6592 Onderlegring 6 UNI 6592 00967 N.
- Page 36 Descrizione Dèsignation Denomination Pos. Code Q.tà Description Bezeichnung Descripcion Fusibile 15A Fusible 15A Zekering 15A 01607 N. 1 15A fuse 15A Sicherung Fusible 15A Potafusibile Tableau des fusibles Zekeringhouder 01605 N. 1 Fuse carrier Sicherungshalter Portafusible Plaque de fixation tableau des Bevestigingsplaat Piastra fissaggio Potafusibile fusibles...
- Page 37 Descrizione Dèsignation Denomination Pos. Code Q.tà Description Bezeichnung Descripcion Cuscinetto alternatore Palier de l’alternateur Lager dynamo 02051 N. 1 Alternator bearing Lager der Lichtmaschine Cojinete alternador Statore alternatore Stator de l’alternateur Stator dynamo 05035 N. 1 Alternator stator Stator der Lichtmaschine Estator alternador Motore EL.
- Page 38 Descrizione Dèsignation Denomination Pos. Code Q.tà Description Bezeichnung Descripcion Bobina Bobine Bobine 03785 N. 1 Choke Spule Bobina Molla comando choke Ressort de commande bobine Bedieningsveer choke 03898 N. 1 Choke pushing spring Choke-Betätigungsfeder Resorte accionamiento bobina Scatola filtro aria Boitier du filtre à...
- Page 39 Notes ........................................................................................................................................................................................................................................................................................................................................................................................................................................................................................................................................................................................................................................................................................................................................................................................Vers. 001 Energy 4010 B...
Need help?
Do you have a question about the ENERGY 4010B and is the answer not in the manual?
Questions and answers