Table of Contents
Advertisement
Quick Links
Advertisement
Table of Contents

Related Manuals for Magnetrol STI Kotron 80


Summary of Contents for Magnetrol STI Kotron 80
- Page 1 Kotron ® Model 80/81 Installation and Operating Manual RF Point Level Switches...
- Page 2 In this manual, a caution box indicates a Magnetrol/STI will repair or replace the control at no cost potentially hazardous situation which, if not avoided, to the purchaser (or owner) other than transportation.
-
Page 3: Table Of Contents
Kotron Model 80/81 RF Point Level Switches Table of Contents 1.0 Introduction 2.8 Calibration ............11 1.1 Principle of Operation...........1 2.8.1 Level Range Selection .......11 1.2 Description............1 2.8.2 Fail-safe Mode Selection ......12 2.8.2.1 High Level Mode........12 2.0 Installation ..............2 2.8.2.2 Low Level Mode .........12 2.1 Unpacking.............2 2.8.3 Calibration Adjustments ......12 2.2 Installation Location..........2... -
Page 4: Introduction
Introduction Principle of Operation The amount of capacitance developed in any vessel is determined by the size (surface area) of the probe, the dis- tance from the probe to its ground, and the dielectric of the medium being measured. Considering that the probe’s mounting position is fixed, and that the dielectric value of the medium is constant, then the amount of capacitance developed in any vessel becomes dependent upon the... -
Page 5: Installation
Installation Caution: Please read the entire installation section carefully prior to starting installation. Unpacking Unpack the instrument carefully. Make sure all compo- nents have been removed from the packing material. Inspect all components for damage. Report any concealed damage to the carrier within 24 hours. Check the contents against the packing slip and report any discrepancies to the factory. -
Page 6: Tanks/Silos W/Non-Conductive Materials Of Construction
2.2.2 Tanks/Silos w/Non-Conductive Materials of Construction With plastic, concrete, wood, or any other non-conductive walled vessels, the reference electrode mentioned above needs clarification. Most commonly, this electrode will be in the form of a concentric ground tube (i.e. stilling well). In questionable circumstances, consult the factory. -
Page 7: Vertical Mounting
Vertical Mounting Vertically mounted probes provide the capability to adjust the control point up or down a section of probe rod by means of calibration adjustments within the unit’s amplifier. The vertical mounting of a probe rod is the preferred method for application involving coating conductive type liquids or conductive solids. -
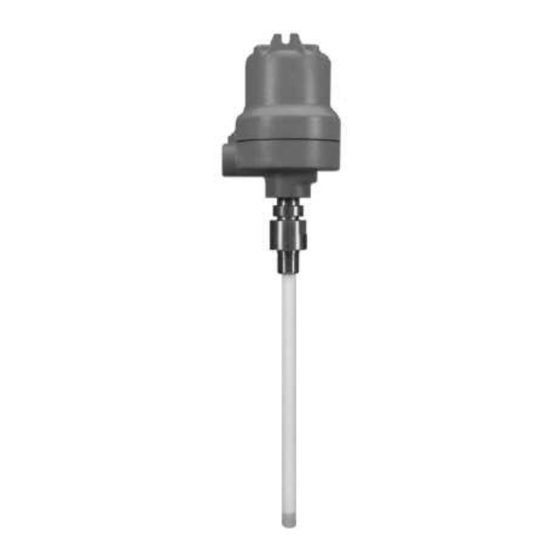
Page 8: Integral Mount With Flexible Probe
2.5.2 Integral Mount with Flexible Probe Probe Connection Screw Caution: Flexible probes are shipped with the cable clamp and the Clamp Mylar Housing probe nut hand tightened. The end of a flexible probe Insulator (slips over clamp) MUST be secured to the bottom of the tank by either Teflon Retaining attachment to a bracket or to a heavy weight in order to... -
Page 9: Remote Mount With Rigid Probe
2.5.3 Remote Mount with Rigid Probe 2.5.3.1 Main Amplifier Conduit Supplied By User Amplifier Remote amplifier assemblies are normally shipped from Housing the factory assembled into an “L” mounting bracket. Refer to Figure 8 while following instructions. Probe Terminal 1. Remove amplifier from mounting bracket. Power Wire Mounting... -
Page 10: Preamplifier
2.5.4.2 Preamplifier Caution: Flexible probes are shipped with the cable clamp and the probe nut hand tightened. The end of a flexible probe MUST be secured to the bottom of the tank by either attachment to a bracket or to a heavy weight in order to keep the probe taut. -
Page 11: Electrostatic Discharge (Esd) Handling Procedure
19. Proceed to Section 2.7, Wiring. Electrostatic Discharge (ESD) Handling Procedure Magnetrol’s electronic instruments are manufactured to the highest quality standards. These instruments utilize electronic components which may be damaged by static electricity present in most work environments. The... -
Page 12: Remote Mount Models
Caution: Observe all applicable electrical codes and proper wiring procedures. 5. Replace housing cover. 6. Power up unit and proceed with calibration of instrument as described in instructions following. Probe preamplifier to positive and negative NOTE: Be certain to route all power and control wires through con- terminals on amplifier. -
Page 13: Relay Wiring
2.7.2.2 Relay Wiring Refer to Section 2.7.3, Relay Wiring hart for different relay wiring options. Refer to Section 3.4, Terminal onnections on page 21 for terminal locations. 2.7.2.3 Power Wiring 1. Make sure power source is turned off. 2. Pull power supply wires through conduit connection. Refer to Figure 8 on page 6. -
Page 14: Wiring Notes And Definitions
2.7.4 Wiring Notes and Definitions 1. Equipment controlled by the Kotron relays is assumed to be powered from one source, while the Kotron unit itself is assumed to be powered from a different source. 2. There is a fail-safe switch on the Kotron unit, which may be set in either a HL or LL position. -
Page 15: Fail-Safe Mode Selection
The position of the jumper is dependent upon the fluid being measured. Locate this jumper in the "LO" position if the fluid is non-conductive (dielectric less than 10); for conductive fluids, position this jumper in the "HI" position. For narrow differential units, always place the jumper in the "LO"... -
Page 16: Zero And Span Adjustment
2. Set the fail-safe mode for the alarm relays: a. In low level fail-safe mode, the alarm relay will be de-energized when the material level is BELOW the alarm set point. b. In high level fail-safe mode, the alarm relay will be de-energized when the material level is ABOVE the alarm set point. -
Page 17: Time Delay Adjustment
4. Turn the zero adjustment counterclockwise until the LED indicator goes off (the relay will change state), then turn the control slowly in the clockwise direction until the indi- cator again comes on. Repeat this on-off operation several times and leave the LED indicator OFF. This completes the zero calibration of the wide differential point. -
Page 18: Reference Information
Reference Information Troubleshooting 3.1.1 Probe Caution: When an insulated probe is used in a hazardous and/or abrasive medium, the probe should be inspected annual- ly for any nicks, cuts or abrasions which may ruin the integrity of the insulation. In the event that wear is found, replace the probe or consult the factory for further instruc- tions. -
Page 19: Narrow Differential Point Units
Caution: This procedure changes any previous calibration of the amplifier. If the unit checks out as operational, it will have to be recalibrated before being used in the process. 3.1.2.1 Narrow differential point units 1. Turn off the power to the unit. 2. - Page 20 3.1.2.2 Wide differential point units 1. Turn off the power to the unit. 2. Remove the lead wire from the probe. 3. Turn the zero and span potentiometers fully clockwise. NOTE: On wide differential units, the zero potentiometer is located above the span potentiometer.
-
Page 21: Agency Approvals
Agency Approvals AGENCY MODEL APPROVED APPROVAL CATEGORY APPROVAL CLASSES 80-80XXX-3XX Explosion Proof Class I, Div. 1; Groups C & D 81-80XXX-3XX Class II, Div. 1; Groups E, F & G (Note: This approval available with rigid insulated probes only All Models Non-Hazardous TYPE 4X 80-80XXX-3XX... -
Page 22: Dimensional - Integral Mounts
Specifications 3.3.2 Dimensional Specifications – Integral Mounts Inches (mm) Rotation Rotation Clearance Clearance NEMA 4X/7/9 9.91 (251) plugged NEMA 4X/7/9 9.89 (251) Optional 2.37 Mounting (60) Flange plugged 2 Holes .38 (10) Dia. 3.00 2.00 (76) (51) " NPT (opt.) 3.50 3.75 .1875 (5) -
Page 23: Dimensional - Remote Mounts
Specifications 3.3.3 Dimensional Specifications – Remote Mounts Inches (mm) 4.63 4.63 (118) Dia. (118) Dia. 3.00 3.00 (76) (76) 2.75 2.75 (70) (70) " NPT " NPT Optional 3.23 Optional 4.67 Mounting Mounting (82) (119) Flange Flange .1875 (5) .2500 (6) 4.87 (124) I.L. -
Page 24: Terminal Connections
Terminal Connections Time Delay (if furnished) Fail-safe Mode Selection Switch LED Indicator Zero Adjustment Span Adjustment Typical DPDT (if furnished) control relay. Each terminal Operating Relay screw is identified on the terminal strip Amplifier Assembly LED Indicator Twisted Pair Terminals 120/240 VAC input Transformer... -
Page 25: Replacement Parts
Replacement Parts Amplifier P.C. Board Housing Cover Preamplifier P.C. Board Remote Mount Probe Housing O-Ring Housing Base Remote Electronics Mounting Bracket Twisted Shielded Pair Conductor Figure 15 120 VAC 240 VAC 24 VDC Description Integral or Remote Integral or Remote Integral or Remote Single point narrow differential Z30-2124-001 Z30-2124-002... -
Page 26: Model Numbers
Model Numbers MOUNTING CONFIGURATION Integral Remote HOUSING NEMA 4X carbon steel, ⁄ " NPT single conduit NEMA 4X/7/9 aluminum, ⁄ " NPT dual conduit, single point models NUMBER OF SET POINTS Single point, alarm control Single point, pump control INPUT POWER 120 VAC 240 VAC 24 VDC... -
Page 27: Notes
NOTES 50-605 Kotron RF Point Model 80/81 Level Switches... - Page 28 8. 5300 Belmont Road • Downers Grove, Illinois 60515-4499 • 630-969-4000 • Fax 630-969-9489 • www.magnetrol.com 145 Jardin Drive, Units 1 & 2 • Concord, Ontario Canada L4K 1X7 • 905-738-9600 • Fax 905-738-1306 Heikensstraat 6 •...
Need help?
Do you have a question about the STI Kotron 80 and is the answer not in the manual?
Questions and answers