Table of Contents
Advertisement
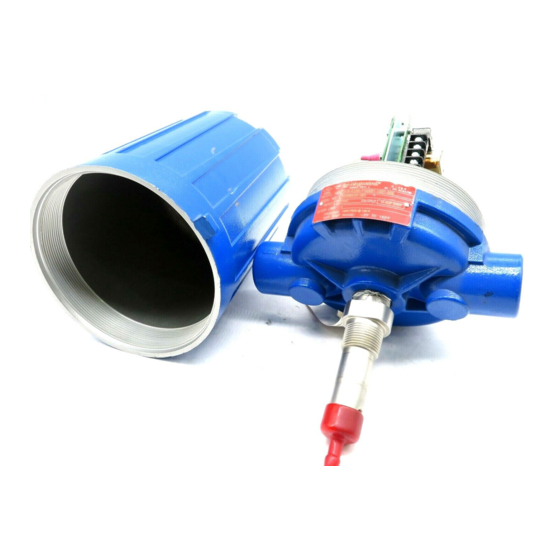
Model 91S
MODEL IDENTIFICATION
Each unit has a nameplate on which the part number is
shown. The part number is coded to identify the configura-
tion of that specific unit. Listed below are the definitions of
each section of the part number, such that one can deter-
mine exactly which options the unit contains.
91S PART NUMBER CONSTRUCTION
Electronics
Output Signal
A1A = 10 amp DPDT relay
L1H = Opto-isolated output
T1W = Two-wire, 8 or 16 mA current shift
(must use Input code 2)
Input
0 =
120 VAC
1 =
240 VAC
2 =
24 VDC
3 =
12 VDC
5 =
48 VDC
Housing
F = NEMA 4X/7/9, aluminum sand cast,
dual conduit
E = NEMA 4X/7/9, aluminum sand cast,
single conduit
Y = NEMA 4X/7/9, 316 stainless steel,
single conduit
7 = NEMA 4X/7/9 Group B, aluminum die cast, 1" NPT
dual conduit
Mounting
0 = Integral
1 = Remote (connecting cable required)
Model 91S with output signal option code A1A or L1H available with
housing option codes F or 7 only.
Model 91S with output signal option code T1W available with housing
option codes E or Y only.
®
Model 92S
-
9 1 S -
1
⁄
3
" NPT,
4
3
⁄
" NPT,
4
3
⁄
" NPT,
4
Echotel
®
Trident 91S/92S
Ultrasonic Level Switches
Instruction Manual and Parts List
91S PART NUMBER CONSTRUCTION cont.
91S Transducer
Transducer type
(Material and unit of length)
B = 316 SS in inches
D = 316 SS in centimeters
E = Monel or HC in inches
F = Monel or HC in centimeters
Process connection
3
⁄
1 =
" NPT
4
2 = 1" NPT
B = 1" 150 lb. flange
1
⁄
C = 1
" 150 lb. flange
2
D = 2" 150 lb. flange
E = 1" 300 lb. flange
1
⁄
F = 1
" 300 lb. flange
2
G = 2" 300 lb. flange
H = 1" 600 lb. flange
J = 2" 600 lb. flange
Transducer material
22 = 316/316L stainless steel
HC = Hastelloy C
MM = Monel
Transducer length
Specify length in inches (from 1" to 130") or centimeters
(from 3 to 330 cm). Consult factory for lengths over
130". Minimum length is 2" (5 cm) for flange process
connections.
316 SS Model 91S transducers have tip sensitive gaps as shown in
Figure 19 on page 17. Monel and Hastelloy C Model 91S transducers
have side gaps as shown in Figure 21 on page 18.
Connecting Cable
Cable Type
A1 = RG178 for 1 set point, 1–50 ft.
B1 = RG58 for 1 set point, 51-300 ft.
Cable Length
Length of cable from remote electronics to
transducer in feet (300 feet max.)
-
-
9
1
1
3 7 0 - 0 0
-
Advertisement
Table of Contents

Subscribe to Our Youtube Channel
Related Manuals for Magnetrol STI Echotel Trident 91S


Summary of Contents for Magnetrol STI Echotel Trident 91S
- Page 1 Echotel ® Trident 91S/92S ® Ultrasonic Level Switches Instruction Manual and Parts List 91S PART NUMBER CONSTRUCTION cont. 91S Transducer Transducer type (Material and unit of length) B = 316 SS in inches D = 316 SS in centimeters E = Monel or HC in inches F = Monel or HC in centimeters Process connection ⁄...
-
Page 2: Part Number Construction
92S PART NUMBER CONSTRUCTION 92S PART NUMBER CONSTRUCTION cont. 9 2 S - Electronics 92S Transducer Output Signal A1A = 10 amp DPDT relay Transducer type L1H = Opto-isolated output (Unit of length) T1W = Two-wire, 8 or 16 mA current shift B = Inches (must use Input code 2) D = Centimeters... -
Page 3: General Information
GENERAL INFORMATION PRINCIPLE OF OPERATION PRINCIPLE OF OPERATION cont. The Trident Model 91S/92S operates on a two crystal the crystals through the frame of the sensor. This allows the pulsed or “transmit-receive” principle which applies a high entire sensor, including the bond between the crystals and frequency electronic burst to the transmit crystal. -
Page 4: Electrostatic Discharge (Esd) Handling Procedure
ELECTROSTATIC DISCHARGE (ESD) HANDLING PROCEDURE Magnetrol’s electronic instruments are manufactured to the 2. Use a grounding wrist strap when installing and remov- highest quality standards. These instruments utilize elec- ing circuit boards. A grounded workstation is also rec- tronic components which may be damaged by static elec- ommended. - Page 5 FOUR-WIRE MODELS (RELAY/OPTO-ISOLATED) INSTALLATION/WIRING cont. NO1 CO1 NC1 NO2 CO2 NC2 Alarm Relay Terminal Block Malf. Test Remote Self Test Wet Test Terminal Block (TB3) (+) L1 Common Power Wiring (–) N Alarm-Malfunction Relay Action (P2) High/Low Level Failsafe Selection (P1) Malfunction Relay Terminals...
- Page 6 FOUR-WIRE MODELS (RELAY/OPTO-ISOLATED) INSTALLATION/WIRING cont. 92S DUAL POINT WIRING REMOTE MANUAL SELF-TEST WIRING (91S/92S) 1. Run power leads to power terminal block TB1 on the Remote self test is accomplished by connecting remote lower left side of the power supply board. Refer to test switches to terminal block TB3 for 91S.
-
Page 7: Remote Electronics Installation
FOUR-WIRE MODELS INSTALLATION/WIRING cont. REMOTE ELECTRONICS INSTALLATION REMOTE ELECTRONICS INSTALLATION cont. Remote mounting must be used where high process tem- peratures prohibit integral mounting of the electronics. CAUTION: Do not interchange transducer connection A remote electronics also allows more convenient servic- cables (OUT1 &... -
Page 8: Coaxial Cable Installation
FOUR-WIRE MODELS INSTALLATION/WIRING cont. COAXIAL CABLE INSTALLATION DUAL POINT MODELS All 91S/92S remote units are equipped with a transducer housing, as shown in Figure 8. The coaxial cables from the transducer will terminate inside the transducer housing in phono jacks. Connect phono jacks OUT1 and OUT2 on the remote terminal board to J1 and J2 on the main amplifier board. - Page 9 ELECTROSTATIC DISCHARGE (ESD) HANDLING PROCEDURE Magnetrol’s electronic instruments are manufactured to the 2. Use a grounding wrist strap when installing and remov- highest quality standards. These instruments utilize elec- ing circuit boards. A grounded workstation is also rec- tronic components which may be damaged by static elec- ommended.
- Page 10 TWO-WIRE MODELS INSTALLATION/WIRING cont. REMOTE ELECTRONICS INSTALLATION cont. TOP POINT 1. Install electronics housing using mounting bracket. Provide adequate clearance to remove housing cover. 2. Remove housing cover. 3. No. 14 AWG wire size is recommended for power and control circuit wiring. 4.
-
Page 11: Relay Wiring
AMPLIFIER BOARD POWER SUPPLY BOARD USER SELECTION DESIGNATIONS USER SELECTION DESIGNATIONS WET LED (LED1) Auto Fill/Auto Empty Selection (P1–Dual point) An LED which illuminates red when liquid fills the sensor tip A jumper which allows the selection of an automatic fill or or gap. - Page 12 USER SELECTIONS cont. R E F E R T O F I G U R E 1 2 O N P A G E 1 0 F O R T H E DUAL POINT DESIGN FOLLOWING CHARTS. The 92S is a dual point design that can be used for simple two point alarming functions, auto fill or auto empty capa- LED INDICATION (TWO-WIRE/AMPLIFIER BOARD) bility.
- Page 13 USER SELECTIONS cont. SELECTION DESCRIPTION The following tables illustrate the various control schemes available depending on the positions of the Failsafe switch (S1), Control Function switch (S2), and Auto Fill/Auto Empty jumper (P1). BOTTOM POINT/TOP POINT (S1) LLFS — (P1) AUTO EMPTY — (S2) BP/TP (S1) HLFS —...
- Page 14 ON DEMAND SELF-TEST (Integral or Remote Units) SELF-TEST OPTO-ISOLATED OUTPUT cont. The opto-isolator will not eliminate the need for relay out- With the transducer properly connected to the electronics, check to ensure all cable connections are correct. puts. The relay is still the best electrical method for switch- ing high current loads.
-
Page 15: Troubleshooting
TROUBLESHOOTING CAUTION: In hazardous areas, do not remove housing until power is disconnected and atmosphere is determined to be safe. Sensor wetted, unit powered, but control relay does not The ‘WET’ and ‘MALFUNCTION’ conditions may be sim- energize. ulated by pressing the associated test switches on the amplifier board. -
Page 16: Electrical Specifications
SPECIFICATIONS & AGENCY APPROVALS ELECTRICAL SPECIFICATIONS Two-Wire 91S/92S Four-wire 91S/92S Description Specification Description Specification Supply voltage 10-35 VDC 12 or 24 VDC Supply voltage 120 or 240 VAC, 50/60 Hz 650 Ohms with 24 VDC power source Current loop loads 1200 Ohms with 35 VDC power source Two relay outputs. -
Page 17: Dimensional Specifications
SPECIFICATIONS DIMENSIONAL SPECIFICATIONS inches (mm) 4.29 4.29 (108) (108) 8.34 8.34 (212) (212) 1" NPT 1" NPT Conduit Conduit connection connection 1.70 (43) 1.70 (43) 1/2" NPT (std.) 3/4" NPT (opt.) Welded 1.00 (25) Min. Transducer/ flange Actuation 3.00 amplifier cable process (76) connection... - Page 18 SPECIFICATIONS cont. 3.00 3.00 (76) (76) 6.87 6.87 (175) 3/4" NPT (175) 3/4" NPT Conduit Conduit connection connection 1.12 NPT Process 1.12 (28) connection (28) NPT Process connection Insertion Actuation length Length .87 (22) Dia. Actuation 1.62 (41) Figure 22 91S-XXXX-E10 Models (w/ Tip Sensitive 316 SS Transducer) .87 (22) Dia.
-
Page 19: Replacement Parts
REPLACEMENT PARTS Part Number Description 120 VAC 240 VAC 24VDC 12VDC Single Pt. Relay 030-2184-003 Master (Top) 030-2184-003 Dual Pt. Relay 1* Amplifier Board Slave (Bottom) 030-2184-004 Single—two-wire 030-2184-001 Master (Top) 030-2184-001 Dual—two-wire Slave (Bottom) 030-2184-002 2* Single Point Power Supply 10 Amp DPDT 030-2445-001 030-2445-003 030-2445-007 030-2445-005 PC Board... - Page 20 5300 Belmont Road • Downers Grove, Illinois 60515-4499 • 630-969-4028 • Fax 630-969-9489 ® 5300 Belmont Road • Downers Grove, Illinois 60515-4499 • 630-969-4000 • Fax 630-969-9489 • Website http://www.magnetrol.com 6291 Dorman Road • Mississauga, Ontario L4V-1H2 • 905-678-2720 • Fax 905-678-7407 Heikenstraat 6 •...
Need help?
Do you have a question about the STI Echotel Trident 91S and is the answer not in the manual?
Questions and answers