
Related Manuals for Sports Attack TEAM FEEDER


Summary of Contents for Sports Attack TEAM FEEDER
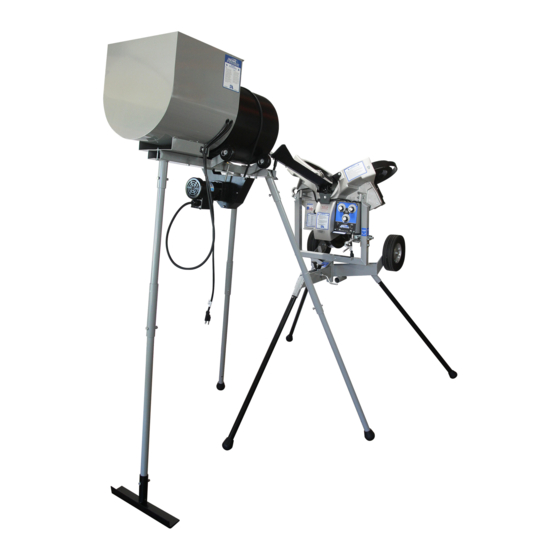
- Page 1 TEAM BALL FEEDER FOR BASEBALL & SOFTBALL Shown as Baseball Feeder TEAM BALL FEEDER PATENTS APPLIED FOR INSTRUCTION MANUAL OPERATION · SETUP · USE & CARE · SERVICE SPORTS ATTACK LLC. | 800.717.4251 | www.sportsattack.com...
-
Page 2: Warranty Statement
P.O. Box 1529 Verdi, NV 89439 Should such equipment be found to be defective, Sports Attack LLC. will, at its option and sole discretion provide at no cost to the purchaser new or rebuilt replacements for defective parts and will pay the pre-approved labor charge to repair the product for the duration of the warranty period only. -
Page 3: Receiving The Product
Please check the contents of your boxes to ensure you have received all parts for the feeder. If anything is missing or damaged, call Sports Attack Customer Service at 800-717-4251. If the product or package has been damaged in shipping, note on shipping tag, save all evidence of damage along with related documents and contact the shipper immediately. - Page 4 SAFETY INSTRUCTIONS WARNING ELECTRICAL SAFETY PERSONAL INJURY HAZARD Use a 115 volt single phase 3-wire (2 wire with ground) grounded power source. Carefully read all instructions in Up to 200 ft. from power source, use a minimum #14/3 grounded 3-wire 15 amp this manual, and all labels and minimum rating extension cord.
-
Page 5: Features & Operating Controls
½” Wrenches or wrench and socket-ratchet combo. Baseball Leg For missing parts, please Extension (3) call: Sports Attack Customer Service Dept. 800-717-4251 (775) 345-2883 Extra Hole (3) Stays As-is T E A M B A L L F E E D E R Spor ts Att ack , LLC. - Page 6 Figure 2. could result in equipment damage and/or personal injury. NOTE: The Team Feeder is supplied with one (1) ball feed chute. Figure 1 Bolt ball Reservoir to main frame, using washers and bolt.
- Page 7 Team Ball Feeder. 6. Assemble ball feed trough. NOTE: The Team Feeder is supplied with one (1) ball feed chute. Figure 3 Insure sufficient tension on the tensioning bolt to keep the belt from slipping. To apply tension, rotate bolt clockwise.
- Page 8 TEAM BALL FEEDER ASSEMBLY NOTE: The Team Feeder is (cont’d) supplied with one (1) ball feed chute. 7. Align ball feed trough and Team Ball Feeder to pitching machine. See Figures 5a through 5c. When aligning the Team Ball Feeder, ball feed trough and pitching machine, make sure the hitter’s warning light will be visible to the batter while...
- Page 9 ” Nylon Lock Nut Figure 8 on page 8). 2. Using the ½ inch wrenches or ratchet, attach the bracket to the team feeder (See TOOLS REQUIRED Figure 8 below). The Team Feeder is now ready to attach to your pitching machine.
- Page 10 To order additional parts, TEAM BALL FEEDER BALL TRAY ASSEMBLY (cont’d) please contact: Sports Attack Customer Service Dept. 800.717.4251 775.345.2883 Figure 8 Team Ball Feeder and bracket. Rubber tube should be facing up. Metal tube should be facing down. Figure 9 Ball tray assembly at pitching machine T E A M B A L L F E E D E R Spor ts Att ack , LLC.
- Page 11 To order additional parts, TEAM BALL FEEDER DRIVE BELT ASSEMBLY please contact: Sports Attack Customer Service Dept. 800.717.4251 775.345.2883 Figure 10a Install drive belt guard as shown INCLUDED MATERIALS Qty Item Drive Belt Guard ” - 20 x 2 ” Bolts ”...
-
Page 12: Operation
Be alert at all times. 1. Do not mix different types of balls. 2. ALWAYS use protective screen to protect Team Feeder from batted balls and line drives or void warranty. T E A M B A L L F E E D E R Spor ts Att ack , LLC.
Need help?
Do you have a question about the TEAM FEEDER and is the answer not in the manual?
Questions and answers