
Related Manuals for Sports Attack CRICK ATTACK


Summary of Contents for Sports Attack CRICK ATTACK
- Page 1 CRICKET BOWLING MACHINES CRICK ATTACK™ BOWLING MACHINE PATENTS APPLIED FOR INSTRUCTION MANUAL OPERATION · SETUP · USE & CARE · SERVICE SPORTS ATTACK LLC. | 800.717.4251 | www.sportsattack.com...
- Page 2 If the warranty repair involves a replacement part, we will make sure you get both the part and easy instructions for replacement at no cost to you. If a service person is needed, Sports Attack will pay the pre-approved labor charge to get your machine back in working order.
-
Page 3: Table Of Contents
This manual contains the information needed to properly set up the Crick Attack, and to use, care for and maintain the Crick Attack in a manner which will ensure its optimum performance. -
Page 4: Safety Instructions
A loose swivel lock can allow a pitch to be inside which could hit CAUTION: Carefully check Crick Attack for completeness and condition before the batter. connecting to electrical power: 1. Throwing wheels must be tight on the motor shafts ELECTRICAL SHOCK 2. - Page 5 Never use wet balls! BATTING PRACTICE The horizontal swivel lock must be securely tightened before the batter enters the net. ALWAYS test and adjust the Crick Attack before a batter enters the net: 1. Adjust so that Crick Attack throws a ball straight at first, then read just for variations. 2. Throw test balls until required velocity, swing or spin are reached.
-
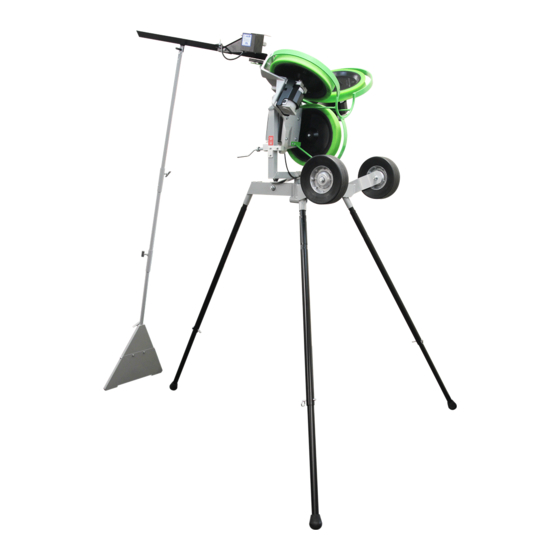
Page 6: Features & Operating Controls
CRICK ATTACK PITCHING MACHINE PATENTS APPLIED FOR Detail A control panel frame here with labels Ball Chute Wheel Guard Figure 1 Position Crick Attack Throwing Wheel Serial Tip up onto Wheel Guard; Number Insert two front legs... -
Page 7: Set-Up & Preparation
See Figure 2 on page 4. Clear all hitters away from home Walk around to the front of Crick Attack, and, with your back to home plate, reach plate, the batter’s box and the down and grasp the wheel guards. Then, lift Crick Attack up and over the front legs backstop area before connecting and set it gently onto the rear leg. - Page 8 INSTALLING EXTENDED LEGS ONTO YOUR ADJUSTABLE CRICK ATTACK CRICKET BOWLING MACHINE HEIGHT LEGS Requires two people) 1. FRAME LOCK the throwing head (see manual for instruction; ref. Shutting Down) Figure 1 2. Remove all three standard legs by laying down the machine. NOTE: See Figure 2. After standard legs are removed insert the extended legs.
- Page 9 INSTALLING EXTENDED LEGS ONTO YOUR CRICK ATTACK CRICKET BOWLING MACHINE CONT’D Requires two people) Figure 4 Figure 5 Figure 6 Figure 7 C R I C K AT TAC K™ C R I C K E T B O W L I N G M AC H I N E Sp or ts Atta ck, LLC.
-
Page 10: Training Practice
Bottom to “4” Make sure that no one steps in front of Crick Attack while Check again to make sure no one is in front of Crick Attack or anywhere near the it is connected to electric power. net. Then, feed a ball down the ball chute to bowl the first ball. Clear all hitters away from the Note where the ball goes in relation to the stumps. - Page 11 Right wheel Real leather OR balles designed to work in cricket machines are best. speed control speed control Discard old or soft leather balls from your Crick Attack batting sessions. Similarly, discard older worn cricket pitching balls. STRAIGHT OUT SWING...
-
Page 12: Shutting Down
Tighten just enough to secure the throwing head. It is not necessary to over tighten. Storing Legs in Travel Socket Using the rear leg as a handle, tip Crick Attack up and over onto the wheel guard. Remove (unsocket) both front legs and store by inserting in the travel storage sockets. ELEVATION CONTROL 5. See Figure 8 at right:... -
Page 13: Care, Cleaning & Maintenance
EXAMINE THE MACHINE Examine Crick Attack for condition and completeness before every use: For batting practice, be sure the horizontal swivel lock is secured. Throwing wheels must be tight on the motor shafts. Check that the keyway retaining bolts are tight. -
Page 14: Component Replacement
COMPONENT REPLACEMENT THROWING WHEEL REPLACEMENT Turn the on/off switch “OFF” and unplug the power cord. For the bottom throwing wheel, remove 6 bolts holding the wheel guard to the main casting. Hold the wheel so that it cannot move. Turn the keyway retaining bolt counter- clockwise using a box end wrench. - Page 15 COMPONENT REPLACEMENT (cont’d) CONTROLLER REPLACEMENT Turn the on/off switch “OFF” and unplug the power cord. Remove four screws holding controller faceplate into main casting. Note the position of the main power and motor wires on the controller, then disconnect the wires.
-
Page 16: Exploded View
EXPLODED VIEW Cane Tip Leg, Cricket Undercarriage Horizontal Swivel Lock Handle Swivel Lock Pivot Bolt Assembly Leg Spring, Dual Snap Travel Wheel (with axle, bolt, not, washers) Yoke Frame Lock Pin Spring, Lock Pin Elevation Control Nut Assembly Tension Spring, Elevation Control Handle, Elevation Control Main Casting, Throwing Head Upper Clamp... -
Page 17: Parts List
Sports Attack Customer Service Dept. 280-1000 Cane Tip 800.717.4251 532-0026 Leg, Cricket 775.345-2883 513-1309 Undercarriage, Crick Attack 533-0500 Horizontal Swivel Lock Handle 533-0501 Swivel Lock Pivot 270-0002 Leg Spring Dual Snap 281-0002 Travel Wheel (with axle, bolt, not washers) 533-1302...
Need help?
Do you have a question about the CRICK ATTACK and is the answer not in the manual?
Questions and answers